No Oven Stove Top Bread: Master Stove-Top Baking
Learn to bake bread on the stove without an oven. This step-by-step guide covers gear, dough options, heat control, troubleshooting, and a simple stovetop loaf to enjoy crusty bread anytime.

Learn how to bake bread on the stove without an oven by using a heavy skillet, a snug lid, and dough that develops gluten well. This guide covers dough choices, heat control, timing, and troubleshooting, with practical, step-by-step instructions and real-world tips. By the end, you'll produce crusty stovetop bread with a tender crumb that rivals an oven-baked loaf.
No-oven stovetop bread: why this method matters
If you want no oven stove top bread, you can bake a loaf on the stove using a heavy skillet, a snug lid, and a dough that develops gluten reliably. This approach mimics oven conditions using steam and sustained heat, helping crust form while keeping the crumb tender. The method shines when an oven isn't available—during power outages, in small apartments, or when you simply want a quick, hands-on baking session. The key is understanding the balance between surface heat and internal temperature, plus how dough hydration influences rise and texture. You’ll find that crust quality hinges on preheating, steam retention, and the pan’s heat capacity. With patience and the right gear, no oven stove top bread can deliver a satisfying bite and aroma that fills your kitchen just as effectively as traditional oven baking. As you practice, you’ll learn to read dough readiness by feel and touch rather than by a timer alone.
Essential gear for stovetop bread
A successful stovetop bread setup starts with a sturdy, heavy skillet and a reliable lid. A cast-iron skillet (10-12 inches) with a tight-fitting lid creates the perfect heat retention and steam environment. A heat diffuser or a small rack helps distribute heat evenly if your burner runs hot or unevenly. You’ll also want a dough mixing bowl, a sturdy spoon or dough whisk, measuring cups/spoons, a parchment sheet for easy release, and a timer to monitor resting and cooking intervals. For handling hot cookware, have silicone mitts or high-heat gloves on hand. A digital thermometer is optional but handy for checking pan surface temperature and avoiding scorching. Keep a damp towel nearby to manage dough during shaping and a clean workspace to prevent sticking. With these tools, you’ll minimize guesswork and stay consistent from loaf to loaf.
Dough foundations for stovetop bread
Stovetop bread benefits from dough that develops strong gluten structure and appropriate hydration. You have options: a yeast-based dough that is kneaded or a no-knead hybrid that hydrates more slowly but yields a looser, open crumb. In either case, aim for dough that passes a gentle stretch test and holds gas without tearing. Hydration levels influence how readily the dough expands under a brief steam environment, so start with moderate water absorption and adjust in future batches based on results. If using a starter or sourdough, ensure it is active and bubbly before mixing. Salt and fat (like a touch of oil) can enhance flavor, texture, and crust stability. Label dough times clearly and allow adequate resting to maximize flavor development and oven-like crust formation without an oven.
Heat control: achieving crust and crumb on the stove
The heart of stovetop baking is managing surface temperature and steam. Preheat your skillet on a medium flame for several minutes, then introduce the dough and reduce to a steady, gentle heat. Cover the pan to trap steam, which helps the crust form while the interior steams to doneness. If your burner runs hot, use a diffuser or set the pan on a low rack to avoid scorching. Rotate the bread halfway through cooking for even browning, and consider a brief, higher-heat finish uncovered to set the crust. Adjust times based on pan material, thickness of dough, and ambient temperature.
A simple no-oven stovetop bread recipe (basic loaf)
This no-oven stovetop bread recipe uses a simple dough that blends flour, salt, yeast or starter, and water. Mix until a soft, cohesive dough forms, then let it rest long enough to show visible expansion. Shape into a round or oblong loaf and rest briefly if needed. Preheat your skillet, place the dough inside, and cover. Cook until the bottom crust is deeply colored and the top looks set, then flip and finish on the other side. Remove from heat, rest briefly, and slice to serve. This method yields a crusty exterior with a tender interior and a warm, comforting aroma. Experiment with hydration and resting times to tailor crumb style for your preferences.
Troubleshooting common issues and fixes
If the crust browns too quickly, lower the heat and extend the cooking time to allow the interior to finish without scorching the crust. If the loaf looks pale, increase heat slightly at the outset or extend the covered cooking period to build better steam pressure. Dough that refuses to rise may be underproofed or overhydrated; give it more time to rest in a warm area and adjust hydration for future batches. Sticking can occur if the pan isn’t properly preheated or if you don’t use parchment or oil; ensure your cooking surface is well-seasoned and lightly oiled. For uneven browning, rotate the loaf and use a diffuser to even out heat distribution. Finally, avoid over-working dough, which tightens gluten and dampens rise; gentle handling improves texture and crumb.
Authority sources and further reading
- For general cooking techniques and home baking science, consult university extension resources and reputable health publications. These sources support practical no-oven bread methods and food safety considerations without requiring an oven. - Mayo Clinic: healthy cooking tips and kitchen safety guidelines. - Extension services from land-grant universities offer dough handling and baking insights applicable to stovetop methods. - Nutrition.gov provides nutritional context for bread ingredients and hydration considerations.
Variations and serving ideas
Skillet breads adapt well to a variety of there and flavors. Try adding olive oil and herbs to the dough for a savory loaf, or fold in roasted garlic, grated cheese, or sun-dried tomatoes for a Mediterranean twist. Flatbreads can be rolled thinner and cooked longer with less resting to achieve a cracker-like crispiness, while thicker rounds produce a softer, sandwich-friendly crumb. Serve warm with butter, olive oil, or your favorite spread. Storing stovetop bread in a clean towel-lined container helps retain moisture and softness for up to a couple of days, though fresh bread is always best.
Tools & Materials
- Cast-iron skillet with lid (10-12 inches)(Heavy bottom preferred for even heat and crisp crust)
- Heat diffuser or metal rack(Optional to distribute heat evenly on very hot burners)
- Dough mixing bowl(Non-reactive; large enough for dough to double)
- Wooden spoon or dough whisk(For gentle mixing without tearing gluten)
- Measuring cups/spoons(Accurate measurement ensures dough consistency)
- Parchment paper or a light coating of oil(Prevents sticking and makes flipping easier)
- Timer or smartphone timer(Track resting, proofing, and cooking intervals)
- Oven mitts or heat-resistant gloves(Protect hands when handling hot pan)
- Digital thermometer (optional)(Useful to check surface or interior temperature)
Steps
Estimated time: 40-60 minutes
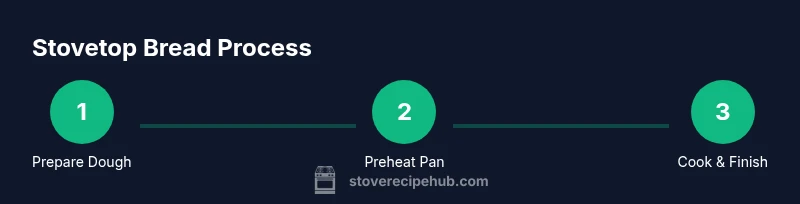
- 1
Prepare the dough
Combine flour, salt, and yeast or starter with water until a shaggy dough forms. Knead briefly or mix until gluten begins to develop, then let it rest in a warm spot until hydrated and slightly puffy.
Tip: Keep dough covered to prevent drying; a longer rest improves flavor. - 2
Preheat the pan
Place the cast-iron skillet on the stove over medium heat and let it heat for several minutes until the surface feels hot to the touch. A preheated pan helps set the crust quickly.
Tip: If your burner is very hot, use a diffuser to avoid scorching. - 3
Shape and rest the dough
Gently shape the dough into a round or oblong loaf that will fit your skillet. Rest briefly if needed so the dough relaxes, which promotes even expansion during cooking.
Tip: Don’t over-work the dough; gentle shaping preserves the crumb structure. - 4
Cook with lid on
Carefully place the dough into the preheated pan, cover, and cook on a steady, moderate heat. The lid traps steam, aiding crust formation and inside cooking.
Tip: Rotate the pan halfway through to promote even browning. - 5
Flip and finish cooking
After the first side browns, flip the loaf and cook the other side until evenly colored and firm to the touch. If the top is not set, finish with lid on for a few minutes more.
Tip: If the bread resists flipping, loosen the edges with a spatula and re-lodge before turning. - 6
Rest and slice
Remove from heat and let the bread rest on a rack for a few minutes. This helps the crumb set and moisture redistribute, then slice and serve.
Tip: Resting is essential for a tender, sliceable interior.
Common Questions
Can I make a traditional loaf on the stovetop?
Yes, with a heavy skillet and proper steam, a loaf-style dough can cook well on the stove. You may need to adapt proofing times and sheet or pan shape to fit your skillet.
Yes, you can bake a loaf on the stove with a heavy skillet; adapt shape and timing for the pan.
Will the crust be as crusty as oven-baked bread?
A good crust is achievable by preheating, trapping steam, and finishing with a brief higher-heat period. The crust won't be identical to an oven loaf but can be very satisfying.
You can get a crusty crust with proper steam and heat control.
Is a lid essential for stovetop bread?
A lid helps trap steam, which greatly improves crust development and even cooking. Without it, the crust may be uneven and the crumb denser.
Yes, use a lid to trap steam and improve results.
Can I make flatbreads with this method?
Absolutely. Flattened doughs cook quickly on the stove and can deliver a crisp exterior with a soft interior, perfect for toppings or wraps.
Yes, flatbreads are a great stove-top option.
How do I know when the bread is done?
Look for a deep golden crust, a firm bottom, and a hollow sound when tapped. The interior should be fully set and not gummy.
A deep golden crust and a firm bottom indicate doneness.
Watch Video
Top Takeaways
- Preheat the pan for a crisp crust.
- Maintain steady heat and trap steam with a lid.
- Proof dough adequately for good rise and crumb.
- Rest the loaf before slicing for best texture.