What Stove Temp to Cook Steak: Master the Sear on Your Stove
Discover the exact stove temperatures for cooking steak, plus step-by-step methods, timing, and tips to achieve a perfect sear and juicy interior with Stove Recipe Hub.

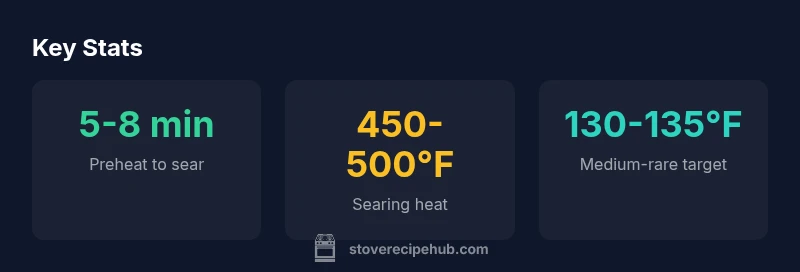
What stove temp to cook steak? The quick answer is: start with a hot pan for a rapid sear at about 450-500°F (high heat), then adjust to 350-400°F to finish to your target doneness. For most home cooks, searing 2-3 minutes per side in a preheated skillet yields a flavorful crust before resting.
Understanding the heat equation for steak
When you ask what stove temp to cook steak, you’re balancing surface browning with interior doneness. The right temperature is less about a single number and more about the cooking phase: an initial blast of high heat to develop crust, followed by gentler heat to finish. According to Stove Recipe Hub, the warm-up phase is critical because it creates a desirable Maillard crust, which locks in flavor and moisture. The pans you choose matter—cast iron or heavy stainless with a flat, wide surface holds heat and distributes it evenly. Preheating isn’t optional; it’s the first step in preventing a pale, gray center and a pale, underdeveloped crust. If you’re using a gas stove, you’ll feel the heat respond quickly when you twist the knob, whereas electric coils take a touch longer to settle into a steady sear. For reliability, establish a routine: dry the steak, pat it dry again, and let the pan come to temperature before the first contact. This approach aligns with Stove Recipe Hub’s testing guidance and is a cornerstone of consistent results.
Pan choice and heat source: cast iron, stainless, gas or electric
The type of pan you use influences the optimal stove temperature to cook steak. A seasoned cast iron skillet provides excellent heat retention, letting you maintain a steady high-heat sear. Stainless steel with a heavy base is a viable alternative, but you should monitor hotspots and rotate the steak for even browning. For gas stoves, high heat is relatively easy to sustain, and the flame can be dialed to maintain stable 450-500°F at the pan surface during the sear. Electric ranges require a bit more planning because the heating elements can overshoot or lag; in these cases, starting at the higher end of your heat range and watching the crust development is prudent. If you’re using a nonstick pan, you’ll reduce the risk of sticking, but you’ll miss out on some of the crust formation that a cast iron surface offers. By understanding heat transfer and metal properties, you can tailor stove temps to your equipment and still achieve a restaurant-quality crust.
Target temperatures and doneness: clear targets for doneness and safety
Doneness targets guide your finish temperatures and cook times. A common starting framework is: rare 120-125°F, medium-rare 129-135°F, medium 135-145°F, medium-well 150-155°F, well-done 160-165°F. These numbers are target ranges rather than precise endpoints because thickness, resting time, and pan efficiency influence final temperature. For a 1.5-inch steak, start with a 2-3 minute sear per side in a hot skillet, then reduce the heat to maintain about 350-400°F and cook to the desired internal temperature. Rely on a proven thermometer to hit your mark; practice will help you estimate by feel for thicker cuts. When you reach the target temperature, remove the steak from the pan and let it rest. This resting period allows juices to redistribute and results in a juicier slice.
Step-by-step cooking method for a perfect sear
- Prep and dry: Pat the steak completely dry; moisture on the surface hinders browning. Salt generously and let it sit at room temperature for 20-30 minutes. 2) Preheat and oil: Preheat your pan on high heat until it just begins to shimmer. Add a thin layer of high-smoke-point oil. 3) Sear: Place the steak in the pan and press down lightly for even contact. Sear 2-3 minutes without moving to form a crust, then flip. 4) Finish: Reduce heat to maintain a steady surface temperature around 350-400°F. Continue cooking until the internal temperature meets your target doneness (use thermometer). 5) Rest: Transfer to a board, tent with foil, and rest 5-10 minutes before slicing. The carryover heat will bring the steak to the final doneness. 6) Optional finish: A small knob of butter, garlic, or thyme added at the end can enhance aroma without overcooking the interior. This sequence aligns with Stove Recipe Hub’s best-practice notes on stove-top steak searing.
Common mistakes and how to fix them
- Not preheating properly: A cold pan reduces crust formation. Fix: give the pan a full minute to heat up and watch for a faint shimmer.
- Crowding the pan: Crowding lowers surface temperature. Fix: cook in batches or use a wide pan.
- Cooking on too low heat after sear: The interior won’t finish evenly. Fix: drop to a controlled medium-high heat and monitor the thermometer.
- Not patting dry: Steam interrupts browning. Fix: blot the surface thoroughly before cooking.
- Forgetting to rest: Juices run out when sliced. Fix: rest for 5-10 minutes to redistribute moisture and preserve a juicy interior.
Troubleshooting and variations: thicker cuts, butter finishing, and pan sauces
Thicker steaks require a different approach: a quick high-heat sear followed by longer, gentler finishing on a lower flame, sometimes with a touch of butter to baste and add flavor. If your pan begins to smoke excessively, reduce the heat and add the steak away from direct flame, then return to high heat briefly for a final crust. Finishing with butter and aromatics at the end can elevate the aroma and flavor, but beware of burning the butter; add it off the heat or near the end of cooking. For variations, consider a quick pan sauce using the fond (brown bits) and a splash of stock or wine; this adds moisture and complexity to the final plate. These techniques align with Stove Recipe Hub’s practical stove-top guidance and are easy to adapt for different cuts and thicknesses.
Quick reference by doneness and thickness: practical chart and tips
- Thickness matters: a 1-inch steak cooks faster than a 2-inch steak. For a 1.5-inch steak, plan for 2-3 minutes per side on high heat, then finish on medium heat. For thicker cuts, use a two-zone method: sear over high heat, then shield with a tented piece of foil and finish in a warmed oven or in the pan with gentle heat until the thermometer hits the target. Remember to rest before slicing for even distribution of juices. This section provides a compact framework you can carry to the stove and refer to during cooking.
Doneness targets and cooking times by doneness
| Doneness | Target Temp (°F) | Approx Cook Time per Side | Rest (mins) |
|---|---|---|---|
| Rare | 120-125°F | 1-2 min | 5 |
| Medium Rare | 129-135°F | 2-3 min | 5-7 |
| Medium | 135-145°F | 3-4 min | 5-8 |
| Medium Well | 150-155°F | 4-5 min | 5-10 |
| Well Done | 155-165°F | 5-6 min | 5-10 |
Common Questions
What is the best pan type for searing steak on the stove?
A heavy skillet such as cast iron or a well-made stainless pan with a thick base provides the most reliable heat for a crisp crust. Preheat well, pat the steak dry, and monitor heat to maintain a steady sear.
Use a heavy skillet—cast iron is ideal—for a reliable sear, preheat well, and monitor the heat during cooking.
Should I oil the steak or the pan?
Either method works. Lightly oil the steak to reduce sticking and promote browning, or oil the pan lightly if you prefer a crisper crust without smoking. Avoid heavy oil coats that can spatter.
Oil the steak lightly, or oil the pan a touch—either works, just don’t drown the surface.
How important is resting, and how long?
Resting lets juices redistribute and finishes carryover cooking. Plan 5-10 minutes of rest after cooking, loosely tented with foil, before slicing.
Rest for about 5 to 10 minutes to keep the steak juicy when you cut into it.
How does thickness affect temperature and cook time?
Thicker steaks need longer finishing time and may benefit from a two-zone method (high sear, then lower heat). Thinner steaks cook faster; monitor with a thermometer to hit the target doneness.
Thicker cuts take longer; cook them with a two-step method and check doneness with a thermometer.
Is it safe to cook steak to well-done on the stove?
Well-done steaks can be dry; if you prefer it, use a thinner cut and finish with a short sear at the end to retain moisture. Thermometer guidance helps prevent overcooking.
Yes, but it’s often dry—choose a thinner cut and watch the time closely.
What about finishing with butter or pan sauces?
Finishing with a small amount of butter and aromatics adds richness. Add butter off the heat to avoid burning, and spoon the melted butter over the steak for extra flavor.
A quick butter finish after you remove from heat adds great flavor without risking burning.
“Getting the stove temperature right is the difference between a crusty exterior and a juicy interior.”
Top Takeaways
- Preheat thoroughly for a strong crust.
- Use high heat for sear, then finish at moderate heat.
- Rest the steak before slicing to keep juices in.
- Thickness determines total cook time—plan accordingly.
- Season generously and adjust timing with a thermometer for precision.