Stove Top Pot Roast: A Practical Weeknight Guide
Learn to make a fork-tender stove top pot roast with a proven braising method. This step-by-step guide covers searing, deglazing, simmering, and finishing touches from Stove Recipe Hub.

With this guide, you will master a stove top pot roast by searing, browning, and braising on the stovetop until the meat is fork-tender. You’ll need a heavy skillet with a lid, a flavorful braising liquid, aromatics, and a gentle simmer. The method yields consistent flavor and tender texture. Expect a rich sauce and versatile leftovers.
Why Stove-Top Pot Roast Shines for Weeknights
When the mood is cozy and the clock is ticking, stove-top pot roast offers a reliable path to tender beef with minimal fuss. The technique uses a braise: a lower, steady heat, a lid to trap moisture, and enough liquid to lightly cover the meat. According to Stove Recipe Hub, the key is low, stable simmer rather than a raging boil, which would toughen connective tissue instead of coaxing it to melt. A well-chosen cut, like beef chuck or blade roast, benefits from the long, slow exchange of heat with aromatics and liquid, resulting in fork-tender slices with a glossy sauce. In practice, you’ll spend a few minutes searing the roast to build color and flavor, then let it braise while you attend to sides. The stove-top approach yields a deeply flavored dish without heating the entire kitchen, a small win for busy weeknights. The technique also scales well for family dinners or meal-prep, producing leftovers that reheat with minimal loss of moisture.
As you work, keep the meat submerged enough to braise but not so much that you’re boiling. A calm, steady simmer is the difference between flavor development and gray, overcooked edges. By starting with a good sear and ending with a silky pan sauce, your stove top pot roast becomes a reliable anchor for weeknight menus—and a comforting reminder of home-cooked dinners.
Essential ingredients and substitutions
A successful stove top pot roast rests on a few reliable ingredients plus a couple of flexible substitutions. Core beef options include beef chuck or blade roast, typically 2–3 pounds, trimmed of excess fat. Aromatics like onions, garlic, and carrots add depth, while potatoes are delicious adding heartiness. For liquid, use beef broth or stock; red wine or a splash of Worcestershire can enrich the sauce. Optional tomato paste, soy sauce, or balsamic vinegar can tilt the flavor toward savory or subtly sweet. Herbs such as thyme and bay leaves are classic; fresh parsley adds brightness at the end. A high-smoke-point oil (like canola or grapeseed) helps with the initial browning. If you’re avoiding alcohol, simply use more broth. The key is a well-balanced braising liquid that gently covers the meat and preserves moisture during the long simmer.
Ingredient proportions can vary by family preference, but the method remains: sear for color, build flavor with aromatics, and braise gently until tender. Stove Recipe Hub’s guidance emphasizes planning for about 60–90 minutes of simmering after the initial sear, with flexibility for larger roasts or thicker cuts. The result is a glossy, flavorful sauce that clings to tender meat, making every bite satisfying. For a lighter variation, increase vegetables in the pot during the braise and finish with a bright herb finish to contrast the rich sauce.
Searing and browning for depth of flavor
Searing is not just about color—it’s about creating a crust that locks in flavor and builds a rich fond in the pan. Pat the roast dry with paper towels to ensure maximum browning, then season generously with salt and pepper. Heat a heavy skillet over medium-high heat and add a thin layer of oil. Place the roast in the pan and leave it undisturbed for 2–4 minutes per side until a deep brown crust forms. Turn with tongs and repeat until all sides are well browned. Once seared, remove the roast briefly to prevent overcooking while you deglaze the pan. Deglazing lifts the fond into your braising liquid, which adds depth to the final sauce. Pro tip: keep the pan hot but not smoking to preserve the crust and avoid scorching the fond. The aroma of caramelized meat will set the stage for the rest of the braise.
The braise: mastering temperature and liquid levels
Return the roast to the pan and add your braising liquid and aromatics. The liquid should come about halfway up the sides of the meat—not fully submerged. Bring to a gentle simmer, then reduce the heat to maintain a steady, barely bubbling bath. Cover the pan and braise on the stove at a low simmer for 60–90 minutes, checking occasionally for tenderness. An ideal time allows the collagen to break down, producing fork-tender slices. If the liquid reduces too quickly, add a splash more broth or water and adjust the heat to maintain a simmer rather than a boil. Stir in aromatics and herbs partway through the braise to build layers of aroma. If you’re cooking a thicker roast, plan for slightly longer simmering; start checking tenderness at the 75-minute mark and proceed in 10–15 minute increments as needed.
Troubleshooting common issues
Tough meat is often the result of insufficient braising time or too high heat. If your roast isn’t tender after the initial braise, lower the heat further and continue to simmer in 10–15 minute increments, checking tenderness with a fork. If the sauce seems thin, remove the roast and reduce the liquid by simmering uncovered for 5–10 minutes, then whisk in a small slurry of flour or cornstarch if a thicker finish is desired. Too salty? Balance with unsalted broth or a splash of unsweetened liquid like a touch of tomato juice. For an uneven texture, ensure the roast is evenly sized and rotated occasionally for uniform cooking. Finally, never let the pot boil vigorously; a calm, steady simmer is essential to keep the meat moist and flavorful.
Finishing touches and serving ideas
Rest the roast for 10–15 minutes before slicing to allow the juices to redistribute. Meanwhile, finish the sauce by skimming fat and adjusting seasonings. Slice the roast against the grain for tenderness, and fan the slices onto a warm platter. Spoon the glossy pan sauce over the meat and serve with roasted or mashed potatoes and lightly sautéed vegetables such as carrots or green beans. If you prefer a thicker sauce, whisk in a slurry of cornstarch and cold water, cooking for 1–2 minutes until it coats the back of a spoon. A sprinkle of fresh herbs like parsley or chives adds color and brightness, balancing the richness of the braise. Leftovers reheat beautifully and can be turned into a hearty stew by adding a bit more stock and vegetables.
Variations and adaptations
Beef chuck or blade roast aren’t the only options. You can experiment with different braising liquids: red wine, beer, or even a small amount of balsamic for a deeper glaze. Substituting vegetables—mushrooms for a richer umami or parsnips for extra sweetness—adds nuance. If you’re short on time, you can reduce the braise by using a larger pan and a slightly higher simmer, though the longer, lower heat yields the most tenderness. For a lighter version, use half the beef and add more vegetables to the pot to maintain volume. The base technique remains the same: sear, deglaze, braise gently, and finish with a glossy sauce.
As you build confidence, you’ll adjust for your family’s taste—swap thyme for rosemary, or add a dash of soy for a savory accent. This flexibility makes stove top pot roast a reliable anchor for weeknight menus.
Leftovers and storage
Leftovers can be refrigerated for up to 3–4 days when stored in airtight containers. Reheat gently on the stove over low heat, adding a splash of broth or water to loosen the sauce if needed. The meat will continue to tenderize with time, making it ideal for sandwiches, stews, or pasta sauces. Freeze portions for longer storage, but note that texture may change slightly after freezing. Thaw in the refrigerator overnight and reheat slowly to maintain moisture. Plan to use any added vegetables within a day or two, as they can become mushier after reheating.
Final note on safety and quality
Always practice safe cooking habits: thaw meats safely, keep raw meats separate, and ensure a safe internal temperature when serving. The braising method used for stove top pot roast minimizes risk by cooking the meat evenly and at a controlled temperature. If at any point the pan looks dry, add more liquid to avoid scorching and maintain consistent moisture throughout the braise.
Tools & Materials
- Heavy-bottomed skillet with a tight-fitting lid (cast iron recommended)(3-4 quart or larger; lid must seal well)
- Tongs(For turning the roast without piercing the meat)
- Chef's knife(Trim fat and slice after resting)
- Cutting board(Stable surface for prep)
- Instant-read thermometer(Check internal temperature and tenderness)
- Measuring cups/spoons(Measure liquids and seasonings)
- Wooden spoon(Stir without scratching the skillet)
- Aluminum foil(Tent roast during resting if needed)
- Kitchen towels(Keep area clean and safe)
Steps
Estimated time: 90-120 minutes
- 1
Prep the roast and ingredients
Trim excess fat, pat dry, and arrange aromatics. This initial prep takes about 5–10 minutes and ensures even browning later.
Tip: Good prep prevents uneven searing and helps timing stay on track. - 2
Season liberally and bring to room temp
Season the roast on all sides with salt and pepper. Let it sit 10–15 minutes to promote even flavor absorption.
Tip: Seasoning ahead reduces the chance of uneven salt distribution. - 3
Sear the roast until deeply browned
Heat the skillet with a thin oil layer and sear the roast on all sides until a rich crust forms. This browning adds flavor to the sauce.
Tip: Do not move the roast too soon; allow crust to form before turning. - 4
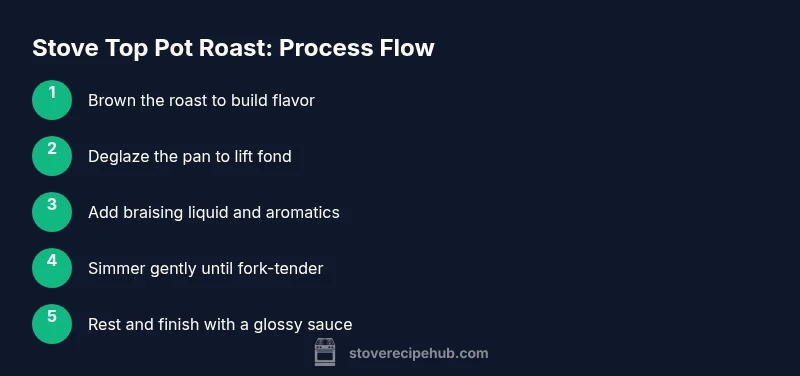
Deglaze the pan to lift fond
Pour a splash of broth or wine and scrape up the browned bits from the bottom. This fond will enrich the braising liquid.
Tip: Use a wooden spoon to release stubborn bits without scratching the pan. - 5
Add braising liquid and aromatics
Return the roast to the pan and add broth, wine, onions, garlic, and herbs. The liquid should come about halfway up the meat.
Tip: Keep heat at a gentle simmer to avoid toughening the meat. - 6
Braise gently on the stove, covered
Cover and simmer at a barely bubbling temperature for 60–90 minutes, or until fork-tender. Check tenderness after 75 minutes and adjust time as needed.
Tip: If liquid evaporates, add a splash more broth to maintain moisture. - 7
Rest, finish sauce, and slice
Let the meat rest 10–15 minutes, then slice against the grain. Skim fat from the sauce and finish with a quick reduction if desired.
Tip: Resting prevents juices from pooling on the cutting board.
Common Questions
What cut of beef is best for stove top pot roast?
Beef chuck or blade roast is ideal for braising because of their connective tissue that breaks down with slow cooking, yielding tender slices and rich flavor.
Beef chuck or blade roast work best for braising because their connective tissue breaks down into tender meat.
Can I use a Dutch oven instead of a skillet?
Yes. A heavy, lidded pot like a Dutch oven works well for the braise, and it can go from stove to oven if you want even heat distribution.
A Dutch oven is a great substitute and can also go in the oven if you want even heat.
How do I prevent the pot roast from drying out?
Keep a gentle simmer, keep the lid on, and use enough braising liquid. Rest the meat after cooking to redistribute juices.
Maintain a gentle simmer and rest the meat to keep it juicy.
How can I thicken the sauce without flour?
Reduce the sauce by simmering uncovered or whisk in a cornstarch slurry for a glossy finish.
Reduce it or whisk in cornstarch slurry for a glossy finish.
Can I add vegetables to the braise?
Yes, carrots and potatoes do well in the braise. Add vegetables during the last 30–40 minutes for even cooking.
You can add carrots and potatoes during the braise near the end.
How long can I store leftovers safely?
Leftovers keep in the fridge for 3–4 days in airtight containers and can be frozen for longer storage.
Eat within 3–4 days in the fridge or freeze for longer storage.
Watch Video
Top Takeaways
- Sear deeply to build flavor
- Keep a gentle simmer for tenderness
- Rest the roast before slicing
- Slice against the grain for tenderness
- Use the pan juices to finish the sauce