Gas Stove Connection: Safe Setup and Testing
A comprehensive how-to on connecting a gas stove to a gas line safely, with step-by-step instructions, safety checks, tools, and professional boundaries for DIYers.

You will learn how to safely connect a gas stove to a gas line and verify leaks, with step-by-step safety checks and when to hire a professional. By the end, you'll understand essential safety considerations, required tools, leak-testing methods, and the signs that you should call a licensed gas technician rather than attempting DIY fixes.
Why a proper gas stove connection matters
According to Stove Recipe Hub, a correct gas stove connection is essential for safety and performance. A poor connection can lead to gas leaks, oxygen depletion, and inefficient burners, increasing your risk of fire or carbon monoxide buildup. The gas stove connection is more than a plumber's task; it’s a critical control point where supply pressure, fittings, and venting all interact. In this section, we’ll explain how gas lines, regulators, and connectors work together and the code concepts that govern safe installation. You’ll learn the signs of a safe setup and what to do if you notice any unusual smells, hissing sounds, or excessive heat around the connection. The goal is to give you a clear mental model of the gas stove connection so you can evaluate whether your setup meets basic safety standards and when it’s time to call a licensed professional.
How gas lines, regulators, and connectors work
A gas supply system starts at the utility line, passes through a shutoff valve, a regulator, and then to the appliance connector attached to the stove. Regulators set the pressure delivered to each appliance, while connectors ensure a tight seal that resists vibration and temperature changes. Misalignment, damaged threads, or mismatched threads can create tiny leaks that accumulate over time. Understanding these components helps you recognize safe configurations and common failure points. Local codes often specify acceptable connector types, maximum lengths, and required materials for your region. If anything in your setup looks corroded, bent, or brittle, treat it as a red flag and consult a licensed professional.
Tools, safety gear, and preparation
Before touching any gas equipment, gather all required tools and PPE to minimize risk. Essentials include a gas-rated flexible connector, wrenches, thread sealant approved for gas, leak-detection solution, and a portable flashlight. Wear eye protection and gloves, and ensure the area is well-ventilated. Confirm you’re working during a period when emergency help is accessible. Document the current configuration before making changes so you can revert if needed. This preparation step reduces surprises and keeps the process organized.
Common mistakes and how to avoid them
Rushing a connection or skipping permit steps is a frequent source of trouble. Don’t assume a dry, tight fit means no leak—always test with a soapy solution. Avoid using non-gas-rated sealants, electrical tape, or generic thread tape on gas fittings. Never overtighten connections to the point of damaging threads. Finally, never modify a gas line without professional guidance; many jurisdictions require licensed installation for any line work. By avoiding these missteps, you reduce the risk of leaks and accidental disconnections.
Authority sources
For safety and compliance, refer to trusted, official resources. The links below provide government and major publications guidance on gas safety and leak prevention. These sources help you understand why proper connection practices matter and how to verify safe operation. Always cross-check with local codes and your appliance’s installation manual.
Safety-first mindset and professional boundaries
Gas line work carries real risks, including fire, explosion, and carbon monoxide exposure. If you are unsure about any step, stop and call a licensed gas technician. DIY checks without proper training can void warranties and violate local regulations. Keep this project within your comfort zone and lean on professional services when required. By maintaining a safety-first mindset, you protect your home and your family.
Tools & Materials
- Gas-rated flexible appliance connector(Ensure compatibility with stove inlet size and gas type (natural gas or propane); follow local code limits on length.)
- Gas shutoff valve key or wrench(For turning off the supply quickly during work.)
- Industrial-grade adjustable wrench(Use to snug connections; avoid over-tightening which can damage fittings.)
- Pipe thread sealant or Teflon tape rated for gas(Only use sealants approved for gas and apply per manufacturer directions.)
- Leak-detection solution or soap and water(Used to verify seal integrity after assembly.)
- Flashlight or headlamp(Ensure good visibility in the work area.)
- Gas detector (portable) or soap test kit(Optional safety enhancement, especially in older homes.)
Steps
Estimated time: 60-120 minutes
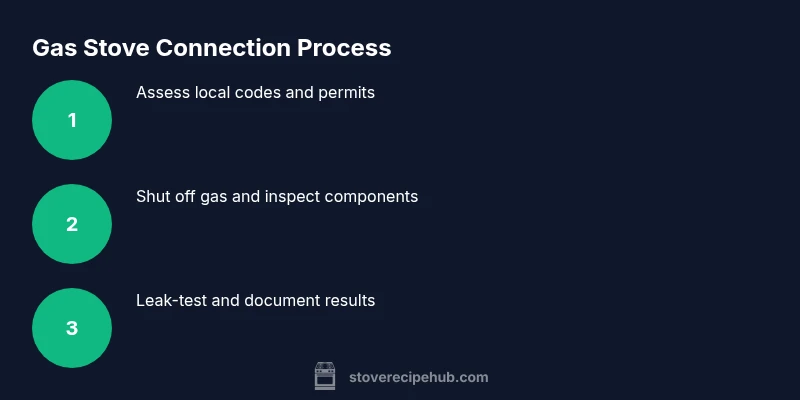
- 1
Verify codes and permits
Check local building codes and whether a permit is required for gas-line work. If in doubt, contact your local authority or a licensed gas technician before you begin. Document any approvals in writing and keep a copy with your project records.
Tip: Always start with the regulatory requirement; no shortcut replaces a permitted installation. - 2
Shut off gas and ventilate
Turn off the main gas supply and the appliance shutoff valve. Open nearby windows or run an exhaust fan to improve ventilation. Do not light flames or create sparks while the system is open.
Tip: Ventilation reduces the risk of accumulating gas and helps you detect leaks early. - 3
Inspect existing components
Check the condition of the stove inlet, shutoff valve, and any existing connectors. Look for rust, cracks, or damaged threads. If you see damage, do not reuse the parts; replace with code-compliant components.
Tip: Damaged parts should be replaced rather than repaired; avoid improvising with makeshift fixes. - 4
Apply sealant and prepare connections
If using sealant, apply only the amount recommended by the manufacturer and ensure surfaces are clean. Dry-fit components first to confirm alignment before final assembly. Avoid over-application which can cause leaks.
Tip: Use gas-rated products only; improper sealing is a common leakage path. - 5
Connect stove to gas line
Attach the connector to the stove inlet and to the shutoff valve, tightening with the appropriate wrench. Do not overtighten; snug plus a quarter-turn is typically enough depending on fittings. Verify alignment to prevent strain on joints.
Tip: After tightening, test the system without lighting the stove to check for leaks. - 6
Leak test and documentation
Apply a soap solution to all joints and watch for bubbles indicating a leak. If bubbles form, tighten or replace the faulty part and retest. Once no leaks are detected, restore power and keep a record of the test results for future reference.
Tip: If you smell gas at any point, evacuate and call emergency services.
Common Questions
Do I need a permit to connect a gas stove to a gas line?
In many communities, yes. Gas-line work often requires a permit and inspection. Check with your local building department before starting and obtain written approval if required.
Check local rules; permits are commonly required for gas-line work and inspections may be needed.
Can I use a flexible connector to install my stove?
Flex connectors are permitted in many areas when rated for gas and within length limits. Always follow the manufacturer’s guidelines and local codes. If unsure, consult a licensed pro.
Flexible connectors are sometimes allowed, but verify gas rating and local limits first.
What should I do if I smell gas after installation?
If you smell gas, evacuate immediately and call emergency services or the gas utility. Do not operate switches or create sparks. Ventilate once you’re in a safe location.
If you smell gas, leave the area and contact emergency services right away.
How long does a typical gas-stove connection take?
A professional installation can take 1–3 hours depending on existing infrastructure and code requirements. A DIY approach may extend this time if setbacks occur or inspections are needed.
It usually takes a couple hours, depending on code checks and existing lines.
Is DIY installation safe if I have basic plumbing skills?
Basic plumbing knowledge helps, but gas-line work is high-risk and subject to strict codes. For most homeowners, hiring a licensed professional is the safer choice to ensure a safe, compliant connection.
Gas-line work is risky; consider hiring a licensed professional to ensure safety and compliance.
Watch Video
Top Takeaways
- Prioritize safety and local code compliance.
- Perform a thorough leak test after any gas-line work.
- Use only gas-rated components and approved sealants.
- If in doubt, hire a licensed professional.