Gas Stove Igniter Replacement: A Practical Step-by-Step Guide
Learn how to safely replace a gas stove igniter with a practical, stove-top maintenance approach. This guide covers tools, steps, safety cautions, troubleshooting, and maintenance to keep your kitchen firing on all cylinders.

You can replace a gas stove igniter by following a safety-first, model-specific procedure that includes unplugging the unit, closing the gas valve, removing the burner, swapping in a compatible igniter, and testing the spark. This guide provides tools, step-by-step actions, and troubleshooting tips to help home cooks perform the replacement confidently. If you’re uncomfortable with gas work, contact a licensed pro.
Understanding the why and when of igniter replacement
Igniters on gas stoves wear out over time due to frequent arcing, carbon buildup, and exposure to heat. A failing igniter can produce a weak spark, misalign, or fail to ignite at all. According to Stove Recipe Hub, ignoring symptoms such as a hesitation before ignition or a faint crackling sound when attempting to light can lead to uneven heating and increased gas usage. Replacement is usually straightforward for most modern models, but exact parts and screws vary by brand and oven range. Before you start, confirm you have a compatible igniter part, a clear workspace, and a plan for safely handling gas components. This section helps you decide if replacement is the right move versus cleaning or professional service.
Safety first: set the stage for a safe replacement
Working with gas and electricity requires careful safety measures. Always unplug the appliance or switch off the dedicated circuit, close the gas supply, and work in a well-ventilated area. Keep a fire extinguisher nearby and wear cut-resistant gloves. Avoid wearing loose clothing and keep kids and pets away from the workspace. If you smell gas strongly or suspect a leak, leave the area and call your gas provider or emergency services. These precautions protect you from electrical shock, gas exposure, and accidental ignition during the replacement.
How to diagnose before you replace
Not all igniter issues require a new part. A dirty electrode or misaligned burner cap can mimic ignition failure. Check for grime, food residue, and corrosion around the igniter and its electrode. If the spark is weak or intermittent, verify the wiring harness is intact and that the connector seats snugly. For some models, you can test continuity with a multimeter; for others, a visual cue and spark test are sufficient. This diagnostic step saves you time and ensures you only replace when the igniter is truly faulty.
Tools and parts to have on hand (and why)
Before you begin, gather the essential items: a compatible replacement igniter (model-specific), a small screwdriver (PH2 or appropriate bit), needle-nose pliers for disconnecting wires, safety gloves, a flashlight, and optional tools like a multimeter and electrical tape. Having the right tools reduces the risk of damaging fasteners or connectors. A tidy workspace prevents misplaced screws and helps you retrace steps if needed. If you encounter stubborn fasteners, a precision driver set can help without stripping screws.
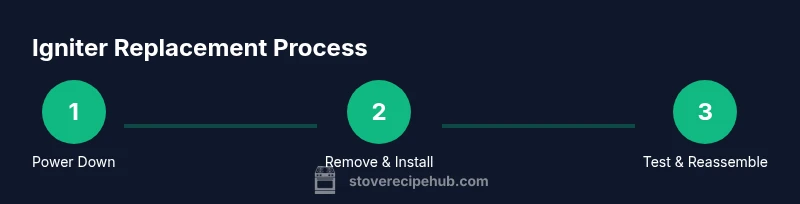
Step-by-step overview (high-level) before you dive in
Think of igniter replacement as a sequence: power down, access the igniter, disconnect the old part, remove and replace it, reconnect wiring, and test. This overview helps you plan your workflow, estimate time, and anticipate tricky moments like connector fit or misalignment. While the exact path may vary by model, the general approach remains consistent across most gas stove igniters, making it a repeatable DIY task for home cooks who want to save time and keep their stove performing reliably.
Step 1: Power down safely and access the burner
Start by unplugging the stove or switching off the circuit breaker. If your unit has a gas shutoff valve, close it to reduce risk while you work. Remove the burner grate and cap to reveal the burner head and igniter housing. A bright flashlight helps you spot a damaged connector, melted insulation, or a burned electrode. This step ensures you can access the igniter without disturbing other components.
Step 2: Disconnect the igniter harness and remove the old igniter
Carefully unplug the igniter’s electrical connector, taking note of wire routing. Some models use a single fastener to hold the igniter in place; others rely on clips. Use your needle-nose pliers to assist with gentle removal if needed. Remove the old igniter from its mounting and inspect the area for residue or corrosion that could affect a new igniter’s performance. This step reduces the risk of misalignment and poor spark delivery.
Step 3: Install the new igniter and secure its position
Position the replacement igniter so the electrode is aligned with the burner ports and the ground strap sits properly. Reconnect the wiring harness, ensuring a snug fit and correct polarity where applicable. Use the original screws or fasteners to secure the igniter in place without overtightening, which could crack the housing. A quick visual check confirms you didn’t disrupt nearby components.
Step 4: Reassemble and perform a spark test
Reassemble the burner cap and grate, then restore power and gas. Turn the knob to ignite and observe the spark and flame. If the igniter produces a strong, consistent spark and the burner lights reliably, you’ve completed a successful replacement. If not, recheck connector seating, electrode alignment, and burner cap seating. A slow, deliberate test helps you confirm proper operation.
Maintenance and troubleshooting tips for longevity
Keep the igniter clean and dry to extend its life. Wipe away any grease, oil, or food debris after cooking, and avoid splash from boiling water hitting the igniter area. If you notice corrosion or frequent misfires, recheck wiring and consider replacing the igniter sooner rather than later. Periodic inspection prevents unexpected failure and preserves fuel efficiency.
When to call a pro and what to expect
If you feel uncertain about electrical wiring, gas line proximity, or the need to disassemble more than the burner head, stop and contact a licensed technician. A pro can verify gas pressure, verify spark continuity across all igniters, and ensure there are no leaks. The Stove Recipe Hub team recommends professional help when you encounter burnt connectors, cracked housings, or ongoing ignition failures after replacement.
Authority sources and reputable safety references
For additional safety guidance and standards, consult trusted sources like the U.S. government and major safety organizations. See Energy.gov for broad energy-safety considerations, CPSC for consumer safety concerns, and OSHA for general workplace electrical safety practices. These references support best practices when performing gas appliance maintenance and emphasize the importance of proper disassembly, testing, and reassembly.
Tools & Materials
- Compatible gas stove igniter replacement(Model-specific; verify part number and compatibility with your stove model)
- Small Phillips screwdriver (PH2)(Used to secure the igniter or its mounting screw)
- Needle-nose pliers(Assist with wire disconnects and small connectors)
- Safety gloves(Protect hands from sharp edges and hot components)
- Flashlight or headlamp(Illuminates hard-to-see ignition housing and wiring)
- Multimeter (optional)(Use to check continuity if your model supports it)
- Electrical tape (optional)(Secure loose wires or protect exposed conductors)
Steps
Estimated time: 60-120 minutes
- 1
Power down and prepare
Unplug the stove or switch off the circuit, and close the gas valve if applicable. Clear the area and remove the burner grate and cap to access the igniter housing.
Tip: Having a ready flashlight helps you see connectors that are often hidden under grime. - 2
Access the igniter
Locate the igniter and its electrical connector. Note wire routing so you can reconnect it the same way after replacement.
Tip: Take a quick photo before disconnecting wires for reference. - 3
Disconnect and remove old igniter
Carefully unplug the harness and remove the igniter from its mounting. Inspect for corrosion or residue.
Tip: Avoid pulling on wires; disconnect at the connector first. - 4
Install the new igniter
Place the replacement igniter in the same orientation as the old one and secure it with screws. Reconnect the wiring harness firmly.
Tip: Ensure the electrode is aligned with the burner ports for consistent sparks. - 5
Reassemble and test spark
Reassemble the burner cap and grate, reapply power, and test the spark by attempting to light the burner.
Tip: If you don’t hear a spark, recheck connectors and alignment before repeating the test. - 6
Safety check and cleanup
Ensure there are no gas smells or smells of burning insulation. Wipe surfaces and store tools.
Tip: Keep a fire extinguisher accessible and verify the area is dry before use.
Common Questions
Can I replace a gas stove igniter myself, or should I call a professional?
Replacing a gas stove igniter is often doable as a DIY project if you follow safety steps and use a model-specific igniter. If you encounter wiring, gas pressure, or leak concerns, contact a licensed technician.
Yes, you can often replace it yourself if you follow safety steps and use a model-specific igniter, but call a pro if you’re unsure about wiring or gas issues.
What tools are essential for igniter replacement?
At minimum, you need a compatible igniter, a small screwdriver, needle-nose pliers, safety gloves, and a flashlight. A multimeter and electrical tape are optional but helpful for diagnostics and secure wiring.
The essentials are the igniter, a small screwdriver, pliers, gloves, and a flashlight. A meter and tape are optional extras.
How do I know if the replacement is compatible with my stove model?
Check the stove model number and compare it to the replacement igniter’s listed compatibility. If unsure, contact the manufacturer or supplier with your model details.
Match your model number to the igniter’s compatibility list or contact support with your model details.
What are common signs that the igniter still isn’t working after replacement?
A weak spark, no sparked ignition, or repeated misfires may indicate wiring problems, electrode misalignment, or defective new parts. Recheck wiring and positioning before seeking professional help.
Weak spark or no ignition after replacement usually means wiring or alignment needs another look.
Is it safe to use the stove while I’m waiting for a replacement part?
If the igniter is nonfunctional, avoid using the burner until replacement is complete. Do not attempt to light gas with a sparkless electrode, and consider alternative cooking methods.
Do not use the burner if the igniter isn’t working; switch to other burners or methods until replaced.
What maintenance can help extend igniter life?
Keep the igniter area clean and dry, wipe away grease after cooking, and avoid water contact. Regular inspection can catch wear or loose connections before a failure occurs.
Clean and dry the igniter area, inspect for wear, and fix loose connections early.
Watch Video
Top Takeaways
- Identify igniter failure signs early to avoid long-term gas waste.
- Always prioritize safety: disconnect power, close gas, test in a well-ventilated area.
- Use the model-appropriate igniter and secure alignment for reliable sparks.
- Test ignition thoroughly after replacement to confirm success.
- Consult a professional if you face wiring or gas system concerns.