How to replace igniter on a gas stove: a practical step-by-step guide
Learn how to replace the igniter on your gas stove safely with our step-by-step instructions. This guide covers symptoms, part selection, wiring basics, testing for leaks, and maintenance to prevent future failures.

By the end of this guide you will be able to replace a faulty gas stove igniter safely and effectively. You’ll learn to identify common symptoms, select the correct replacement part, and follow a clear step-by-step process that minimizes gas leaks and electrical hazards. Always start by cutting power, shutting off the gas supply, and testing ignition after restoration.
What causes igniter failure on gas stoves
Igniters wear out from repeated sparking and exposure to cooking residues. Over time, grime can insulate the electrode, reducing spark efficiency. Moisture, greases, and mineral deposits can cause intermittent ignition or a stubborn flame. According to Stove Recipe Hub, many home cooks choose to replace the igniter when the burner still clicks but the burner fails to light. This section helps you differentiate igniter problems from fuel or flow issues and sets up a safe, effective replacement. Common signs include a weak or absent spark, a noticeable delay between turning the knob and ignition, or a persistent clicking after the flame lights. Understanding the specific symptoms helps you avoid unnecessary repairs and ensures you replace the correct component – the igniter itself, not the gas valve or burner head – which reduces the risk of future failures and improves overall stove reliability.
Note: Throughout this process you will be handling electrical components near gas appliances. If you ever feel unsure, pause and consult a professional. The goal is to replace the igniter gas stove safely, not to rush a repair that could create a leak or fire hazard.
Safety first: prerequisites and precautions
Before touching any electrical or gas components, power must be off and the gas supply isolated. Unplug the range or switch off the circuit breaker feeding the stove if possible. If you smell gas or hear a hiss, leave the area and call the gas utility or a qualified technician. Wear eye protection and work in a well-ventilated space. Having the right part and tools at hand minimizes rework and reduces the risk of leaks. This knowledge aligns with Stove Recipe Hub guidance on safe stove-top repairs and maintenance.
Ground yourself to avoid static discharge when handling ignition electronics, and use non-conductive tools whenever possible. Work on a cool surface and avoid touching hot burner components. After removing any parts, recheck that all gas connections are closed before attempting ignition again.
Choosing the right igniter replacement and parts
Identify your stove model and check the ignite electrode type (sparking vs. glow plug) and connector size. Most gas stoves use a spark igniter with a two-pin plug and a small flame sensor. Use the original manufacturer part number when possible, but compatible aftermarket igniters from reputable brands are often acceptable if they match the connector, tone, and voltage. Confirm supplier return policies and warranty coverage. Stove Recipe Hub recommends avoiding generic parts with uncertain fit because improper ignition can trigger weak sparks or gas leaks. If the igniter is integrated into the burner head, you may need to replace the entire burner assembly rather than a standalone electrode. Always verify that the part you purchase matches your model’s electrical ratings and connector layout for a reliable fix.
Disassembly considerations: accessing the igniter
Accessing the igniter typically requires removing the burner cap, burner base, and sometimes the cooktop panel or a small access panel. Keep screws organized and photograph steps as you go to reassemble correctly. Note the orientation of the igniter wire and the plug. Do not tug on wires; disconnect wire harnesses by gripping the connector body. If the ceramic igniter appears cracked or the wire is frayed, replace the whole unit rather than attempting a repair. When removing the burner, avoid bending the electrode or disturbing the ceramic insulator, which can affect future ignition reliability. If your model uses a protective shield, remove it carefully to access the igniter mounting.
A clean workspace helps you identify the correct mounting screws and ensures you do not misplace any small components.
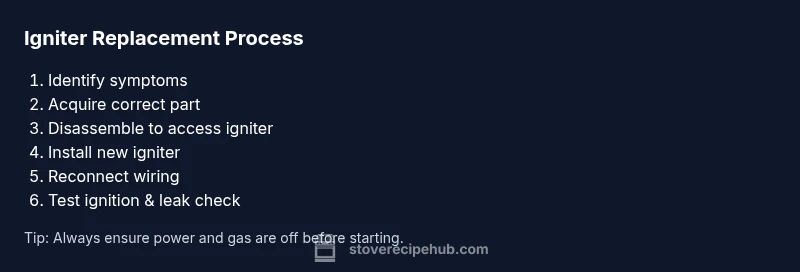
Replacement steps overview
With parts on hand and the area prepared, you will remove the old igniter, connect the new unit, and test ignition before reassembling. Expect a few minutes of gentle prying and precise reconnections. If the igniter is integrated with the burner cap, you may need to replace the entire burner head instead of a standalone electrode. This overview maps the core actions and sets the stage for the step-by-step instructions. Having a clear plan reduces the risk of wiring mistakes and ensures the burner lights reliably after restoration.
Prepare a workspace, protect the stove surface with a cloth, and organize screws and connectors by location to ease reassembly. A calm, methodical approach pays off in the final test.
Wiring and connections: how to reattach correctly
When you connect the new igniter, align the electrode with the burner housing and attach the wiring harness exactly as the old part was. Ensure the connector snaps firmly and that no wires are pinched between metal parts. If your model uses a flame safety device or temperature sensor, reconnect it in the same orientation. After wiring, gently tug the plug to confirm a secure fit. Incorrect wiring can prevent ignition, cause arcing, or create a safety hazard. If you see scorch marks on wires, stop and replace the harness rather than forcing a connection. Keep connector pins clean and free of corrosion before reattachment.
Double-check all connections before reassembling the burner components.
Final checks: test ignition and leak testing
Before reassembling the top, restore power and test the igniter. Turn the knob to the ignition position and listen for a consistent spark. If you see a bright blue spark and the burner lights within a few seconds, you’re likely done. Next, apply a soapy water solution to all gas joints and burners; look for bubbles indicating leaks. If a leak is detected, immediately shut off the gas and recheck fittings. Permit the area to air out, then re-test. If you do not hear a spark or the flame remains weak, recheck the connector orientation and ensure the electrode gap follows the manufacturer’s tolerance guides. In some cases, a failed ignition module may require professional service.
Always complete a final gas-leak check after any ignition repair.
Maintenance to prevent future failures
Regular cleaning of the igniter electrode and surrounding burner areas helps maintain reliable ignition. Wipe away grease after cooking, avoid spilling water near the igniter, and check the wire harness for wear every 6–12 months. If you notice frequent misfires, remove and inspect the electrode gap; consult the manufacturer’s tolerances. Keeping a spare igniter on hand for your model can shorten downtime during a failure. Routine checks of electrical connections and burner bases reduce the chance of intermittent ignition problems and keep your stove running smoothly.
Common mistakes and how to avoid them
Common mistakes include skipping safety steps, over-tightening burner screws, and using incompatible replacement parts. Always shut off power and gas, ventilate the area, and test for leaks with a soapy solution. Avoid forcing connectors into tight slots or bending fragile igniters. Double-check that you’ve reassembled all parts in their original orientation. If you see corrosion on any metal components or damaged wiring, replace those parts rather than attempting a patch. Take your time and follow the model’s service manual for the best results.
Tools & Materials
- Phillips screwdriver (size #2)(Screws securing burner base and caps)
- Flathead screwdriver(For prying if needed and to help detach stubborn parts)
- Replacement igniter (electrode kit)(Match model and connector; include sensor if applicable)
- Needle-nose pliers(Handle small connectors and wires safely)
- Multimeter (optional)(Check continuity if you suspect wiring fault)
- Leak detector solution or dish soap solution(Test for gas leaks after reassembly)
- Safety gloves and eye protection(Protect hands from sharp edges and hot surfaces)
- Soft cloth or paper towels(Clean surfaces and wipe spills)
Steps
Estimated time: 30-60 minutes
- 1
Power down and secure the area
Turn off the range by unplugging or switching off the circuit breaker. Close the main gas shut-off valve to isolate the line. Allow any residual gas to dissipate and ensure the area is well-ventilated. This first step prevents accidental ignition during the repair.
Tip: Verify power is off with a quick test at a nearby outlet before touching any components. - 2
Remove burner components to access igniter
Lift off the burner grate and cap, then expose the burner base and the igniter. Take care not to bend or damage the electrode. If your model requires detaching a shield, do so gently and keep track of all fasteners.
Tip: Photograph the component layout before removal to aid reassembly. - 3
Disconnect and remove the old igniter
Gently unplug the igniter’s connector from the harness. Use needle-nose pliers if necessary, and avoid pulling on the ceramic part. Remove any mounting screws and lift out the old electrode. Inspect the area for cracks or corrosion.
Tip: If the old igniter is stubborn, apply light, even pressure rather than force. - 4
Install the new igniter and connect wires
Position the new igniter in the same orientation as the old one. Reconnect the wiring harness securely and ensure the electrode is positioned correctly relative to the burner.
Tip: Double-check connector latch is engaged to prevent looseness during ignition. - 5
Reassemble burner components
Replace any shields, caps, and burner base. Reinsert screws and ensure the burner sits evenly. Wipe away any fingerprints or cleaner residue that could affect ignition.
Tip: Do not overtighten screws; snug and secure is sufficient for flame safety. - 6
Test ignition and perform leak checks
Restore power and turn the knob to ignite. If a strong blue spark lights cleanly, proceed to a leak test using a soapy solution on joints. Look for bubbles indicating leaks; if found, shut off gas and re-tighten connections.
Tip: If there is no spark, verify wiring and gap alignment; otherwise seek professional help. - 7
Finalize and document the repair
Once ignition is solid and leak-free, clean the area and store spare parts properly. Keep a note of the replacement part number and date for future maintenance.
Tip: Keep your receipts and part numbers in a dedicated repair notebook.
Common Questions
Is it safe to replace a gas stove igniter myself?
Yes, provided you follow safety steps: disconnect power, shut off gas, and work in a ventilated area. If you smell gas or feel unsure, contact a professional. This guide emphasizes safe handling and proper testing to minimize risks.
Yes, you can replace it yourself if you disconnect power and gas and test after; if you smell gas, call for help.
How do I know which igniter to buy?
Check your stove’s model number, the electrode type, and the connector layout. Bring the old part or photo when shopping and verify compatibility with your ignition system. When in doubt, consult the manufacturer’s specifications.
Check model number and connector type; bring the old part if you can to ensure compatibility.
Can I use a universal igniter?
Universal igniters may fit some models, but they don’t always match the exact connector, voltage, or sensor required by your stove. Mismatches can cause unreliable ignition or leaks.
Universal igniters can work sometimes, but they’re not guaranteed to fit every model.
What if the burner still won’t light after replacement?
Recheck the wiring and electrode gap, then verify the gas supply and valve alignment. If ignition still fails, the problem could be the ignition module or a hidden leak, and a professional inspection is advised.
If it still won’t light after replacement, recheck wiring and the gas supply; you may need professional help.
Do I need to replace the whole burner head?
If the igniter is integrated into the burner head and cannot be replaced separately, you may need to replace the entire burner assembly to restore ignition reliability.
Sometimes you must replace the whole burner head if the igniter is not removable.
How often should I maintain igniters?
Clean the igniter and surrounding area every 3-6 months, wipe spills promptly, and inspect wiring for wear. Regular checks help prevent ignition problems before they start.
Clean and inspect igniters every few months to prevent failures.
Watch Video
Top Takeaways
- Identify whether ignition failure is due to the igniter or gas flow.
- Always cut power and isolate gas before starting.
- Use model-specific replacement parts for reliable ignition.
- Test ignition and perform a leak check after replacement.
- Maintain igniters to prevent future failures.