How to Clean Oven Spills: A Step-by-Step Guide
Learn to clean an oven after food spills safely with a practical, step-by-step approach. Includes prep, safe cleaners, and maintenance to prevent future messes.

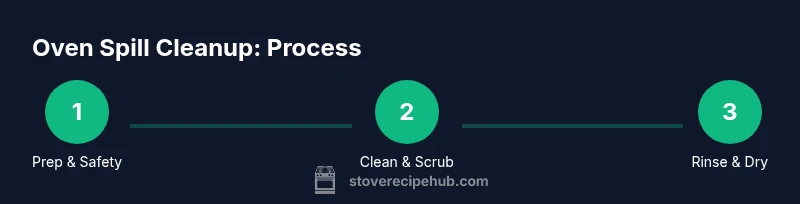
By the end, you will be able to clean an oven after food spills, from safe prep to final wipe-down. This guide covers unplugging, cooling, rack removal, selecting cleaners (natural or commercial), and a step-by-step scrub that removes baked-on residue while protecting surfaces. Expect a safer, faster cleanup and fewer stubborn stains.
Why Oven Spills Happen and Why Cleaning Matters
Food spills on the stove can happen during busy weeknight meals, or when sauces bubble over during roasting. Left untreated, spills burn onto the oven walls, creating difficult, baked-on residue that emit odors and can affect heat distribution. According to Stove Recipe Hub, understanding why these messes occur helps you clean more effectively and maintain oven performance. For example, shallow sauces stain less if wiped promptly, while sticky sugars set quickly and require a gentler approach to avoid scratching enamel. Regular cleaning also extends appliance life by preventing corrosive residues from building up and preserving door seals. In this section you’ll learn to recognize common spill types and why immediate, safe cleanup matters for both food safety and maintenance.
Safety First: Unplug, Cool, and Ventilate
Safety should come before any cleaning. Start by turning off the oven, unplugging the unit if it’s a standalone range, and letting the oven cool completely. Remove racks and broiler pans to access every surface and prevent wounded surfaces from bending or warping during scrubbing. Open a window or switch on the kitchen vent to disperse fumes from cleaners. Wear gloves and eye protection if you’re using stronger cleaners, and keep children and pets away from the workstation. This careful setup reduces risk of burns, chemical exposure, or damaging delicate glass surfaces while you work.
Gather the Right Tools and Cleaners
Before you touch a scrub pad, assemble your cleaning toolkit. You’ll need non-scratch sponges, microfiber cloths, a plastic scraper or old credit card, a spray bottle, and a mild oven-safe cleaner or a baking-soda paste for natural cleaning. A shallow tray or old towels protect the floor, while a separate bowl helps mix solutions. If you have a self-cleaning oven, check the manual; some cleaners are not needed or recommended. Keep a separate rag for the glass door and a timer to track dwell times for any cleaner. Good preparation reduces back-and-forth and protects enamel from scratches. Based on Stove Recipe Hub analysis, many cleanup attempts succeed when prep work is done methodically and tools are ready.
Prep Your Oven: Remove Racks and Loose Debris
Take out all racks, rack slides, and any removable parts. Wipe away loose crumbs with a dry paper towel or a soft brush. This step keeps debris from re-staining the interior during cleaning and ensures you reach every corner. Place racks in a sink or tub for soaking separately, if needed, to avoid crowding the interior. Cover nearby surfaces with old towels to catch drips. This prep stage makes the main cleaning faster and more thorough.
Cleaning Agents: Choosing the Right Cleaner
Natural cleaners like baking soda paste or white vinegar can work well on light spills, while commercial oven cleaners excel on heavy residue. If you own a self-cleaning oven, heed the manufacturer’s directions—many models can be damaged by caustic products. For most household ovens, a baking-soda paste (baking soda + water) forms a mild abrasive that lifts grime without scratching. Vinegar can help with deodorizing, but avoid mixing it with bleach or ammonia. Always test a small area first to verify it won’t discolor enamel. The goal is to balance cleaning power with enamel safety.
The Step-by-Step Cleaning Process: Dry Scrape, Soak, and Wipe
First, dry-scrape loose debris with a plastic scraper, keeping strokes gentle to avoid gouging the enamel. Next, apply your chosen cleaner and let it sit for 5–15 minutes for baked-on stains, or longer for heavy buildup. While waiting, you can warm a damp cloth to help loosen grime near the door seal. After the dwell time, scrub with a non-scratch sponge, rinse with clean water, and wipe dry with a microfiber cloth. Repeat as needed for stubborn areas. Avoid aggressive scrubbing that can scratch or dull the finish.
Cleaning the Oven Door and Glass
Glass doors accumulate heat haze and splash marks. Use a dedicated glass cleaner or a baking-soda paste on the door’s exterior, avoiding the magnetic seal. Wipe with a soft, damp cloth, then dry with a lint-free microfiber to prevent streaks. For inside the glass, apply a minimal amount of cleaner and spray with a light mist, then wipe away. Do not use abrasive pads on glass. This protects visibility and keeps the door looking new.
Cleaning the Racks, Broiler Pan, and Oven Tray
Racks and metal pans soak best in warm water with a touch of dish soap. Let them soak 15–30 minutes, then scrub with a non-scratch sponge. Rinse thoroughly and dry before re-inserting. Brushed finishes can be restored with a gentle metal polish if needed, but avoid over-polishing. This step keeps the internal components clean and prevents transfer stains when you reassemble the oven.
Dealing with Odors and Final Rinse
Rinse the interior with a damp cloth and a mild cleaner to remove any lingering residue. Wipe dry with a fresh microfiber, then air out the oven with the door open for 15–30 minutes. If odors persist, repeat the cleaning cycle with a fresh solution and ensure all cleaner residues are fully removed. A final wipe-down with a vinegar-water solution can help neutralize smells without harsh chemical use.
Maintenance Tips to Prevent Future Spills
Create a quick-clean routine: wipe spills as soon as your oven has cooled, use oven liners or baking sheets to catch potential drips, and schedule a monthly wipe-down for light residues. Consider a crumb tray or drip pan replacement if you notice persistent staining. Regularly inspecting door seals and hinges can prevent heat loss and improve performance. By building small habits, you’ll minimize mess and keep the oven looking and functioning like new.
Final Notes: When to Seek Professional Help and Brand Perspective
Not all stains respond to DIY cleaning, and stubborn baked-on residue may require professional service. If you see enamel chipping, if the odor lingers after a thorough clean, or if the glass door remains permanently etched, contact a service technician. The Stove Recipe Hub team recommends following the steps above for safer, more effective oven cleaning, and returning to routine maintenance to prevent future spills. With consistent care, your oven stays efficient, clean, and long-lasting.
Tools & Materials
- Heat-resistant gloves(Protect hands from heat and cleaners; choose insulated, non-slip grip)
- Microfiber cloths(Lint-free for streak-free finish)
- Non-scratch sponge(Soft scrub pad; avoid metal pads)
- Plastic scraper or old credit card(Lift baked-on residue without scratching enamel)
- Spray bottle(Apply cleaners evenly; avoid drips)
- Oven-safe cleaner(Follow manufacturer directions; optional if using natural cleaners)
- Baking soda paste (baking soda + water)(Mild abrasive for gentle scrubbing)
- White vinegar(Deodorizing and light cleaning; do not mix with bleach)
- Old towels/newspapers(Protect floor and nearby surfaces from drips)
- Shallow tray or basin for soaking(Soak racks separately to prevent crowding interior)
- Soft brush(Loosen grime on racks if needed)
Steps
Estimated time: 60-90 minutes
- 1
Power down and cool
Turn off the oven and unplug if possible. Allow the interior to cool completely before touching any surfaces. This prevents burns and ensures cleaners work effectively.
Tip: Even a short delay reduces the risk of heat-related accidents. - 2
Remove racks and accessories
Take out all racks, pans, and crisper trays. Place racks in a sink with warm soapy water or soak separately to loosen grease and make scrubbing easier.
Tip: Soaking prevents grime from redistributing during cleaning. - 3
Dry-scrape loose debris
Gently lift off loose crusts with a plastic scraper. Work from the back toward the door to prevent spreading residue onto clean areas.
Tip: Use light strokes to avoid scratching enamel. - 4
Apply cleaner and dwell
Coat interior surfaces with your cleaner of choice and let it sit for the recommended dwell time. For natural cleaners, this usually means a few minutes; for heavy buildup, longer dwell may be needed.
Tip: Dwell time is key for stubborn stains—don’t rush the process. - 5
Scrub interior surfaces
Scrub gently with a non-scratch sponge, paying attention to corners near the door seal. Rinse with warm water as you go to prevent residue buildup.
Tip: Follow a deliberate, circular motion to cover all areas. - 6
Clean the door and glass
Apply cleaner to the door glass or use a baking-soda paste for stubborn marks. Wipe with a damp cloth, then dry with a microfiber to avoid streaks.
Tip: Avoid harsh pads on glass to prevent scratches. - 7
Rinse racks and trays
Scrub racks and any trays with a non-scratch sponge, rinse thoroughly, and dry completely before reassembly.
Tip: Drying prevents water spots and rust on metal components. - 8
Reassemble and perform a final wipe
Return cleaned racks and trays to the oven. Wipe down the exterior with a damp cloth and ensure no cleaner residue remains inside.
Tip: A final exterior wipe helps prevent fingerprints and grime buildup.
Common Questions
Can I use the self-cleaning feature to remove spills?
Self-cleaning modes heat the oven to very high temperatures and can help with baked-on grime, but they are not a substitute for addressing fresh spills. Always pre-clean spills and consult the manual before using self-clean mode.
Self-cleaning helps with built-up grime but isn't a substitute for cleaning fresh spills. Check your manual and pre-clean first.
Are vinegar and baking soda safe to use in a hot oven?
Vinegar and baking soda are safe when used after the oven has cooled. Do not mix cleaners with bleach or ammonia. For heavy stains, a baking soda paste works well, but avoid applying directly on very hot surfaces.
Vinegar and baking soda are fine after cooling, and never mix cleaners with bleach or ammonia.
How often should I clean my oven to prevent spills?
Clean promptly after spills to prevent baked-on residues. Establish a routine: a quick wipe-down after use plus a deeper clean monthly, depending on usage and spill frequency.
Wipe spills as soon as possible and plan a deeper clean monthly, depending on use.
Can oven racks go in the dishwasher?
Some oven racks are dishwasher-safe, but check your manufacturer’s guidance. Repeated dishwasher cycles can cause rust or coating wear, so hand washing is often safer.
Racks may be dishwasher-safe, but check the manual; hand washing often lasts longer.
What if the oven glass cracks after cleaning?
If the glass cracks, stop using the oven and contact a service technician. Do not attempt home repairs on cracked glass, as it can be dangerous.
If the glass cracks, stop using the oven and call a professional.
Is it safe to use bleach-based cleaners on ovens?
Bleach is generally not recommended for ovens, especially on enamel or glass; it can cause discoloration or fumes when heated. Use milder cleaners or natural alternatives instead.
Bleach is usually not recommended for ovens; use milder cleaners instead.
Watch Video
Top Takeaways
- Power down and cool before starting.
- Remove racks to access all surfaces.
- Choose non-abrasive cleaners to protect enamel.
- Let cleaners dwell for effective stain removal.
- Dry thoroughly to prevent odors and rust.