How to Fit Stove Door Rope: A Practical Step-by-Step Guide
Learn how to fit stove door rope gasket with clear, safe steps. This guide covers tools, techniques, safety tips, and maintenance for durable seals on your stove.

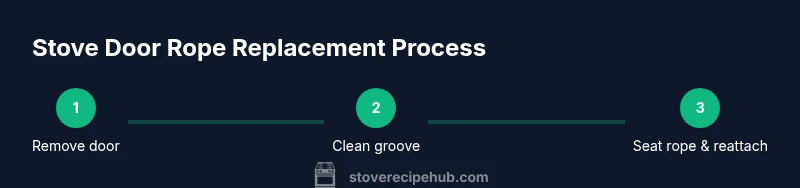
By following these steps you can fit stove door rope gasket to restore a tight seal. Remove the door, clean the groove, cut the rope to length, and seat it evenly around the edge before reattaching. Use the rope type that matches your oven model and verify a snug fit with the door closed.
What is stove door rope and why replace it?
According to Stove Recipe Hub, the stove door rope, or gasket, is a heat-resistant seal that runs around the inner edge of the door. Over time, heat, friction, and cleaning can wear it down, causing gaps that let heat escape and smoke leak. A worn rope can also affect how evenly the door seats, which leads to longer preheat times and uneven cooking. The Stove Recipe Hub Team notes that replacing this gasket is cost-effective, preserves energy, and restores proper door alignment. Visually inspect for fraying fibers, compressed sections, or missing chunks. If you feel air on the other side while the door is closed, the rope is likely past its prime. In many models, the rope is simple to swap, offering a straightforward maintenance task for capable home cooks. This upgrade reduces heat loss and improves safety when operating at high temperatures. Always consult your manual and use the rope recommended for your specific oven model.
Brand note: The Stove Recipe Hub team recommends approaching this task with care and verifying fit before regular use.
Choosing the right rope for your stove
Selecting the correct rope is crucial for a durable seal. Fiberglass rope is common for high-heat ovens, but some models use silicone or PTFE-coated options. Check your oven manual for the exact temperature rating and the rope cross-section that fits the channel groove. Measure the door’s inner perimeter so you buy a length that can be trimmed to fit without overlaps. The material should be rated for the temperatures your oven reaches, and it should sit neatly in the groove without forcing the door shut. A well-chosen rope reduces heat loss, prevents drafts, and keeps grease and smoke from escaping into the kitchen. If you’re unsure of the exact size, consult the manufacturer’s recommendations or contact customer support for your model.
Stove Recipe Hub analysis shows that properly replacing the door rope improves energy efficiency and keeps heat contained when the door closes. Keep a spare gasket for future maintenance and store it in a dry place.
Safety and preparation steps before you start
Before you begin, switch off power to the oven or gas supply if you’re dealing with a gas stove. Wear gloves to protect your hands from sharp edges and hot surfaces. Clear the work area, lay a soft cloth on the floor to catch any dropped hardware, and have a helper hold the door if needed. Disconnecting power helps prevent accidental activation while you work. Review the rope manufacturer’s guidelines for installation and temperature ratings. If you notice damaged hinges or a warped door frame, address those issues first or seek professional help. The goal is a safe setup where you can work without interruption and reassemble the door with confidence.
Cleaning the groove and inspecting the door frame
Thorough cleaning of the groove is essential for a good seal. Remove any old rope remnants with a blunt tool, then scrub the groove with a mild detergent and warm water. Rinse and dry completely before seating the new rope. Inspect the groove for burrs, corrosion, or missing sections of metal; smooth any rough edges to prevent rope fraying. If the groove is damaged beyond simple cleaning, you may need replacement parts or professional service. A clean groove ensures uniform seating and reduces the risk of gaps along the edge.
Common mistakes and how to avoid them
Mistakes to avoid include using the wrong rope size, stretching the rope tight, or tearing it while seating. Do not use glue or adhesive to fix the rope—most gaskets rely on a snug fit in the groove. Cutting the rope too long can cause wrinkles that create air gaps; cut slightly longer than needed and trim gradually. Over-tightening screws can distort the door frame, so tighten gradually and test the seal. Finally, never rush the seating process; take time to evenly press the rope into the groove to avoid twists.
Maintenance tips for longer rope life
Keep your rope in good condition by performing a quick inspection every few months. Clean the groove regularly to prevent buildup that can trap debris and wear the rope prematurely. Store spare rope away from heat sources and moisture. When re-seating, ensure the rope remains flat and untwisted around the circumference. If you notice cracking or hardening of the rope, replace it promptly to maintain a secure seal and safe operation.
Troubleshooting common issues
If you still feel heat loss or notice leaks, recheck the rope length and seating. Gaps often form at corners where the rope folds; trim carefully and re-seat. If the door doesn’t close smoothly or appears misaligned, inspect hinges and frame for wear. In some models, the door gasket sits behind a metal retainer; remove the retainer only if you’re confident in reassembly. When in doubt, consult the manual or contact a professional technician.
Tools & Materials
- Stove door rope gasket (correct size and material)(Choose high-temp fiberglass rope rated for your oven; match model and groove width.)
- Scissors or a sharp utility knife(Cut rope cleanly; avoid jagged edges.)
- Screwdriver (Phillips and flat-head)(To remove the door or hinges if needed.)
- Measuring tape or ruler(Measure circumference and rope width accurately.)
- Mild detergent and cleaning cloth(For cleaning the groove and removing residue.)
- Old toothbrush or brush(For detail cleaning in the groove.)
- Gloves(Protect hands from sharp edges and hot surfaces.)
- Masking tape or small clamps(Optional to hold rope in place during seating.)
Steps
Estimated time: 20-35 minutes
- 1
Remove the door safely
With a helper, support the door and locate the hinge screws. Use the screwdriver to loosen the screws enough to lift the door away from the hinge. Place the door on a soft surface to prevent damage and inspect the door edge for any obvious warping before starting the gasket replacement.
Tip: Have a partner hold the door to prevent it from slipping and causing injury. - 2
Clean the groove and inspect the channel
Use a brush and mild detergent to clean the groove where the rope sits. Rinse and dry thoroughly. Look for burrs, uneven sections, or damaged edges that could prevent the rope from seating evenly.
Tip: Inspect the groove at multiple points; a single rough spot can ruin the seal. - 3
Cut rope to length and prepare for seating
Measure the door’s inner perimeter and subtract a small amount to account for compression. Cut the rope in one continuous length, making clean end edges. If your door has corners, allow for gentle bends without kinking the rope.
Tip: Cut slightly longer, then trim as needed for a perfect fit. - 4
Seat rope evenly into the groove
Begin at a corner and press the rope into the groove, working clockwise. Ensure the rope lies flat, with no twists or overlaps. If the rope sits high in the groove, gently press it down until it sits flush.
Tip: Use a small tool or damp cloth to help push the rope into tight corners. - 5
Reattach the door and test the seal
Lift the door back onto the hinges and snug the screws without overtightening. Close the door and check for air leaks by feeling along the edge or using a paper test. If you detect gaps, reposition or trim the rope and reseat.
Tip: Perform a quick heat test (inside safe limits) to confirm the seal holds during operation.
Common Questions
Can I reuse old stove door rope?
If the rope is clean, undamaged, and not stretched, you may reuse it. Otherwise, replacement is recommended for a reliable seal.
If the old rope is clean and not stretched, you can reuse it; otherwise replacement is best for a reliable seal.
What size rope do I need?
Measure the groove width and the door’s inner perimeter. Use the rope specified by your oven’s manual and choose a length that fits with a slight compression.
Measure the groove and circumference, then use the exact rope size recommended by your oven’s manual.
Do I need special tools?
Basic tools like a screwdriver, scissors, measuring tape, and cleaning supplies are sufficient for most rope replacements.
A screwdriver, scissors, measuring tape, and cleaners are usually all you need.
How long does rope replacement take?
Most replacements take about 20-35 minutes, depending on door access and groove condition.
Most replacements take under an hour, typically around 20 to 35 minutes.
How can I test if the seal is good after replacement?
Close the door and check for air leaks along the edge, or use a simple paper test to see if it slides out with light resistance.
Close the door and look for leaks; a simple paper test helps confirm a good seal.
Watch Video
Top Takeaways
- Verify rope size and fit before cutting.
- Seat rope evenly with no twists for a tight seal.
- Test the door seal after reassembly.
- Keep spare rope handy for quick maintenance.