When to Replace Stove Rope: Practical Guide for Home Cooks
Learn when to replace stove rope on gas stoves, how to inspect wear, choose the right material, and follow a safe, step-by-step replacement process to improve efficiency and safety.

You should plan to replace stove rope whenever you notice wear, gaps, or heat loss around the oven door seal. Look for fraying, cracking, or compression, plus any gas odor or soot buildup near the seal. This guide outlines inspection, selection, and a safe, step-by-step replacement process.
Why Stove Rope Matters
The door seal on an oven or stove uses a rope gasket to maintain heat and prevent drafts. A healthy rope keeps temperatures stable, improves efficiency, and reduces the risk of heat loss that can affect baking results. According to Stove Recipe Hub, stove-top and oven seals are often overlooked until problems become obvious, but proactive maintenance protects energy use and performance. When the seal is intact, you’ll notice more consistent cooking results, shorter preheat times, and less stray heat around the cabinet edges. In older appliances, rope seals dry out and crack faster, making early inspection worth the small effort.
Signs That You Need to Replace Stove Rope
Look for visible wear: fraying, cracking, flattening, or stiff, brittle sections along the gasket. If the rope feels hard or compressed, it may not seal properly. Gaps when the door is closed, increased oven temperature, or soot and smoke around the seal are red flags. A gas odor near the door is a safety concern and warrants immediate attention. If you routinely adjust the door to improve sealing, it’s time to replace. Addressing worn rope promptly can improve energy efficiency, oven performance, and overall safety.
How to Inspect the Rope and Groove
Begin with a visual check—clean the area to remove crumbs, then inspect the rope’s surface for nicks or tears. Shine a light into the groove where the rope sits and feel for hard spots or uneven seating. Check the groove for residue that could interfere with seating. If the rope sits unevenly or sits recessed, you’ll need to reseat or replace it. Measure the rope diameter and groove width to confirm you’re purchasing a size that fits the channel. This careful inspection saves you from buying the wrong size later and helps ensure a proper seal.
Rope Materials and Compatibility
Most oven door seals use fiberglass rope, sometimes with a silicone coating for durability. Some newer designs employ ceramic blends or high-temperature silicone. The key is to match diameter, cross-section, and length to your door groove. Not all ropes are interchangeable, so verify compatibility with your model before purchase. If you’re unsure, consult the oven manual or manufacturer guidance. Using the wrong material can compromise safety and energy efficiency, so take your time to confirm the right type.
How to Choose the Right Replacement Rope
Start by measuring the rope diameter and groove width; even small differences affect the seal. Look for heat-resistant fiberglass rope rated for the temperatures your oven experiences; silicone-coated variants can ease installation and offer improved resistance to heat cycling. Ensure the rope length covers the entire seal with some allowance for corners. Favor a rope of similar construction and color to the original for smoother seating. When in doubt, compare product specifications and follow the manufacturer’s guidelines.
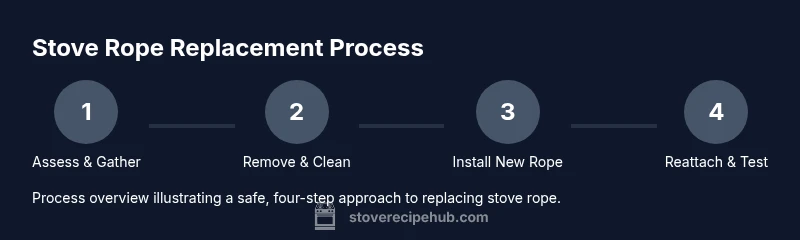
Step-By-Step Replacement Overview
Replacing stove rope is a multi-step task that rewards careful preparation. You’ll save time and avoid mistakes by planning ahead, keeping the workspace clean, and following the sequence below. This section provides a concise roadmap, while the dedicated STEP-BY-STEP block gives detailed actions.
Safety Precautions and Best Practices
Always ensure the oven is cool and power is off before starting. Work in a well-ventilated area and wear heat-resistant gloves. Use only rope and adhesives approved by the manufacturer; avoid flammable solvents near heat sources. Keep children and pets away from the work area. If you smell gas at any point, stop, ventilate, and seek professional assistance. Following these precautions protects you and your home.
Maintenance Tips After Replacement
Regularly inspect the seal every 6–12 months and clean the groove with a soft brush to remove debris. Avoid abrasive cleaners that can wear the rope. If you notice new wear, replace again promptly. Keep a small spare rope for future maintenance and record the replacement date to track service intervals. Proper ongoing care helps maintain efficiency and prolongs door seal life.
Tools & Materials
- Screwdriver set(Flathead and Phillips for door screws)
- Replacement oven door rope(Diameter and length matching the groove)
- Heat-resistant gloves(Protect hands when handling hot metal)
- Razor knife or utility knife(To trim old rope precisely)
- Measuring tape or calipers(Accurate diameter and groove width)
- Soft cloth or brush(Clean groove and door surface)
- Gasket adhesive (optional)(Only if the manual recommends bonding)
- Mask or ventilation(Breathing comfort if fumes are present)
Steps
Estimated time: 45-60 minutes
- 1
Prepare and gather tools
Power off the oven and disconnect if possible. Open the door to access the seal area and lay out tools on a clean surface. This prevents misplacing parts and reduces the risk of injury.
Tip: Double-check you have the exact rope size for your model before removing anything. - 2
Remove oven door or access panel
Carefully detach the door according to manufacturer instructions or remove the panel that exposes the seal groove. Work slowly to avoid damaging glass and hinges.
Tip: Support the door with both hands and place it on a soft surface. - 3
Remove old rope from groove
Carefully lift the old rope from the groove using a dull tool or fingers, taking care not to scratch the groove. Note any adhesive residue.
Tip: If rope is stubborn, apply a little heat or use a gentle cutting motion to release it without gouging. - 4
Measure groove and select rope
Measure the groove width and rope diameter to match the replacement. Compare with the original rope and confirm compatibility before purchasing.
Tip: When in doubt, bring a photo of the groove to the store or check the manual online. - 5
Install new rope into groove
Gently press the new rope into the groove, ensuring it sits evenly and flush with the door edge. Avoid twisting or stretching the rope during seating.
Tip: A small tool or flat blade can help tuck the rope into tight corners without tearing it. - 6
Reattach door and test seal
Reinstall the door or panel and recheck the seal by closing the door with light pressure. Look for gaps or misalignment and adjust if needed. Cool surfaces before testing.
Tip: Run a quick bake cycle to confirm the seal holds heat without leaks.
Common Questions
When should I replace stove rope?
Replace rope if you notice wear, gaps, heat loss, or gas odor near the seal. Address issues promptly to maintain efficiency and safety.
Replace the rope when you see wear or gaps, or if you smell gas near the seal.
Can stove rope be repaired?
Repairing rope is rarely effective. Worn rope should be replaced to restore a proper seal and safety.
Repairing isn’t reliable; replace the rope to restore the seal.
Will the same rope fit all ovens?
No. Rope size and material vary by model. Always verify diameter, cross-section, and length with your manual or manufacturer guidance.
Check your model’s manual to confirm the correct rope size.
How long does replacement take?
Most replacements take about 30 to 60 minutes, depending on the model and access to the seal groove.
Usually thirty to sixty minutes.
Do I need special tools?
Basic tools plus the correct rope material are sufficient; some models may require a gasket adhesive if recommended by the manufacturer.
Mostly common tools; refer to your manual for model-specific needs.
Is it safe to operate after replacement?
Yes, once the rope seating is verified and the door seals cleanly, test the oven at low heat first to ensure no leaks.
Yes—test the door seal at low heat after replacement.
Watch Video
Top Takeaways
- Inspect rope regularly for wear and gaps.
- Choose rope with correct diameter and material for your model.
- Follow manufacturer guidance to avoid safety risks.
- Document replacement dates for future maintenance.
- Test the seal after replacement to confirm effectiveness.