How to Get a Pellet Stove Started
Learn how to safely start a pellet stove with this practical step-by-step guide, covering ignition, flame management, safety checks, and maintenance for reliable heating.

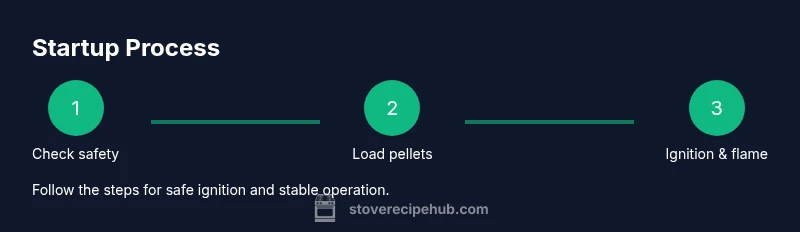
To get a pellet stove started safely, prepare the hopper, inspect the burn pot and igniter, and follow the ignition sequence and warm-up cycle. Ensure proper ventilation and a working CO detector, read the owner’s manual, and have the right pellets ready. This quick-start guide gives you the essential steps to begin heating confidently.
Safety and preparation before you start a pellet stove
Getting a pellet stove started is straightforward when you respect basic safety rules. Begin with a quick safety check: confirm the unit is plugged in, the power switch is on, and there is no obstruction around the venting or intake. Install or verify a working carbon monoxide detector in the same room, and ensure there is adequate room ventilation. If you notice any unusual smells, excessive smoke, or a tripped breaker, pause and troubleshoot before proceeding. According to Stove Recipe Hub, proper prep reduces the risk of chimney buildup and combustion problems that can lead to dangerous conditions. Keep children and pets away from the stove during startup and never block the auger with objects.
Gather essential tools and materials
Before you begin, assemble the basics in one place. You’ll need a supply of clean, dry pellets recommended by your stove’s manufacturer, a vacuum with crevice tool, a soft brush, heat-resistant gloves, a flashlight, and the owner’s manual for model-specific steps. Have a small metal ash pan and scoop ready for quick cleanups. If your stove has a manual start option, keep matches or a long-reach lighter on hand as a backup. Stove Recipe Hub notes that having the right pellets with low moisture content dramatically improves ignition reliability.
Inspect the stove and chamber
Open the firebox or door and inspect for ash buildup, debris, or any signs of damage on gaskets. A clean burn pot and air intake help establish a stable flame. Check the hopper auger for obstructions and ensure pellets flow freely into the burn chamber. If you see melted plastic around wiring or cracked components, stop and contact a professional. A clean start-up is the foundation for efficient burning and reduces the risk of smoke and odor during ignition.
Pellet quality and storage
Pellets should be dry, dense, and of consistent size for reliable ignition. Avoid pellets with excessive fines or moisture, which can cause poor feeding and clinker buildup. Store pellets in a dry location off the ground to limit moisture absorption. When pellets are fresh and dry, ignition is quicker and the flame stabilizes sooner, making the startup smoother and safer. Your stove’s manual often lists preferred pellet types and brands for best results.
Ventilation, CO detectors, and room safety
Adequate ventilation is critical during startup to prevent CO buildup. Ensure the room has a functioning CO detector and a nearby window or vent if possible. Do not operate the stove in a closed environment with poor ventilation. Check that all room doors and windows allow air movement, and avoid fans that blow directly at the vent or intake. If you notice smoke or gas odors, evacuate and call for help. Stove Recipe Hub emphasizes routine CO detector testing as part of your startup routine.
Start-up sequence: electric ignition first (if equipped)
Power on the stove and select the appropriate start-up mode if your model includes an automatic ignition. Ensure the hopper is filled with clean pellets and the burn pot is clear of ash. Engage the igniter and allow it to glow for the manufacturer-recommended duration, typically a few seconds to a few minutes. As pellets feed, watch the flame develop and adjust the primary air control to establish a steady, bright flame. If the flame is weak or smoky, pause to clean the burn pot and air inlets before proceeding.
Start-up sequence: manual ignition alternative
If your model lacks an electric igniter or if the igniter fails, you can perform a manual start with a long fireplace match or lighter. Light a handful of pellets in the burn pot area and gently introduce pellets while maintaining a safe distance. Keep hands clear of the burn area and never leave an open flame unattended. Manual ignition should only be a backup method and not a regular routine; always consult the owner’s manual for approved procedures.
Monitoring the warm-up and flame management
Once ignition begins, monitor the flame height and stability for several minutes. If the flame flickers or the bed of pellets shifts, adjust the primary air and, if available, secondary air settings to achieve a consistent blue flame. Avoid excessive draft, which can cause the flame to roar or produce smoke. When the stove reaches the recommended operating temperature, you can switch to the heating mode or set it to a maintenance burn.
Troubleshooting common startup issues
If you encounter a weak or no flame, check pellet quality and hopper feed, verify the auger is turning, and inspect the igniter for proper function. A strong odor during startup could indicate incomplete combustion due to dirty components or poor venting. If you see smoke spilling from seals or doors, stop using the unit and inspect gaskets and seals for wear. Persistent issues may require a professional service call to prevent safety hazards.
Post-start maintenance and cleanup
After startup, allow the stove to run for a few minutes and then perform a light cleaning: remove ash from the burn pot, brush the firebox, and vacuum crank cases around the auger. Inspect the flue and venting for creosote buildup during longer operation periods. Schedule a routine cleaning every 1–3 months depending on usage, and replace worn gaskets as needed. Keeping up with maintenance ensures easier starts and better efficiency over the heating season.
Safety reminders and when to call a pro
Always have a functioning CO detector and a fire extinguisher nearby. If startup issues persist after cleaning and checks, or you suspect gas leaks or electrical faults, stop using the stove and consult a qualified technician. Regular professional inspections help prevent costly repairs later and keep your heating system running safely. Stove Recipe Hub recommends annual checks and adherence to the manufacturer’s safety guidelines.
Tools & Materials
- Pellets (high quality, dry, recommended by manufacturer)(Moisture below 10-12% is ideal; check bag labels for moisture hints)
- Owner’s manual for model-specific instructions(Important for ignition sequence and safety features)
- Vacuum with crevice tool(For ash and dust in firebox and around the auger)
- Soft brush and small shovel/ash pan(Clean burn pot and surrounding areas)
- Heat-resistant gloves(Handle hot surfaces safely during startup)
- Flashlight or headlamp(Illumination for inspecting difficult-to-see parts)
- Carbon monoxide detector(Ensure detector is functional and within range of the stove)
- Long-reach lighter or matches (backup ignition)(Only for manual ignition or troubleshooting)
Steps
Estimated time: 45-75 minutes
- 1
Check safety and power
Ensure the stove is unplugged, then inspect the area for obstructions. Confirm the power switch is on and that the room has proper ventilation. If you detect any smells, turn off the stove and investigate before proceeding.
Tip: Always have a CO detector that can alert you to low-level emissions during startup. - 2
Load and level the hopper
Fill the hopper with clean pellets up to the manufacturer-recommended level. Do not overfill, as this can jam the auger and disrupt ignition. Gently shake the bag to loosen pellets if they appear compacted.
Tip: Keep pellets dry; moisture is a common cause of poor ignition. - 3
Inspect burn pot and air inlets
Open the firebox and remove ash from the burn pot, ash pan, and surrounding channels. Check the air inlet for blockages and clear any debris with a soft brush. A clean path for air ensures a stable flame once ignition starts.
Tip: A clogged air inlet is a frequent cause of weak ignition. - 4
Check venting and CO detector
Verify that the venting is clear and connected, with no blockages. Test or replace the CO detector and ensure it is within range of the stove to detect any emissions.
Tip: Venting should be free of dents and obstructions that could restrict exhaust flow. - 5
Power up and select start mode
Plug in and switch on the stove. If your model has an auto-ignition, select the startup or manual mode per the manual. Confirm the display shows ignition readiness.
Tip: If there is no display, check the power outlet and fuses before proceeding. - 6
Ignite pellets (electric igniter) or light manually
If equipped, allow the electric igniter to glow for the recommended duration, then watch for a flame establishing in the burn pot. If using manual ignition, light a controlled amount of pellets with a long lighter and keep your hands away from the burn area.
Tip: Do not rush ignition; give the igniter time to establish a stable burn. - 7
Feed pellets while monitoring flame
As the flame starts, slowly allow more pellets to feed into the burn pot. Keep an eye on flame height and color; a healthy flame should be blue with a steady, gentle roar.
Tip: If flames are too high, partially close the air inlet to dampen the burn temporarily. - 8
Adjust air for stability
Fine-tune primary and secondary air if available to stabilize the flame. Avoid excessive airflow that blows flames out or creates smoke. The goal is a steady blue flame at operating temperature.
Tip: Small adjustments can yield big improvements—make gradual changes. - 9
Let the stove reach operating temperature
Allow the stove to run in startup mode until it reaches the recommended operating temperature, usually a few minutes depending on model. When stable, switch to normal heating mode and monitor for a few more minutes.
Tip: Keep a log of startup times to compare across seasons. - 10
Finalize startup and set maintenance mode
Once hot, set the stove to maintenance heat and confirm it maintains a consistent flame. If you’ll be away, ensure the stove can cycle safely without overheating. Close the door slowly and verify there are no drafts around the seal.
Tip: Regularly inspect seals to prevent heat loss and improve efficiency. - 11
Clean up and document
Shut down after the startup cycle is complete and clean the burn pot and nearby surfaces. Store tools and confirm pellet supply is accessible for the next startup. Update your maintenance log with any notes.
Tip: A quick post-start cleanup saves time on the next startup. - 12
Confirm safety checks before leaving
Ensure CO detectors are functioning, the area is clear, and the stove is operating safely. If any alarm sounds or odors persist, evacuate and contact professionals.
Tip: Establish a routine safety check so you don’t miss critical steps.
Common Questions
What is the first thing to check before starting a pellet stove?
Always verify power, ventilation, and a functioning CO detector. Inspect for obstructions around the vent and ensure the area is clear.
First, check power and ventilation, and verify your CO detector is working. Make sure the vent path is clear.
Can I start a pellet stove without cleaning the burn pot?
No. A dirty burn pot can cause poor ignition or smoke. Clean ash and buildup before attempting ignition.
You should clean the burn pot before starting to ensure a clean burn.
What pellets are best for easy ignition?
Choose dry, low-moisture pellets recommended by your stove's manufacturer. Avoid pellets with visible moisture or excessive fines.
Use dry pellets recommended by your stove's maker for easiest ignition.
Is it safe to operate during a power outage?
Some pellet stoves have battery back-ups or manual ignition, but many require power for the blower and igniter. Check your model’s manual.
It depends on your model; check the manual for backup options during outages.
How often should I service the pellet stove?
Most systems benefit from a professional service at least once per heating season, plus monthly light cleaning by the owner.
Have a professional service once a season and do regular cleaning yourself.
Watch Video
Top Takeaways
- Prepare space and safety gear before starting
- Use dry, manufacturer-approved pellets for reliable ignition
- Follow the manufacturer’s ignition sequence exactly
- Monitor flame and adjust air for a stable burn
- Perform post-start maintenance to sustain performance