Pellet Stove Wall Mount Installation Guide
Learn how to safely mount a pellet stove on the wall using a purpose-built mounting kit. This guide covers wall assessment, hardware selection, venting, clearances, and step-by-step installation for a compliant, efficient heating solution.

Goal: safely mount a pellet stove on a wall using a purpose-built wall-mount kit. Choose a sturdy surface, plan clearances, and route venting properly. This quick answer shows how to select the right kit, verify wall integrity, and perform a safety startup, so you have a compliant, reliable heating setup.
What is a pellet stove wall mount?
A pellet stove wall mount describes securing a pellet stove to a vertical surface instead of resting on a hearth or floor stand. The system relies on a purpose-built wall bracket and fire-rated hardware designed to handle the heat load, vibration, and venting needs of pellet-burning appliances. When installed correctly on a solid wall with appropriate clearances, a wall-mounted unit can free floor space, simplify room layout, and improve heat distribution in compact kitchens or living areas. According to Stove Recipe Hub, the key to a safe wall mount is (1) using a mounting kit designed for your stove model, (2) confirming wall substrate strength, and (3) following clearances and venting guidance from the manufacturer and local codes. This approach minimizes fire risk and ensures a reliable startup every time.
This section lays the foundation for the rest of the installation by defining what a wall mount is, why it can be advantageous, and the critical safety checks that precede any hardware installation. If you plan to maintain a clean aesthetic while keeping heat efficient, a properly chosen wall mount can be a strong solution for smaller rooms or open-plan living areas.
Planning and safety considerations before you begin
Mounting a pellet stove on a wall is feasible, but it requires careful planning. Begin by confirming local building codes and the stove’s installation manual. Ensure the chosen wall can bear the stove’s weight, allow required clearances from combustibles, and accommodate venting without compromising attic or crawlspace access. The Stove Recipe Hub team emphasizes heat resistance, structural integrity, and proper vent routes to prevent hot-wall damage and backdrafts. Before you drill, map out power supply access, fresh-air intake routing, and a safe escape path for smoke and carbon monoxide. Keep a fire extinguisher within reach and ensure children and pets cannot reach the mounting area. This stage reduces surprises and aligns your plan with safety standards.
Also consider room layout, furniture placement, and ceiling height. If the wall is masonry or concrete, you will need different anchors and possibly a masonry drill with proper bit size. If the wall is wood stud construction, stud-finder accuracy and stud spacing become critical to support the unit’s weight. In all cases, verify that the wall material and supports are rated for high heat and mechanical stress. Your goal is a secure mount that won’t loosen or shift over time, even with vibration from the pellet stove.
Tools and mounting kits you’ll need
- Wall-mount kit compatible with your pellet stove model (essential)
- Heavy-duty wall anchors or lag bolts suitable for wall type (essential)
- Stud finder for wood walls (essential)
- Drill/driver with appropriate drill bits (essential)
- Tape measure and level (essential)
- Heat shields and wall plates (recommended)
- Heat-resistant silicone or gasket sealant (optional but helpful)
- Fire-rated wall material or shield patch if needed (optional but recommended)
Choosing a mounting kit that explicitly lists the stove model is crucial. Look for kits that include a mounting bracket, anti-tip hardware, and a venting spacer if required by the manual. For masonry walls, you’ll typically rely on sleeve anchors or sleeve masonry bolts along with corresponding washers. For wooden studs, ensure the fasteners penetrate deep enough to engage the stud cores. Heat shields protect wall finishes and help sustain a uniform heat profile around the mounting area.
Step-by-step: planning and measurement
- Define mounting location with at least the minimum clearance recommended by the stove’s manual and local codes. Use a level to set a true vertical line and a plumb bob for height reference.
- Measure the distance from floor to the desired mounting height, then from the wall to the stove’s vent exit to ensure there’s sufficient space for piping, ducting, and venting components.
- Mark stud centers or approved mounting points on the wall, aligning with the wall-mount kit’s hole pattern. If you encounter a wall with limited access or unusual framing, consult a professional before proceeding.
- Double-check that utilities (electrical outlets, gas lines, or water pipes) aren’t in the drilled path. This reduces the risk of damage during installation and later maintenance.
Why the planning step matters: incorrect placement can lead to overheating near combustibles, backdrafts, or a wobbling stove. A solid plan reduces the need for rework and keeps installation compliant with safety standards.
Step-by-step: attaching the wall bracket to the wall
- Drill pilot holes at the marked mounting points, using a masonry bit for concrete or appropriate bit for wood.
- Install wall anchors or lag bolts, ensuring they are fully seated and flush with the wall surface.
- Attach the wall bracket or mounting plate firmly to the wall, tightening fasteners in a crisscross pattern to distribute weight.
- Verify bracket rigidity with a gentle test pull. If there is any play, reseat fasteners or use stronger anchors.
Tip: Use a center punch to prevent drill bit walking on metal-backed or masonry walls, and check for studs behind the drywall with your stud finder to maximize hold.
Why this matters: a loose bracket is a common failure point that can cause the stove to drop or shift, creating fire and injury hazards.
Step-by-step: mounting the stove to the wall bracket
- With a second person, carefully lift the stove toward the mounted bracket and align the mounting holes on the stove with the bracket’s hook or slot system.
- Slide, hook, or bolt the stove onto the bracket according to the kit’s instructions. Do not force-fit parts; misalignment can cause damage or create unsafe gaps.
- Level the stove once mounted, and secure any additional locking hardware as specified.
- Re-check that the stove sits flush against the wall and that there is no binding on doors or access panels.
Pro tip: Communicate clearly with your helper and use protective gloves to prevent sharp edges from causing injuries during lifting and mounting.
Step-by-step: venting, clearances, and electrical considerations
- Install venting components following the manufacturer’s directions, ensuring the vent path maintains required clearance from the wall and any combustibles. Use wall thimbles or sleeves where needed to maintain insulation and prevent heat transfer.
- Verify there is a proper exhaust height and that the vent runs gradually to the outside, avoiding sharp bends that reduce draft efficiency.
- If your unit requires electrical power, plug into a dedicated outlet and avoid daisy-chaining power strips. Keep cords away from hot surfaces and moving parts.
- Seal any penetrations with heat-rated sealant when required and install a wall plate over the electrical outlet to reduce drafts.
Rationale: proper venting is essential for safe indoor air quality and efficient stove operation. Inadequate clearances or poor vent routing can create carbon monoxide risks or heat damage to the wall. Always follow the stove’s manual and local code requirements.
Step-by-step: final checks, startup, and safety run
- Do a final visual inspection, ensuring all fasteners are tight, there are no gaps between the stove and wall, and vent connections are secure.
- Perform a low-power startup and observe flame behavior, heat distribution, and venting draft for several minutes.
- Check for any unusual odors, smoke, or noises. If you detect a smell or smoke, shut down and re-check connections before attempting a full heat cycle.
- Document the installation with photos for future maintenance and provide the model and mounting details to any service professional if needed.
Safety check: test the carbon monoxide detectors in the space and ensure there is adequate ventilation during and after startup.
Common mistakes and troubleshooting
- Skipping wall integrity checks or choosing an undersized mounting kit.
- Failing to observe required clearances from combustibles or venting paths.
- Ignoring the wall type and using inappropriate anchors.
- Not securing the stove properly to the wall, leading to movement or detachment over time.
- Inadequate air supply or venting, causing poor draft and overheating.
If you encounter wobble, recheck mounting points and consider upgrading anchors. If the vent draft is weak, inspect bends and ensure the exterior vent termination is clear of obstructions. For any persistent issue, consult a qualified technician.
Authoritative references
- U.S. DOE Energy Saver: https://www.energy.gov/energysaver/home-heating-stoves
- Consumer Product Safety Commission on stove safety: https://www.cpsc.gov/Regulations-Laws/Statutes
- EPA guide on residential wood and pellet stoves: https://www.epa.gov/burnwise
Tools & Materials
- Wall-mount kit compatible with pellet stove model(Ensure kit supports weight and mounting pattern of your specific stove)
- Stud finder(Locate solid studs or structural anchors behind drywall)
- Drill and bits (masonry and wood)(Use the right bit for wall type; avoid over-penetration)
- Heavy-duty wall anchors or lag bolts(Size to wall type and load; use washers as needed)
- Level and tape measure(For precise alignment and correct spacing)
- Heat shields or wall plate(Optional but recommended for heat protection)
- Heat-rated sealant or gasket(Seal joints around vent penetrations)
- Fire extinguisher accessible(Always have safety equipment on hand)
Steps
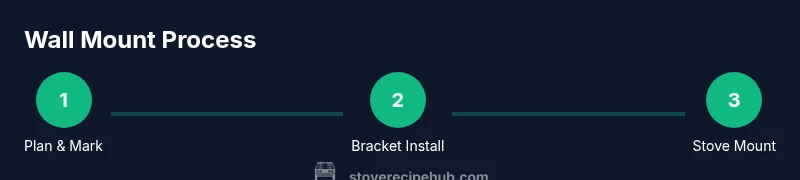
Estimated time: 60-90 minutes
- 1
Plan and measure mounting location
Define the best wall height and location, respecting appliance clearances and local codes. Use a level to set a vertical line and a tape to confirm distances to doors, windows, and furniture. Why: accurate planning prevents rework and ensures safe operation.
Tip: Mark multiple reference points and verify with the stove manual before drilling. - 2
Locate studs and mark mounting points
Use a stud finder to locate sturdy supports behind the drywall and mark their centers. If the wall is masonry, plan for anchors and use a hammer drill. Why: solid anchors prevent bracket loosening over time.
Tip: Avoid drilling near electrical boxes or pipes. - 3
Attach the wall bracket to wall
Drill pilot holes at marked points, insert anchors or lag bolts, and thread the bracket onto the wall. Tighten securely in a crisscross pattern to distribute load. Why: even load distribution reduces stress on any single fastener.
Tip: Use a helper to hold the bracket steady during tightening. - 4
Mount the mounting plate or bracket system to the stove
If the kit uses a secondary plate or adapter, attach it to the stove per the manufacturer’s instructions before lifting the unit. Why: proper interface ensures stable seating and safe detachment if needed.
Tip: Check alignment with the wall before final seating. - 5
Hang the stove and align
With assistance, lift the stove and seat it onto the wall bracket or hooks. Adjust for level and tightness, then lock any final fasteners. Why: misalignment can impede doors, vents, or ash access.
Tip: Two-person lift minimizes risk of damage. - 6
Install venting and ensure clearances
Attach venting components per the manual, keeping distance from the wall and combustibles. Verify straight runs and minimize sharp bends. Why: proper venting ensures safe exhaust and efficient draft.
Tip: Use a wall thimble or sleeve where required. - 7
Final checks and startup
Check electrical connections, test the startup at low heat, and monitor for unusual smells, smoke, or drafts. If anything seems off, power down and recheck connections. Why: early detection prevents unsafe operation.
Tip: Keep detectors and a fire extinguisher within reach.
Common Questions
Can I mount a pellet stove on any wall, or are there restrictions?
Mounting a pellet stove on a wall is possible, but you must match the mounting kit to your stove model and ensure the wall and wall anchors can bear the load. Local codes may require specific clearances and venting configurations. Always verify compatibility before proceeding.
You can mount on a wall if you use the correct kit and follow codes, but check your wall type first.
What mounting kit is required for a pellet stove wall mount?
Use a mounting kit designed specifically for pellet stoves, with compatible bracket patterns and hardware. The kit should support the stove’s weight and venting needs, and include installation instructions for your wall type.
Choose a kit made for your stove model and wall type.
Do I need a professional to install a wall-mounted pellet stove?
A professional can ensure structural integrity, correct vent routing, and compliance with local codes. If you’re confident in carpentry and venting, you can install yourself using manufacturer instructions, but you should consult a pro for complex walls or uncertain wiring.
Consider a pro if you’re unsure about structural or venting work.
What are the venting clearance requirements for wall-mounted stoves?
Vent clearances depend on stove model and wall material. Use the provided vent kit and ensure a straight path with minimal bends. Maintain heat-resistant distances from combustibles as specified in the manual.
Keep clear of walls and follow the manual’s venting distances.
Is wall mounting safe in small rooms or apartments?
Wall mounting can be safe in small spaces if you maintain proper clearances, ensure adequate ventilation, and install CO detectors. Follow local codes and the stove manual for the best setup.
Yes, as long as you follow safety rules and codes.
What should I do if the wall bracket loosens over time?
Shut down the stove, inspect fasteners for tightness, and replace any worn anchors. Re-check the wall surface and mounting pattern to prevent recurrence.
If it loosens, stop using it and re-secure the mounting.
Watch Video
Top Takeaways
- Plan placement with correct clearances and wall strength
- Use a purpose-built kit and proper anchors
- Follow venting guidelines to ensure safe exhaust
- Test start and check safety devices before regular use