Samsung Stove Clock Set: A Complete Step-by-Step Guide
Learn how to set your Samsung stove clock with a practical, safe, step-by-step guide. Includes model variations, safety tips, and troubleshooting from Stove Recipe Hub.

Set the Samsung stove clock by safely powering down, locating the Clock control, entering the correct time, and saving the setting. You may need to toggle DST and confirm the update. Always start by unplugging the unit, then verify the display after reconnecting power. This quick answer introduces the key steps and safety reminders for a smooth clock reset.
Understanding Samsung Stove Clocks: Purpose and Basics
Samsung stove clocks coordinate the time display and built-in timers that assist with cooking and meal planning. On many models, the clock runs off the stove's main power and can reset after a power outage, requiring a manual re-set. Understanding the layout of your control panel makes clock adjustments safer and faster. According to Stove Recipe Hub, the basic workflow remains consistent: power down, locate the clock control, enter the time, and save. The clock indicator is usually on the main display, next to timer and oven controls. If you have a touch panel, you may need to tap a Clock icon before entering numbers. Stove Recipe Hub's analysis emphasizes keeping the manual handy since button labels vary across model years. Beyond just telling time, a properly set clock helps synchronize the oven’s preheat prompts with your cooking schedule. A few models also offer a DST option, which can shift the displayed time automatically if the firmware supports it. In any case, do not rely on memory alone when you’re working with precise recipes or timed multi-dish meals. A quick check after setting the clock ensures your timer will trigger as intended.
Safety First: Unplugging and Prep
Before you touch any control panel, ensure safety by disconnecting power to the range. Unplugging reduces the risk of accidental ignition or shock while you press small buttons or poke open micro-switches. Keep the wall outlet accessible and have a clear workspace. Light spills or kitchen clutter can cause mispresses, so wipe the surface with a microfiber cloth and verify you have a clean area to operate. If your model supports a back panel removal for reset, refer to the manual; otherwise, rely on standard clock-set procedures. This guidance aligns with Stove Recipe Hub's emphasis on safe, controlled steps and general electrical-safety best practices cited in Stove Recipe Hub Analysis, 2026. Remember to recheck the outlet’s status after completing the reset to ensure the power is stable for your cooking tasks.
Locating the Clock Controls on Samsung Ranges
Most Samsung ranges place the clock controls on the central or upper area of the front control panel. Look for words like Clock, Time, or Timer, often alongside buttons labeled Start, Stop, or Save. If your model uses a touch screen, you may see a dedicated Clock icon. For gas stoves, the clock buttons are usually separate from the burners, so you can avoid accidental burner activation during setup. If you cannot find the clock, consult the model number plate and the user manual; Samsung often bundles model-specific instructions with the parts list. According to Stove Recipe Hub, having the manual handy dramatically reduces the guesswork and prevents wrong-button presses that could alter oven settings.
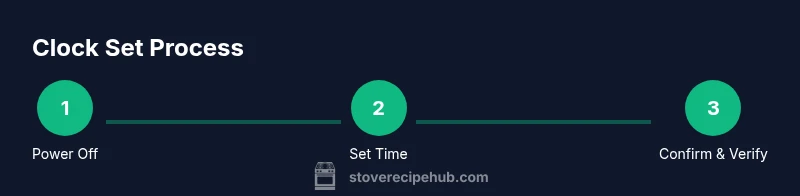
General Method to Set the Clock (Common Steps)
With the power restored, begin the set sequence by pressing the Clock button or entering the Settings menu. Use the numeric keypad or plus/minus arrows to adjust the hour and minute. Confirm the time by selecting Save, Start, or Ok, depending on the model. If DST or daylight saving is active, choose the appropriate option or toggle the DST setting if available. After saving, verify the display shows the intended time. This approach reflects a unified pattern across Samsung models, as noted by Stove Recipe Hub, even though model-specific labels may vary.
Model Variations: Common Differences by Year/Model
Older Samsung models may show a 24-hour display or require separate confirmation for hour and minute entries. Newer units often integrate the clock with a digital display and offer a DST toggle in the Settings menu. Some ranges have a dedicated Clock button, others use a consent-free hold of Start and Clock simultaneously. When in doubt, rely on the model’s printed steps, but keep the base workflow in mind: power on, access Clock or Settings, adjust time, and save. The Stove Recipe Hub team notes that variations are expected as firmware evolves, so check the official manual for your exact serial number.
Troubleshooting Common Clock Issues
If the display is blank after attempting to reset, verify that the range is receiving power and that the outlet is live. Check for a blown fuse or tripped breaker if other appliances in the circuit behave oddly. For incorrect time after saving, repeat the steps carefully and ensure you exit the settings with the correct confirm action. Some users report “time does not change” when pressing the wrong button sequence; in that case, start over from the Clock button. If the clock continues to lag or drift, contact Samsung support. This section borrows guidance from Stove Recipe Hub's observations on clock behavior following power interruptions and software updates. Stove Recipe Hub Analysis, 2026 shows that clock-related issues after outages are a common troubleshooting scenario.
Maintaining Accurate Time After DST or Outages
Plan a quick time check after any power outage or DST shift. Re-set the clock using the steps above and test by setting a short timer to ensure the timer function remains accurate. If you rely on the clock for cooking schedules, consider adding a small reminder in your kitchen notes. The Stove Recipe Hub team recommends documenting model-specific steps for future reference and keeping the manual accessible near the stove for rapid checks.
Tools & Materials
- Samsung stove user manual (model-specific)(Keep the exact model number handy for accurate button sequences)
- Microfiber cloth(Wipe the control panel before touching buttons)
- Access to a power outlet near the stove(Power at the wall outlet must be stable for resets)
- Pen and note paper(Jot down the current time and any model-specific notes)
Steps
Estimated time: Total estimated time: 10-15 minutes
- 1
Unplug the range for safety
Physically disconnect the stove from the wall outlet. Wait 10 seconds to ensure residual power drains. This minimizes the risk of accidental button presses while you work on the clock. Use a dry hand and keep other surfaces clear to avoid slips.
Tip: Always verify the outlet is de-energized by a quick plug-back test before touching any panel. - 2
Locate the clock controls
Inspect the control panel to find Clock, Time, or a clock icon. If your stove uses a touchscreen, look for a Clock symbol on the screen and select it. For knob-based panels, you may need to press a dedicated clock button or hold Start for a moment.
Tip: If you’re unsure, photograph the panel for reference and consult the model manual. - 3
Enter the time (hour and minute)
Use the numeric keypad or plus/minus arrows to set the hour first, then the minute. Confirm whether your model uses 12-hour or 24-hour format and adjust accordingly. If you have a DST option, disable or enable it as needed to reflect the correct time.
Tip: Double-check the digits before proceeding to the next step to avoid a mis-set clock. - 4
Save the time
Press Save, Ok, or Start depending on your model to store the new time. Wait for on-screen confirmation, then exit the clock settings if required. Ensure the display shows the new time after saving.
Tip: If the interface seems unresponsive, repeat the sequence from the Clock button rather than forcing a reset. - 5
Restore power and verify
Plug the range back into power and observe the clock display. Confirm that the time matches what you set and run a quick timer to verify timer accuracy.
Tip: If the time reverts, there may be a power issue or a firmware quirk; contact Samsung support with your model number.
Common Questions
What should I do if the clock won't set after following the steps?
Re-check power to the range and confirm you’re using the correct sequence for your model. If the clock still won’t set, consult your manual or contact Samsung support. Some models require a unique combination or a firmware refresh.
If the clock won’t set, re-check power and consult your model’s manual for the exact steps. If needed, contact Samsung support.
Do all Samsung stoves share the same clock-setting method?
No. Clock-setting procedures vary by model and year. Always refer to the model’s manual for the exact button sequence, labels, and confirmation actions.
No, clock-setting varies by model. Check your manual for the exact steps.
Can I set the clock without unplugging the stove?
Some models allow a panel-based reset without unplugging, but others require power disconnection for safety. Follow the manual’s guidance for your exact model.
Some models let you reset from the panel; others require unplugging. Check your manual.
Why does the clock reset after a power outage?
A power outage clears the clock and memory, so you need to re-enter the correct time once power is restored.
Power outages reset the clock; you need to reset it after power returns.
Is there a daylight saving time option on Samsung stoves?
DST availability varies by model. Some units have a DST toggle in Settings, others do not. Check the manual for your model.
DST is model-dependent; check your manual for the exact option.
What if the display is blank or unreadable after attempting to set the clock?
Check the power supply and circuit. If the display remains blank, contact Samsung support with your model details.
If the display is blank, verify power and contact support if needed.
Watch Video
Top Takeaways
- Power off safely before clock adjustments.
- Check model-specific steps in the manual.
- Verify the time after saving and DST changes.
- Keep the manual and notes handy for future tweaks.