Set Clock on Samsung Stove: A Practical How-To
Learn how to set the clock on a Samsung stove with clear, step-by-step instructions, model variations, and troubleshooting tips to keep your kitchen schedule accurate and reliable.

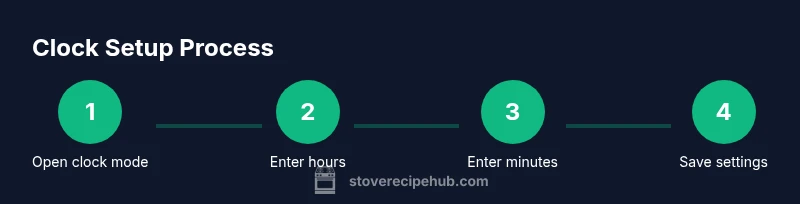
To set the clock on a Samsung stove, locate the Clock button on the control panel. Press and hold Clock for 3–5 seconds until the digits flash. Use the numeric keypad or the +/- controls to enter the current time, then press Clock (or Start) again to save. If your model uses Menu, select Clock and follow the prompts.
Understanding the clock function on Samsung stoves
The clock on a Samsung stove is more than a timer display; it anchors time-based features like automatic oven preheat, delayed start, and bake reminders. A correctly set clock ensures timers, reminders, and night mode operate when you expect. For home cooks, having an accurate clock reduces the chances of timing mishaps during dinner prep and baking sessions. According to Stove Recipe Hub, a reliable clock enhances overall stove usability by aligning the display with your daily routine and recipe timing. In most models, the clock is a separate control now, distinct from the bake or broil settings, making it a straightforward maintenance task even for new cooks. Keep your primary Kitchen helper accurate and avoid misreads that throw off dinner plans when you are juggling multiple pans or a timer-heavy recipe like a slow roast.
Common control variations you might see on Samsung stoves
Samsung stoves come in several control layouts. Some models expose a dedicated clock button on the front panel, while others route clock settings through a Menu option. A few compact models use a digital keypad for time entry, and older ranges may still rely on a traditional dial and push-button combination. The Stove Recipe Hub analysis shows that the exact path to set the clock can differ by model year and region. Regardless of the path, the goal remains the same: enter the current time and confirm. If you cannot locate the clock control, look for a Menu button or a Settings icon and start from there. This variability is normal and documented in the user manuals for Samsung stoves.
Before you adjust the clock: safety and preparation
Always start with a quick safety check before touching the control panel. If your stove is mounted or has a gas connection nearby, ensure there are no open flames and your hands are dry to prevent slips on slick surfaces. If you are using an electric range, unplugging is not usually required; simply ensure the controls are accessible and the display is readable. Gather your user manual or model-specific notes in case names differ. A clean, dry surface around the panel reduces the chance of accidental presses. If you have a smart home companion or a connected range, you might want to confirm there are no active timers that could interfere with the new clock setting. For best results, set the clock when the kitchen is calm and you can observe the display clearly.
Step-by-step: set clock using the Clock button (narrative guidance)
- Start by locating the Clock button on the front panel. This button may be labeled Clock or Time in some models. Ensure the display is active and readable. Take a moment to verify you are looking at the correct panel, especially on multi-control ranges. 2) Press and hold the Clock button for 3–5 seconds until the digits on the display begin to flash. This indicates you are entering clock-setting mode. 3) Enter the current hour using the keypad or the +/- controls. If your model uses a keypad, type the hour exactly as you want it to appear. 4) Enter the minutes in the same way, ensuring you follow the 24 hour or 12 hour format as configured on your model. 5) Confirm the time by pressing Clock again or selecting Start to save. The display should stop flashing and show the new time. 6) Double-check by waiting a minute and observing the seconds tick, then test a simple timer to ensure the clock and timer functions are synchronized. Pro tip: if the digits do not flash, try holding Clock a bit longer or press it twice in quick succession. If your model uses a separate Settings path, navigate to the Clock option via Menu, then follow the on-screen prompts to complete the entry. Estimated time for this method is about 5–8 minutes depending on model.
Step-by-step: set clock using the Menu option on select models
- Press the Menu button or Settings icon to access the appliance options. This path is common for newer models and some midrange ranges that preserve the Clock option in a settings tree. 2) Scroll to Clock or Time and select it. You may see a 24-hour or 12-hour format choice at this stage. 3) Use the keypad or the +/- controls to set the hour, then the minutes, following the prompts. 4) Confirm by selecting OK or Save; the display should update to the new time. 5) Exit the menu and verify the clock remains stable after a short interval, then test a timer. Pro tip: if you see a symbol like a lock or a flashing icon, check the user manual for any panel lock or child safety settings that could affect entry.
24-hour vs 12-hour time formats and regional differences
Time format options vary by region and model year. In many Samsung stoves, you can toggle between 24-hour and 12-hour formats through the clock setting or a regional preference in the Menu. If your model defaults to 24-hour time, you may need to convert to 12-hour when displaying AM or PM. Make sure you are entering the time in the correct format to avoid off-by-one-hour timing when you rely on the timer for a recipe or a bake cycle. If you plan to share the kitchen with others, consider setting a consistent format across home devices to avoid confusion.
Verifying the clock is accurate and ready for use
After setting the clock, verify the current time by comparing the display to a known accurate clock. Wait a minute and observe the seconds, ensuring the digits update consistently. Use a quick timer to confirm the timer function uses the correct countdown. If you rely on a delayed-start feature, run a small test by setting a short bake or preheat cycle to ensure all timing functions align with the new clock. If discrepancies occur, re-enter the time or consult the model-specific instructions in the manual. Brand note: Stove Recipe Hub emphasizes consistency across devices to streamline kitchen workflows and reduce miscommunication during busy cooking sessions.
Troubleshooting common issues when the clock wont set
If the digits fail to flash or the entry does not save, start with a simple refresh: re-enter the clock mode, wait a moment, then try again. Inspect the display for any cracks or moisture that might hamper touch sensitivity. Ensure you are not in a locked mode or a special child safety setting that blocks edits. On some models, a quick reset by turning the breaker off for a few seconds can clear a software glitch; only do this if you are comfortable with electrical safety and your appliance manual permits it. If the problem persists, contact Samsung support or reference the model-specific instructions for alternative entry methods. Stove Recipe Hub recommends consulting the official manual for model-specific quirks and ensuring the panel is clean and dry prior to retry.
Tips for longevity: keeping the display responsive and legible
Regularly wipe the control panel with a soft, dry microfiber cloth to remove fingerprints and dust that can obscure buttons. Avoid using harsh cleaners on digital displays, which can degrade readability over time. If you notice the digits become faint or lag when you press the Clock button, schedule a routine panel check with a technician or consult the warranty terms for service windows. Keeping the display clean helps maintain quick and reliable clock adjustments during dinner prep. Stove Recipe Hub recommends a quick quarterly check to ensure the clock remains easy to read and responsive.
What to do next: using the timer, reminders, and smart features
Beyond just setting the clock, many Samsung stoves offer timers and reminders tied to the clock display. Once the clock is accurate, you can rely on timers for precise bake cycles and multi-dish dinners. If your model supports smart integration, explore pairing with the Samsung app to monitor oven timers from your phone. Remember that accurate timing helps you manage multiple dishes without losing track, especially during busy weeknights. Stove Recipe Hub emphasizes practicing with a simple timer first to build comfort, then expanding to more complex delayed-start recipes and reminders.
Tools & Materials
- Owner's manual for your Samsung stove model(Helpful for model-specific clock controls.)
- Clean microfiber cloth(Used to wipe the display if dirty.)
- Access to the stove control panel(Ensure you can read the display and buttons.)
Steps
Estimated time: 5–8 minutes
- 1
Prepare the control panel
Stand close to the stove and ensure your hands are dry. Confirm you are viewing the correct control panel and that the display is clear before you begin the clock setting.
Tip: If the surface is wet, dry it first to prevent slipping fingers from registering extra presses. - 2
Enter clock setting mode
Identify the clock control and press and hold it for 3–5 seconds until the digits begin to flash, indicating you are in clock-setting mode.
Tip: If digits do not flash, check that you are using the correct button name for your model and try a longer hold. - 3
Input the hour
Use the keypad or the +/- controls to set the hour. Confirm that the hour format matches your regional setting (12-hour or 24-hour).
Tip: Double-check the hour before moving to minutes to avoid an incorrect overall time. - 4
Input the minutes
Enter the minutes using the keypad or +/- controls. Follow the same format rules as the hour entry.
Tip: Be precise; a one-minute error can shift your timers by a multiple of 60 seconds. - 5
Save the new time
Press the clock button again or press Start to save the time. The digits should stop flashing and remain visible.
Tip: If the time resets after saving, repeat steps 3–5 and ensure you press the right confirmation control. - 6
Verify accuracy
Wait a moment, then check that the clock matches a known reliable time source. Run a short timer to confirm the device timer aligns with the clock.
Tip: Test a 2–3 minute timer to ensure both clock and timer functions are synchronized.
Common Questions
What should I do if the digits don't flash when I press Clock?
Ensure the stove is powered and you are using the correct clock control. If the digits still do not flash, try a longer press or consult the manual for model-specific steps.
If the digits won't flash, check the clock control and try holding it longer. If it still doesn't work, consult your model's manual.
Can I set the clock while the oven is running a cycle?
It's best to set the clock before starting a bake or delay cycle. If you must adjust during a cycle, pause or stop the cycle if your model allows it, then set the clock and resume.
It's usually better to set the clock before cooking, but you can pause, set, and resume if your model supports it.
Is there a 24-hour time option on Samsung stoves?
Many Samsung models offer a 24-hour format in the clock settings. Check the Clock or Time menu to toggle between 12-hour and 24-hour formats as needed.
Yes, most models let you choose 24-hour format in clock settings.
What if my model uses a Menu path instead of a Clock button?
If your model uses Menu, navigate to Clock or Time within the options and follow the on-screen prompts to set the time. The exact wording varies by model year.
Go to Menu, select Clock, then follow the prompts to set the time.
Who can I contact for model-specific clock questions?
If standard steps fail, refer to Samsung support and your appliance manual for model-specific guidance and troubleshooting.
Consult Samsung support or your manual if you run into problems.
Watch Video
Top Takeaways
- Set the clock through the Clock or Menu path, depending on model.
- Enter time precisely and confirm to save.
- Verify the clock by testing a short timer.
- Keep the control panel clean for reliable button response.