How to Set Time on a Smart Things Stove
Learn how to set the clock on your smart stove, troubleshoot time issues, and use timers for precise cooking. Step-by-step guidance, safety tips, and expert notes from Stove Recipe Hub.

Set the time on a smart stove by accessing the clock or timer in the control panel or companion app, then confirm and save. Most models require a manual clock setup, while others sync with your home's Wi‑Fi or mobile app. Have the stove manual handy for model-specific steps. If you’re unsure, consult the quick-start guide.
Understanding Why Time Setting Matters on a Smart Stove
Time settings on a smart stove affect not only countdown timers and recipe programs but also safety features like automatic shut-off and delay start. Accurate clocks help ensure baked goods don’t overcook, rotisserie programs run on schedule, and energy usage is predictable. According to Stove Recipe Hub, correct time settings reduce user errors and improve cooking consistency across models. When the clock is wrong, you may trigger late-start cycles or mis-timed preheats, leading to undercooked or burnt meals. This section helps you grasp why the clock exists as a core control on modern stoves, and why setting it correctly matters for every meal you prepare.
- Recognize that many models offer both manual clock and app-based time controls.
- Understand that some units sync time automatically after a firmware update.
- Realize that accurate time improves timer accuracy for bake, broil, and keep-warm functions.
Stove Recipe Hub emphasizes that precision in time settings translates to better results and safer operation. The sooner you master clock control, the smoother your stove-top cooking becomes.
Before You Start: Gather the Right Tools and Safety Checks
Before you touch any controls, assemble a quick toolkit and complete essential safety checks. A clean, legible clock display is easier to read in bright kitchen lighting, and clean panel surfaces prevent accidental presses. Ensure the stove is powered and the area around the control panel is free of obstructions. If your model uses an app, have your smartphone ready with the stove’s companion app installed and logged in. A copy of the model’s user manual should be nearby for model-specific steps and terminology. If power has recently been interrupted, reset the clock from a known-good power state before attempting time changes. This preparation minimizes mis-presses and helps you verify changes quickly.
- Keep the manual within arm’s reach for reference.
- Verify power availability and safe, dry working conditions.
- Have your phone ready only if app-based time setting is required by your model.
Common Time-Setting Methods Across Brands
Across brands, there are several reliable paths to setting the time on a smart stove. Manual clock input on the control panel remains common, using a small knob, keypad, or touch interface to adjust hours and minutes. Some models rely on a companion app; you’ll set the time by syncing the clock with the app, which then updates the stove via Wi‑Fi. A growing subset supports voice commands through integrated assistants or smart home ecosystems, allowing hands-free time changes. Finally, certain ovens and ranges offer automatic time synchronization via network time protocol (NTP) or home Wi‑Fi when connected. If your stove supports firmware updates, completing them can unlock time-sync features. Consult the manual for exact steps, as terminology and icons vary by brand.
- Manual panel: look for a clock icon and a set or adjust sequence.
- App-based: navigate to Clock or Time in the app, then push Sync or Save.
- Voice control: use phrases like “Set time to 7:30.”
- Auto-sync: enable Wi‑Fi time synchronization if available.
Troubleshooting When Time Won't Set
If the clock refuses to set, start with the simplest explanations. A drained or tripped power supply can leave the clock frozen at a default time. A recent firmware update might require a fresh start to activate new time-setting options. If you can access different modes, try switching to a different time-setting method (manual vs app) to isolate the issue. Some units show a blinking display when there’s an error; in such cases, perform a soft reset by unplugging for 30 seconds and plugging back in. If problems persist after reset, consult the manual’s fault code chart and contact customer support for model-specific guidance. Always note your stove’s model number, firmware version, and any recent changes for faster troubleshooting.
- Check for power interruption effects and perform a soft reset if needed.
- Try alternate time-setting methods where available.
- Record model details and firmware in case of support needs.
How to Use Timers Once Time Is Set
With the correct time in place, you can leverage timers for precise cooking control. Most timers operate independently of the clock, counting down from a set duration. You can typically set multiple timers for concurrent tasks—roasting meat while simmering a sauce, for example. When a timer ends, an audible alert or a kitchen notification will trigger. Some models allow timers to be linked to specific cooking modes (e.g., bake at 350°F for 25 minutes). Be mindful of how the timer signal behaves—some units quiet down after a set duration, while others require manual reset. Practice with a short, safe dish to confirm you understand both timer start, pause, and stop controls.
- Test timers with a short duration (e.g., 1 minute) to confirm sound and display.
- Use separate timers for different dishes to prevent overlap.
- Associate timers with the correct cooking mode to ensure consistent results.
Best Practices and Maintenance for Clock Accuracy
Maintaining clock accuracy is easier when you adopt a few simple habits. Regularly inspect the clock display for readability and clean the control panel to prevent mis-touches. If your model supports automatic synchronization, keep Wi‑Fi enabled and ensure the network is stable. When power outages occur, verify the clock immediately after restoration because some units revert to a default time. Keep your manual updated with the latest firmware notes, and perform firmware updates when prompted, as these can enhance time accuracy and timer reliability. Finally, document any recurring time-related issues and reach out to support with your model number and symptoms. Consistency in maintenance reduces future clock problems and keeps timers dependable.
Quick Reference: Troubleshooting by Model Type
Different models map time-setting steps to different interfaces. If you own a traditional dial panel, you’ll likely set time with a pair of push-buttons and a confirm action. App-only models expect a time update within the app, followed by a panel confirmation. Mixed-interface models offer a tutorial screen the first time you enter the clock menu. In all cases, the goal is to obtain a visible, stable clock on the display and reliable timer functionality that matches real-time cooking needs.
Tools & Materials
- Stove user manual (model-specific instructions)(Keep handy to verify time-setting steps and terminology)
- Power supply and access to the control panel(Ensure the stove is powered and reachable)
- Smartphone or tablet (optional)(Needed if your model uses a companion app for time settings)
- Screwdriver (flathead/Phillips) (optional)(Only if your model requires panel access with tools)
Steps
Estimated time: 15-25 minutes
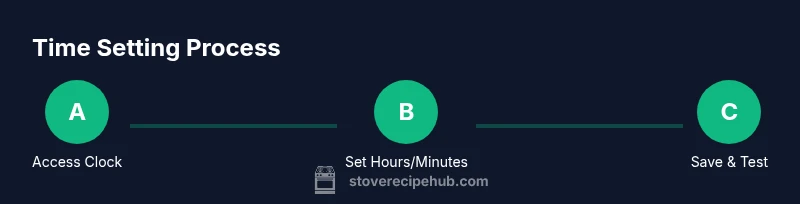
- 1
Identify the time controls
Locate the clock, time, or timer icon on the control panel. If you have an app, locate the Clock or Time section within the app. Understanding where to press first prevents accidental changes elsewhere.
Tip: Take a quick photo of the panel layout for future reference. - 2
Enter time-setting mode
Press the clock or timer button to enter set mode. Some models require you to hold a button for several seconds. If using an app, open the stove’s device page and select Time/Clock to begin.
Tip: If the display is unresponsive, perform a soft reset by power cycling the unit. - 3
Set hours and minutes
Use the dial, keypad, or app sliders to adjust hours first, then minutes. Confirm each input before moving on. Watch for 24-hour vs 12-hour display differences and set accordingly.
Tip: Double-check AM/PM or 24-hour format to avoid mistimed cycles. - 4
Save and exit
Finish by selecting Save/OK or exiting the app. The display should return to the regular clock screen. If the time reverts, repeat the steps or try an alternate method.
Tip: Listen for a confirmation chime or a visible Save indicator to verify success. - 5
Test a timer
Set a short timer (1–2 minutes) to confirm the alert triggers at the correct moment. Note whether the timer alert plays through the kitchen speaker and whether the display updates accordingly.
Tip: If there’s a delay between timer end and alert, check for any firmware notes about timer latency. - 6
Sync with app or update firmware (if available)
If your model supports auto-sync or requires a firmware update for time features, complete this step after setting the time. Recheck the clock afterward to ensure accuracy.
Tip: Run a final timer test after the update to confirm reliability.
Common Questions
Can all smart stoves set time via the control panel?
Most smart stoves offer a clock or timer control on the panel, but interface differences exist by brand. If the panel method is unclear, check the manual or try the companion app for the same settings. Some models require firmware updates to enable certain time features.
Most models have a clock or timer on the panel, but check your manual or app for exact steps.
What should I do after a power outage?
Power losses can reset clocks to a default time. After restoration, re-enter the correct time using the control panel or app and run a quick timer to confirm operation. If the clock keeps resetting, inspect for firmware updates or contact support.
After a power outage, re-set the time on the panel or app and test a timer.
Is time setting different for gas vs electric stoves?
Time setting itself is similar across gas and electric units, but some features like integrated ignition timers or smart controls may vary. Electric models often have more robust app-based synchronization, while gas models may rely more on manual panel inputs.
Time settings are generally similar, but features can differ by fuel type and model.
Why does the clock blink at 12:00 after a reset?
A blinking 12:00 usually indicates a reset state or a power interruption. Re-enter the correct time, and if the blinking persists, perform a soft reset or consult the manual for a factory reset option.
A blinking 12:00 usually means a reset; re-set the time or reset the unit if needed.
Do I need internet to set the time on my smart stove?
Not always. Some models let you set time manually without internet, while others rely on Wi-Fi synchronization. If you depend on internet, ensure your home network is stable and the stove is linked to your account.
Many stoves let you set time offline; some rely on Wi-Fi synchronization when available.
Watch Video
Top Takeaways
- Know where the clock is on your model.
- Always save after setting time.
- Test timers to ensure accuracy.
- Use app sync if supported for reliability.
- Check time after outages or firmware updates.