How to Wash Stove Burners: A Practical Guide
Learn how to wash stove burners safely and effectively, including removable parts, cleaning methods, and maintenance tips to prevent buildup and ensure even flames on gas or electric stoves.

Goal: learn to wash stove burners safely and effectively, including disassembly, cleaning methods, and reassembly. You’ll need basic tools, soap, warm water, a scrub brush, and a dry towel. Always turn off the stove and disconnect power if applicable; for gas stoves, shut off the gas supply first. According to Stove Recipe Hub, regular cleaning reduces the risk of flare-ups and ensures even flame distribution.
What parts you can wash and what to skip
When you wash stove burners, you are primarily cleaning metal components like burner caps, grates, and exposed burner heads that trap grease and food debris. The rest of the stove, including the enamel surfaces and the electronics, should not be soaked or submerged. The first step is to identify which parts are detachable. Gas stoves usually have removable burner caps and grate assemblies; electric stoves with coil elements typically have burner heads that lift off, while glass-ceramic surfaces are more delicate and require gentler cleaning. The keyword here is safety and preserving function. Wash stove burners but avoid soaking the burners into water if the manufacturer warns against it. According to Stove Recipe Hub, regular cleaning reduces the risk of flare-ups and ensures even flame distribution. Before you start, read the appliance manual to know which parts are dishwasher safe and which should be hand-cleaned. Prepare a clean workspace and lay out towels to catch drips. You’ll typically clean with warm, sudsy water and a soft brush; more stubborn grime may need a gentle degreaser or baking soda paste. Remember to remove any attached knobs to access all surfaces safely. This approach keeps your stove in top shape and minimizes the risk of damage.
Safety first: power, gas, and materials
Cleaning stove burners involves power considerations and potential gas access issues. Start by turning off the burner and, for gas stoves, turning off the gas supply if you can safely reach the valve. If you have an electric coil stove, unplug or switch off the circuit breaker to avoid shock. Wear gloves to protect your hands and use a dedicated cleaning area away from heat sources. Do not spray cleaners directly onto open flames or near the igniter; avoid soaking electric components or control panels. Use a damp cloth to wipe the control panel after cleaning nearby parts. Keep a dry towel ready to absorb moisture and prevent water from entering electrical connections. The goal is to avoid warping or corrosion on metal parts, which could lead to uneven flames or slower ignition. Use a soft toothbrush to reach tight crevices on burner heads, but never use metal scrapers or abrasive pads on porcelain surfaces. This section emphasizes the critical safety steps and a cautious approach that protects both you and your appliance.
Quick-use tools and cleaners for everyday grime
A simple cleaning session uses common household items. Gather warm water, mild dish soap, a non-abrasive sponge, a soft-bristled brush, and a microfiber cloth. For stubborn grease, prepare a baking soda paste and a spray bottle with white vinegar to tackle tough stains. A small container or dish for soaking removable parts helps loosen stuck-on residue. If your parts are dishwasher-safe, you can run them through a gentle cycle, but always check manufacturer guidance first. Keep a separate towel for drying to prevent rust on metal components. If you prefer commercial degreasers, choose one labeled safe for kitchen appliances and follow the label directions. As you assemble your toolkit, verify that each item is clean and free of grit; debris can scratch enamel or porcelain when you scrub. This block sets up the practical, accessible approach and helps you plan the cleaning session with confidence. It also aligns with safety guidelines from reputable sources like usfa.fema.gov, cpsc.gov, and epa.gov when handling cleaners near heat and gas appliances.
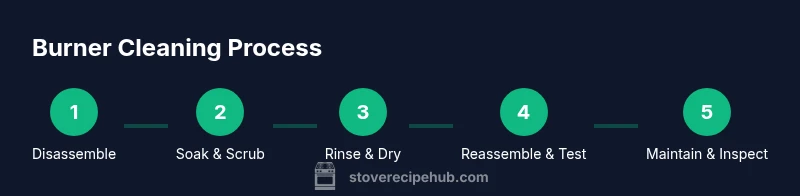
Step-by-step clean-up approach for everyday grime
- Dismantle removable parts: Lift off burner caps, grates, and any removable heads. Soak metal parts in warm, soapy water for 10-15 minutes to loosen grease.
- Scrub gently: Use a soft brush to remove residue from burners, caps, and grates. Rinse with clean water and dry thoroughly.
- Tackle stubborn stains: Create a baking soda paste with water, apply to stubborn spots, and let sit for 5-10 minutes before scrubbing.
- Rinse and dry: Wipe all surfaces with a damp cloth and dry completely to prevent rust.
- Reassemble and test: Put parts back, light a burner to confirm ignition and even flame distribution. This approach keeps components aligned and functioning.
Note: Avoid soaking gas burners themselves; water can clog ports and affect ignition. If you notice corrosion or damage, stop and consult a professional. This section provides practical, repeatable steps to maintain performance.
Deep-clean techniques for stubborn grease
Some builds accumulate thicker grease around burner heads and venturi tubes. For deeper cleaning, remove the grate and cap; soak in hot, soapy water with a cup of white vinegar for 20-30 minutes. Then scrub with a nylon brush to lift baked-on residue. For gas stoves, check that the ports are clear with a small tool; never force debris or use sharp objects that could bend metal. If you see warped caps or worn gaskets, replace them rather than attempting to bend them back into shape. Dry all parts completely before reassembly. A non-abrasive cloth can remove final haze and prevent fingerprint marks on polished surfaces. This block explains what qualifies as deep cleaning and how to perform it safely without damaging delicate components.
Cleaning different burner types: gas, electric, and sealed surfaces
Gas stoves have exposed burners that gather grease around ports; electric coil stoves use removable burner heads that sit on a glass or ceramic base; sealed smooth-top stoves use glass-ceramic surfaces that require gentler cleaning. For gas stoves, avoid soaking the entire assembly; focus on caps, grates, and knobs. Electric burners often do best with warm soapy water and a microfiber cloth; never immerse the control knobs in water. For sealed tops, use a cleaner designed for glass-ceramic surfaces and wipe in a circular motion. Consistently cleaning after cooking helps maintain heat distribution and ignition reliability. The key is to tailor your method to the burner type to prevent damage and ensure safe, reliable operation.
Drying, reassembly, and testing post-clean
After washing, dry all parts completely with a clean towel; moisture on metal can cause rust or misalignment. Reassemble components in the reverse order of removal; verify that each part sits snugly and the flame ports are unobstructed. Wipe the stove surface to remove any residual cleaner and rinse with a damp cloth. Before cooking again, test ignition on a small flame to confirm proper function and even distribution. If you smell gas after reassembly, turn off the appliance and ventilate before rechecking connections. This block emphasizes careful drying and proper reassembly to restore performance and safety.
Maintenance tips to prevent buildup and extend life
To minimize future scrubbing, wipe down stove surfaces after cooking and cover any grease-prone areas during heavy use. Schedule a monthly quick-clean for parts you remove and a quarterly deep-clean for stubborn grime. Keep burners aligned and check for warped caps that can disrupt flame. Use a degreasing cleaner with a soft cloth on exterior surfaces and a brush on interior ports. Additionally, inspect the ignition system for wear and replace components as needed. By adopting a consistent maintenance routine, you’ll reduce cleaning time and keep burners firing cleanly. According to Stove Recipe Hub, a proactive approach to burner maintenance saves time and reduces the risk of malfunctions due to grease buildup.
Tools & Materials
- Warm water(Sufficient for dissolving grease; not hot to avoid warping parts)
- Mild dish soap(Gentle or pH-balanced soap)
- Non-abrasive sponge(Avoids scratching enamel)
- Soft-bristled brush(Reach crevices on burner heads)
- Old toothbrush(Small crevices and ports)
- Microfiber cloths(Drying and buffing)
- Baking soda(For paste on stubborn stains)
- White vinegar(Boosts grease dissolution)
- Dish tub or basin(Soak removable metal parts)
Steps
Estimated time: 30-50 minutes
- 1
Power down and prep
Turn off all burners and unplug electric stoves or switch off the circuit if safe. Remove knobs if needed to access controls and give yourself a clear, heat-safe workspace.
Tip: Keep the knobs in a labeled container to prevent mix-ups. - 2
Disassemble removable parts
Lift off burner caps, grates, and any removable heads. Place them in warm, soapy water to loosen grease.
Tip: Do not force parts; if a piece doesn’t lift, consult the manual. - 3
Clean the components
Scrub caps and grates with a soft brush; use baking soda paste on stubborn grime. Rinse with clean water and dry thoroughly before reassembly.
Tip: Rinse thoroughly to avoid soapy residue that can burn. - 4
Deal with stubborn areas
For stubborn spots, let parts soak in hot soapy water with a splash of vinegar, then re-scrub.
Tip: Avoid soaking electrical elements or igniters. - 5
Dry and inspect
Dry all pieces completely; inspect ports and flame rings for obstructions.
Tip: A dry, clean part reduces ignition delays. - 6
Reassemble and test
Reassemble parts in reverse order, then ignite a burner to confirm even flame and proper ignition.
Tip: If you smell gas, stop and ventilate before retrying.
Common Questions
Can all stove burner parts be washed?
Most removable metal parts like caps and grates can be washed with warm soapy water; enamel or glass-ceramic tops require gentler cleaning. Always check the user manual for any parts that should not be soaked.
Most removable metal parts can be washed with warm soapy water, but enamel or glass-ceramic tops require gentler cleaning. Check your manual for any parts that shouldn’t be soaked.
Should I soak gas burner heads?
Avoid soaking the gas burner heads themselves. Water can clog ports and interfere with ignition. Soak other removable metal parts and scrub ports carefully with a brush.
Avoid soaking the gas burner heads. Soak other parts and carefully scrub the ports with a brush.
What cleaners are safe to use?
Use mild dish soap, warm water, and non-abrasive brushes. For stubborn grease, baking soda paste or a vinegar solution can help. Avoid ammonia-based cleaners on certain finishes unless the manual allows it.
Use mild soap and warm water with a soft brush; for tough grime, baking soda paste or vinegar can help. Avoid harsh ammonia cleaners unless the manual says it’s okay.
How often should I clean stove burners?
Clean after heavy cooking or spills to prevent buildup. Do a quick weekly wipe and a deeper clean monthly or quarterly depending on usage and fuel type.
Clean after heavy cooking to prevent buildup. Do a quick wipe weekly, and a deeper clean monthly or quarterly depending on usage.
I smell gas after cleaning. What should I do?
If you smell gas, stop cleaning, turn off the appliance, ventilate the area, and call your gas provider or a professional technician. Do not ignite anything until the leak is addressed.
If you smell gas, stop, turn off the appliance, ventilate, and contact a professional. Do not light anything until safe.
Watch Video
Top Takeaways
- Disassemble only detachable parts and wash them separately.
- Dry all parts completely before reassembling to prevent rust.
- Use gentle cleaners on enamel and glass surfaces to avoid damage.
- Inspect for wear and replace damaged caps or gaskets.
- Regular maintenance reduces cleaning time and keeps flames clean.