Where to Install a Stove Outlet: A Practical Guide
Learn where to install a stove outlet, the electrical requirements, permitting, and safety steps. A practical, code-conscious guide for home cooks and DIY enthusiasts.

You should plan and install a dedicated 240V stove outlet in a code-compliant location, typically on interior kitchen walls near the stove. Ensure the circuit is sized for your model, with a proper breaker and grounding, and that the outlet remains accessible for maintenance. Because electrical work is hazardous, hire a licensed electrician and verify local code requirements.
Planning Your Stove Outlet: Where the outlet fits in the kitchen electrical plan
The right location for a stove outlet balances accessibility, safety, and code requirements. You’ll want the outlet on a wall that minimizes long run lengths, avoids wet areas, and remains reachable for routine maintenance. Proximity to the stove matters for convenience, but you must respect clearance from cabinets, drawers, and nearby water sources. According to Stove Recipe Hub, kitchens with a clearly planned electrical layout reduce last-minute changes and improve overall safety during cooking. A well-placed outlet also supports cable management, preventing cords from crossing pedestrian paths or snagging utensils while you’re cooking. Keep in mind that local electrical codes may influence permissible locations, so start by checking your jurisdiction’s rules before you measure the wall. A thoughtful plan sets you up for a safe, reliable installation that lasts for years.
Electrical fundamentals for the stove outlet: 240V circuits, amperage, and grounding
Electric stoves typically require a dedicated 240-volt circuit with a suitably rated breaker. This means the circuit’s amperage should align with the stove’s load requirements and the wire gauge used in the run. Grounding is essential for safety, and the outlet must be installed in a way that provides a solid equipment grounding path. Do not share a stove outlet with other high-power appliances, and ensure the circuit does not overload the panel. If you’re uncertain about amperage or wire gauge, consult the stove’s manual and a licensed electrician. While this guide avoids specific model numbers, the key takeaway is that proper sizing and grounding are non-negotiable for safe operation and long-term reliability.
Location considerations: accessibility, safety, and code implications
Accessibility means the outlet should be reachable for plug inspection, testing, and maintenance without moving heavy appliances. It should be away from water splashes and sinks, and it must meet minimum clearance from cabinetry to allow plugging and unplugging without obstruction. Codes may specify distance limits from water sources, the height of the outlet, and whether GFCI protection is required in certain kitchen zones. The goal is to minimize risk while ensuring a practical connection point for your range. Remember: deviations from standard spacing or wiring practices can trigger inspections or rework, so verify any local amendments with your building department before you install.
Outlet types and receptacles: what to expect for a stove connection
Most electric stoves use a dedicated receptacle connected to a 240V circuit. You’ll encounter receptacle types designed for high-current appliances, with protections against arcing and overload. In some areas, a gas line or alternative fuel source may be involved for certain ranges, but for electric stoves, the emphasis is on a robust, properly grounded outlet that can handle peak loads. The exact receptacle configuration (and whether it’s pre-wired or needs a box and conduit) depends on your stove model and local code, so follow the manufacturer’s guidance and local electrical codes for the correct specification.
Permits and professional installation: knowing when to call in the pros
Electrical work on a stove outlet often requires a permit and a licensed electrician. Obtaining a permit ensures inspections align with safety standards and local regulations. An electrician will verify circuit sizing, bonding and grounding, cable routing, and proper mounting of the outlet. They’ll also coordinate with the panel to add a dedicated 240V circuit if needed and perform post-installation testing. While DIY enthusiasm is admirable, the complexity and risk associated with wiring a stove outlet make professional involvement the prudent path.
Safety first: common mistakes to avoid during installation planning
Never compromise on grounding or circuit protection. Avoid shared circuits with other high-draw appliances, don’t route wires through damp basements or behind water lines, and never mount the outlet in a location that obstructs cabinet doors or drawer spaces. Pressure-tested connections and secure junction boxes reduce the risk of loose wires that could cause heat buildup. Finally, don’t skip the inspection step—codes are designed to protect you, the home, and future buyers.
Coordination with your electrician: what to expect from the day of installation
A licensed electrician will typically review the stove’s electrical requirements, confirm local codes, and plan the run from the panel to the outlet. They’ll verify wire gauge, install or modify the junction box, connect the receptacle, and perform grounding and insulation checks. After wiring, they’ll test voltage, continuity, and the GFCI or arc-fault protections as required by code. You should receive a clear explanation of findings and any recommended upgrades.
Testing, inspection, and safe operation after installation
Once wired, the electrician will test the outlet for proper voltage, grounding, and insulation integrity. You should see the correct voltage and a solid ground reading across all live terminals. If your area requires inspection, schedule it promptly so you can operate the stove safely once approved. Keep a log of the installation date, the inspector’s notes, and any follow-up actions needed.
Aftercare and maintenance: keeping the outlet reliable
Regularly inspect the outlet for signs of wear, scorch marks, or loose connections. Keep cords neatly routed and away from heat sources. If you notice intermittent power or unusual smells, shut off power at the breaker and contact a licensed electrician. A proactive maintenance mindset helps prevent outages and extends the life of your stove setup.
Tools & Materials
- Voltage tester and multimeter(Verify voltage, continuity, and grounding)
- Non-contact voltage detector(Quickly check for live wires before handling)
- Stud finder(Locate studs and avoid hidden wiring paths)
- Measuring tape and pencil(Plan clearance and placement accurately)
- Screwdrivers (flathead and Phillips)(Mounting box, outlets, and cover plate)
- Wire strippers/cliers(Prepare conductors for safe connections)
- Conduit, clamps, and junction box(Code-compliant enclosure and routing)
- GFCI/ground-fault protection tester(Optional for splash-prone zones near sinks)
- Personal protective equipment (gloves, eye protection)(Safety during any electrical work)
- Voltage-rated outlet and mounting hardware(Dedicated stove outlet and sturdy installation)
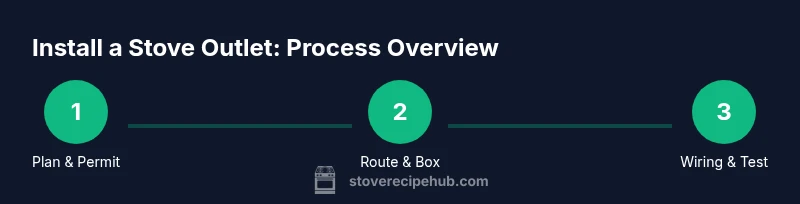
Steps
Estimated time: 2-4 hours (depending on permit and existing wiring)
- 1
Confirm local codes and permit needs
Check with your local building department about permits for installing a stove outlet. Gather your stove’s electrical requirements from the manual and ensure you understand whether a dedicated circuit and inspection are required.
Tip: Contact the inspector early to avoid delays later. - 2
Verify circuit capacity and plan routing
Determine whether your existing panel can accommodate a new 240V circuit. Plan a route from the panel to the outlet that minimizes bends and avoids concealed spaces where heat or moisture could become a problem.
Tip: Draw a simple diagram showing panel, route, and outlet location. - 3
Prepare the location and enclosure
Mark the outlet location with a stud finder and ensure there is at least the required clearance from cabinets and sinks. Install a suitable electrical box and attempt to keep the box depth compatible with wall materials.
Tip: Ensure the box is securely mounted to a stud or solid backing. - 4
Run and connect conductors
Have the conductor wires run from the panel to the outlet box, using conduit or proper sheathing as required by code. Connect the hot, neutral, and ground conductors to the receptacle following manufacturer instructions.
Tip: Do not nick conductors; trim to length with minimal exposed copper. - 5
Mount the outlet and cover plate
Secure the outlet in the box and attach the cover plate. Verify that the outlet sits flush with the wall and that screws are tightened evenly to avoid wobble.
Tip: Check alignment with cabinet edges for a neat appearance. - 6
Test and document
Use a voltage tester to confirm 240V between the hot legs and verify grounding continuity. Keep a record of the test results and any inspection references for future maintenance.
Tip: Capture photos of connections for your records.
Common Questions
Do I need a permit to install a stove outlet?
Yes. Most jurisdictions require a permit for a stove outlet installation to ensure safety standards are met and inspections are completed.
Yes, a permit is usually required to ensure safety and compliance.
What is the typical outlet type for electric stoves?
Electric stoves generally use a dedicated 240-volt receptacle connected to a separate circuit designed for high current.
A dedicated 240-volt receptacle is typical.
Can I install the stove outlet myself?
Electrical work on stoves carries significant risk. Many jurisdictions require a licensed electrician and approvals; review local codes before proceeding.
It's best to hire a licensed electrician.
Where should the outlet be located relative to the stove and sink?
Place the outlet on interior walls near the stove, away from sinks, and with adequate clearance from cabinets to allow easy access.
Position it on a nearby wall, away from water sources.
What tests are essential after installation?
Test voltage, grounding, and insulation integrity. Ensure any required inspections are completed and documented.
Check voltage and grounding, and complete the inspection.
Watch Video
Top Takeaways
- Plan location before starting work
- Only use a dedicated 240V circuit for the stove
- Hire a licensed electrician and obtain permits
- Test thoroughly after installation