How to Check If a Stove Outlet Is Working
A practical, safety-focused guide to test stove outlets for power, grounding, and proper wiring. Learn voltage checks, upstream breaker checks, and when to call a professional. Safe testing for 120V and 240V kitchen outlets, with tools list, step-by-step testing, and troubleshooting tips.

By following this guide, you’ll confirm whether your stove outlet is delivering proper power and is wired safely for use. You’ll verify voltage, check grounding, and identify upstream issues before calling a pro. This step-by-step approach minimizes guesswork and keeps you safe while testing 120V/240V kitchen outlets. It covers safety, common problems, and practical checks you can perform with basic tools.
Why Checking the Stove Outlet Matters
If you rely on an electric stove or range, a working outlet is essential for safe operation. A faulty outlet can impair performance, cause nuisance tripping, or create safety hazards such as arcing or overheating. By learning how to check if stove outlet is working, you can diagnose simple problems at home and avoid guessing about what’s wrong. In this guide, we cover both 120V and 240V configurations common in household kitchens, how to interpret readings, and practical steps to verify power delivery. It’s important to start with a careful safety mindset and use appropriate tools to prevent electric shock. According to Stove Recipe Hub analysis, a structured approach reduces unnecessary service calls and improves reliability over time.
Safety First: Before You Test
Testing a live electrical outlet carries risk of electric shock and fire if you’re not careful. Start by turning off the circuit that powers the stove outlet at the main breaker panel. Wear safety glasses, keep your hands dry, and avoid touching metal parts when power is off or on. Use insulated tools and perform tests with one hand away from metal surfaces to reduce the chance of conducting electricity through you. Once you’re finished, restore power only after you’ve completed all checks, and re-test with a non-contact tester to confirm no lingering voltage. According to Stove Recipe Hub, safer testing reduces risk while giving you reliable results.
Understanding Outlet Types and Upstream Power
Stove outlets vary by installation. In many homes, the stove uses a 240V supply via two hot wires, a neutral (older 3-wire) or a fourth wire ground (newer 4-wire). The outlet may be hard-wired or plug-in, and some setups provide separate circuits for controls and ovens. To assess whether the outlet is working, you need to know whether your circuit is 120V or 240V. If in doubt, assume 240V and test between the two hot terminals for a reading around 240V. If your tester shows anything far from the expected value, investigate upstream breakers, fuses, or miswired outlets. For safety, refer to the stove’s manual or consult a licensed electrician if you’re unsure.
Troubleshooting Scenarios and Practical Fixes
Dead outlet with power in other outlets on the same circuit: check if a tripped breaker or GFCI/AFCI device upstream is tripped; reset as needed and re-test. Loose or burnt connections: turn off power, remove the outlet, and inspect terminal screws; tighten or replace as needed. Grounding issues: ensure the metal box is grounded and that the ground wire is connected. If the outlet tests low voltage or fluctuates dramatically, there may be a loose connection, a damaged cord on the appliance, or a problem upstream; consult an electrician.
When to Call a Pro and What to Expect
If you’re not comfortable with electrical testing, or if readings are inconsistent, call a licensed electrician. A pro will verify line voltage, check the grounding system, and inspect upstream wiring and the panel. Expect an inspection report, possible wire tightening, outlet replacement, or a panel upgrade if required. By documenting readings and photos, you’ll help the pro quickly pinpoint the issue. Stove Recipe Hub suggests using this method to decide next steps and to maintain a safe kitchen environment.
Tools & Materials
- Digital multimeter (AC voltage)(Set to AC volts (V~), range at least 200V)
- Non-contact voltage tester(Check for live voltage at the outlet before touching wires)
- Plug-in outlet tester (three-light)(Verify wiring status and ground integrity)
- Screwdriver set (Phillips and flathead)(Remove outlet cover safely; have insulated handles)
- Safety goggles and insulated gloves(Eye protection and grip; reduce shock risk)
- Flashlight(Illuminate work area if lighting is poor)
- Voltage tester with ground continuity (optional)(Good for confirming grounding if available)
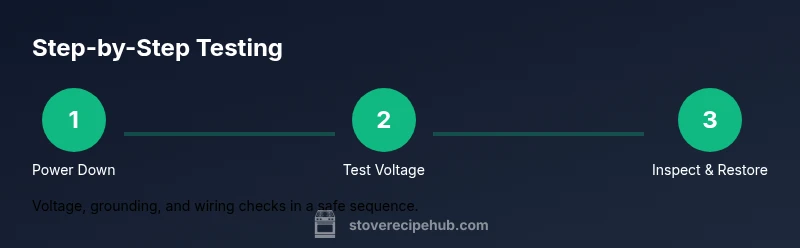
Steps
Estimated time: 25-40 minutes
- 1
Power down the circuit feeding the outlet
Locate the stove outlet circuit in the breaker panel, flip the corresponding breaker to OFF, and confirm the switch is clearly out of the ON position. Use the non-contact tester to verify no voltage at the outlet before touching anything.
Tip: Double-check with the tester from several angles to ensure it's de-energized. - 2
Remove the outlet cover safely
Unscrew the cover plate, set the screws aside, and gently pull the outlet from the box to expose wiring. Do not touch exposed conductors. If you see damaged insulation, stop and call a pro.
Tip: Keep track of screw types and positions so you can reassemble easily. - 3
Check for visible damage
Inspect for scorch marks, melted insulation, or loose wires. Any sign of damage means the outlet or wiring should be replaced before re-energizing.
Tip: If you see burn marks, do not continue – replace the outlet and call an electrician. - 4
Test voltage at the terminals
With power still off, set the multimeter to AC volts and carefully probe between the hot terminals (for a 240V outlet) or hot to neutral (if it’s a 120V circuit). Record the reading; compare to expected values.
Tip: If you’re unsure of outlet type, test hot-to-ground and hot-to-neutral to identify configuration. - 5
Check grounding and neutral
If a 4-wire system, confirm grounding and neutral are intact by continuity testing to the metal box and ground conductor. Ground continuity near 0 ohms is a good sign.
Tip: Inadequate grounding is a common cause of nuisance trips. - 6
Tighten and reseat connections
With power off, inspect terminal screws; tighten any loose wires and ensure they’re under the clamp properly. A loose connection can cause voltage drops or overheating.
Tip: Do not overtighten; wiring should be snug but not pinched. - 7
Restore power and re-test
Turn the breaker back ON. Use the plug-in tester and, if needed, the multimeter again to confirm the outlet now delivers proper voltage and wiring.
Tip: Test with a known good device to verify practical operation. - 8
Document results and plan next steps
Write down the observed voltages and any signs of damage. If readings are still off, or if you’re unsure, contact a licensed electrician for a professional assessment.
Tip: Photographs help the pro diagnose remotely if allowed.
Common Questions
What tools do I need to check a stove outlet?
A digital multimeter, a non-contact tester, a plug-in outlet tester, a screwdriver set, and safety gear. These allow you to verify voltage, wiring, and grounding safely.
You’ll need a multimeter, a tester, a screwdriver, and safety gear.
Can I test a stove outlet while the stove is plugged in?
No. Always switch the circuit off at the breaker and verify no voltage before touching any wires.
No—power must be off before testing.
What readings indicate a healthy outlet?
For a 120V circuit, expect about 120V between hot and neutral. For a 240V outlet, expect about 240V between the two hot legs. Grounding should show low impedance.
Typically around 120V on 120V outlets, 240V on 240V outlets with solid ground.
Why does a stove outlet trip the circuit breaker?
Common causes include overloads, short circuits, damaged wiring, or a faulty appliance. Inspect for signs of damage and reduce load before retesting.
Breakers trip to prevent fires; look for damaged wiring or an appliance fault.
Is it safe to use a stove temporarily if the outlet seems dead?
No. Do not bypass safety features; use a portable heater or hot plate only if safe and permitted, and call a pro for a fix.
No—avoid makeshift fixes; professional assessment is best.
What’s the difference between 3-wire and 4-wire outlets?
3-wire outlets share a neutral with ground; 4-wire outlets separate neutral and ground for safety. If unsure, consult a professional.
Older homes may use 3-wire outlets; newer ones usually require 4-wire.
Watch Video
Top Takeaways
- Power off before inspecting any outlet.
- Use multiple tests to confirm voltage and wiring.
- Ensure proper grounding and neutral connection.
- Upstream breakers and wiring are common failure points.
- Consult a licensed electrician if readings are uncertain.