Wood Burning Stove with Installation: A Home Guide
Learn how to safely select, install, and maintain a wood burning stove with installation guidance for safe, efficient heating.

By the end of this guide you will understand how to safely select and install a wood burning stove, ensure proper clearances and venting, and complete basic maintenance checks. You will learn essential steps, safety codes to respect, and practical tips to avoid common installation mistakes for a reliable, efficient heating setup.
What a wood burning stove is and why proper installation matters
A wood burning stove is a metal cabinet with a sealed firebox where seasoned firewood burns to produce heat. Unlike open fireplaces, stoves are designed to radiate warmth efficiently while minimizing emissions. Proper installation matters because it directly affects safety, indoor air quality, energy efficiency, and your home insurance coverage. The Stove Recipe Hub team emphasizes that the best outcomes come from matching stove size to room heat demand, ensuring airtight connections to prevent leaks, and following local codes and manufacturer instructions. A well-installed stove also reduces creosote formation and helps maintain a steady draft, which improves combustion and minimizes smoke inside the room. In this section we lay the groundwork: you’ll learn how to interpret a stove’s rating, how to align installation with your home’s layout, and what questions to ask before you buy or move a unit. Expect a blend of practical steps, safety considerations, and real-world examples from kitchens, living rooms, and cabins.
Safety foundations and compliance
Safety is the top priority when installing any wood burning stove. Start with a clear understanding that installation must respect both the stove’s manual and your local building codes. Always install a carbon monoxide detector near sleeping areas and a smoke detector on every floor, and verify that the electrical system is capable of supporting additional detectors if needed. Obtain any required permits before starting, and schedule a final inspection after completion. Keep combustibles away from the stove as recommended by the manufacturer, and choose a non-combustible hearth and floor protector. Finally, maintain a clear path for service access and air flow around the stove to prevent overheating and ensure easy maintenance. This section provides a checklist you can use during planning and installation.
Choosing the right stove for your space
Selecting a stove is about more than looks. Consider heat output relative to room size, fuel type (seasoned hardwood vs softer woods), efficiency class, and whether the unit is catalytic or non-catalytic. The best fit balances expected heating days, climate, and existing chimney design. Read independent reviews, compare emissions and efficiency statements from the manufacturer, and weigh maintenance needs. The Stove Recipe Hub approach recommends pairing a stove with a well-insulated living area and a chimney that can maintain a steady draft. Keep in mind that a larger stove without proper dampening can overheat a small room, while a too-small unit will scorch wood and work overtime. In the planning phase, think about how the stove will feel in winter, not just how it looks on a spec sheet.
Assessing space: room sizing, heat output, and placement
Measure the space carefully and consider doors, windows, and furnishings that affect heat distribution. Position the stove so loading wood is convenient and the door has safe clearance from nearby objects. Plan for a straight vent path that avoids sharp bends, and make sure the room layout won’t trap smoke if drafts shift. Consider access for maintenance, including the chimney and flue, as well as where you want to mount a thermostat or room sensor for comfortable heat. This planning reduces the likelihood of aggressive drafts, cold spots, or over-heating sections of the house and helps ensure consistent warmth on cold days.
Clearance, flooring, and heat shielding requirements
Clearances come from the stove’s manual and local code; rely on these to determine how far walls, ceilings, and fixtures must be from the stove. Use a non-combustible hearth pad beneath the stove, and install a heat shield if the wall is partially combustible. The floor beneath should be protected; prefer thick, rated materials like cement board or tile over a wood subfloor. If the stove is near a wall, consider a wall protection panel that extends to the ceiling for added safety. In many regions, building inspectors look for specific clearance values and the proper installation of seals and gaskets. Do not rely on anecdotal estimates; always follow the manufacturer’s directions and your inspector’s guidance.
Venting options and chimney considerations
Wood stove venting typically relies on either a masonry chimney or a factory-built metal chimney. Inspect your existing chimney to determine compatibility with the new stove, and confirm whether an internal flue or a direct-vent system is appropriate for your space. The diameter, length, and number of elbows influence draft and backflow—avoid excessive restrictions that reduce performance. Use a properly sealed, heat-resistant duct or chimney connector and ensure joints are secure with high-temperature sealant. Regular chimney inspections are essential, as creosote buildup can ignite if left unchecked. A well-designed vent path reduces smoke in the living area and supports cleaner, more complete combustion.
Planning the installation: permits, inspections, and planning
Start by listing all required permits, inspections, and any utility adjustments that could affect the installation. Contact your local building department, fire marshal, or housing authority to confirm requirements, timelines, and fees. Assemble a project file with product manuals, clearance charts, and installation diagrams, and keep them available for inspectors. If your local rules require professional installation for certain stove models, schedule the work with a licensed contractor. Finally, define a maintenance plan and a set of safety checks for after the installation, including detector testing and a readiness review for cold starts and warm-up drafts.
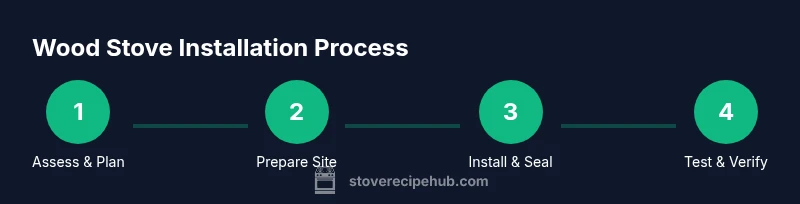
Installation sequence overview (high-level concepts)
The actual installation sequence follows a logical flow rather than a rigid timeline: confirm space and permits; assemble the stove in a clean area; lay hearth protection and ensure proper clearance; connect the venting system with a secure seal; perform a leak and draft test; light a small fire and verify that the stove reaches stable temperatures without smoke leakage. Throughout, document measurements, keep hands away from hot surfaces, and use protective gloves. This overview provides context for the step-by-step section that follows, and it highlights safety checks that reduce risk during final commissioning.
Maintenance and ongoing care
A wood burning stove requires regular upkeep to maintain performance and safety. Clean the interior and door glass per the manufacturer’s instructions to prevent buildup that impedes airflow. Inspect gaskets for wear and replace them as needed to maintain airtight combustion. Schedule yearly chimney inspections and creosote removal if necessary, and test your CO and smoke detectors monthly. Keep a log of fuel type, burn times, and any unusual noises or smells so you can detect changes in performance early. Finally, when weather changes or you notice a draft feel different, re-check clearances, vent connections, and hearth protection to ensure continued safe operation.
Common mistakes and how to avoid them
- Skipping permits or inspections: always verify regulatory requirements before work.
- Underestimating clearances: follow the manufacturer and code guidance rather than guesswork.
- Improper venting: ensure joints, slopes, and supports are correctly installed to prevent leaks and backdrafts.
- Ignoring maintenance: creosote build-up is a major fire risk; schedule cleaning and inspections.
- Using damaged components: replace worn gaskets, seals, or chimney connectors promptly.
- DIY over safety: when in doubt, hire a professional for critical steps such as chimney work and final commissioning.
The examples above illustrate common areas where mistakes occur and how deliberate planning minimizes risk and lengthens the life of your wood burning stove installation.
Tools & Materials
- Wood-burning stove unit (appropriately sized for space)(Choose a model that matches room size and insulation. Verify clearance specs in the manual.)
- Vent/Chimney kit (metal flue pipe, connectors)(Ensure compatibility with your stove and chimney type; use high-temperature sealant.)
- Non-combustible hearth pad or floor protector(Should extend beyond the stove footprint and cover the hearth area.)
- Non-combustible wall shielding/heat shield(Use where walls are partially combustible; follow manufacturer guidance.)
- Carbon monoxide detector (CO)(Place near sleeping areas and test regularly.)
- Smoke detector(Install on each floor for early warning.)
- Fire extinguisher (class ABC)(Keep accessible in the same room.)
- Tools: level, tape measure, screwdriver set, drill with masonry bit(Essential for alignment, mounting, and securing vent components.)
- High-temperature sealant/caulk(Seal joints between stove, pipe, and floor or walls.)
- Safety gloves and protective gear(Use for handling hot components and sharp edges.)
- Chimney brush and accessories(For annual chimney maintenance if DIY cleaning is planned.)
Steps
Estimated time: 6-12 hours
- 1
Assess permits and local requirements
Begin by researching local permit requirements and scheduling any necessary inspections. Collect relevant manuals, dimension drawings, and photos of the installation site. Clarify whether professional installation is required for your stove model and jurisdiction.
Tip: Check with the building department early to avoid delays. - 2
Choose a stove and read the installation manual
Select a model that fits room size, aesthetic goals, and chimney compatibility. Read the installation manual thoroughly, noting clearance specs, venting requirements, and maintenance expectations. Cross-check the manual with your room measurements before purchase.
Tip: Match BTU ratings to your room’s size and insulation level. - 3
Plan vent path and chimney compatibility
Map a vent path from the stove to the chimney that minimizes bends and preserves draft. Confirm chimney type (masonry vs. factory-built), required diameter, and any required liners. If you need to upgrade the chimney, plan time and budget accordingly.
Tip: Avoid sharp elbows; aim for a gentle, monotone run where possible. - 4
Prepare hearth and floor protection
Install a non-combustible hearth pad beneath the stove and extend protection beyond the stove footprint. If mounting on a wall, plan a heat shield or fire-rated panel to maintain safe clearances. Ensure the floor is clean and level before placement.
Tip: Use a level to confirm the stove sits evenly on the pad. - 5
Install the stove and establish clearances
Position the stove according to the manual, secure on the hearth pad, and verify all required clearances from walls and furniture. Attach any doors or accessories per the instructions and ensure safe access for loading wood.
Tip: Double-check that the door seals properly before firing up. - 6
Connect venting system and ensure draft
Connect the chimney connector to the stove, seal joints with high-temperature sealant, and verify there are no gaps. Check draft by lighting a small kindling burn and observing smoke flow; adjust damper or chute as needed.
Tip: A proper draft prevents smoke from entering the room. - 7
Test, safety checks, and finalize permits
Perform a full safety test: CO and smoke detectors, floor clearance, and any permit closures. Have the installation inspected if required and document results for your records.
Tip: Keep a log of tests and dates for maintenance reminders.
Common Questions
Do I need a permit to install a wood-burning stove?
Permit requirements vary by location, but many areas require a permit and a professional inspection. Check with your local building department before starting the project.
Permit requirements vary by location; check with your local building department before starting.
What clearances are required around a wood stove?
Follow the manufacturer’s specified clearances and local codes. Do not rely on guesses, as improper distances can create fire risk and affect ventilation.
Follow the stove’s clearances and local codes; don’t guess.
Can I install a wood stove in a mobile home?
Some stoves are approved for manufactured homes, but you must verify the appliance is listed for mobile homes and follow the manufacturer’s installation instructions.
Only use stoves listed for manufactured homes; consult the instructions.
What maintenance is required after installation?
Schedule annual chimney inspections and regular creosote cleaning. Test CO and smoke detectors monthly and replace worn gaskets or seals as needed.
Annual chimney inspections and regular cleaning are essential.
Is CO and smoke detection required?
Yes. Install CO detectors near sleeping areas and smoke detectors on every floor, and test them regularly to ensure readiness.
Install and test CO and smoke detectors regularly.
Can a DIY install be dangerous?
DIY installation can pose fire and health risks. If in doubt, hire a licensed professional for critical steps such as chimney work and final commissioning.
DIY can be risky; consider hiring a pro for critical steps.
Watch Video
Top Takeaways
- Verify permits before work.
- Follow the stove’s installation manual.
- Maintain proper venting and clearance.
- Install detectors and test safety equipment.
- Schedule annual maintenance and inspections.