How to Make Stovetop Popcorn
Learn how to make stovetop popcorn with a single pot, precise oil, and timed popping. This educational guide covers heat control, kernels, flavor ideas, and troubleshooting for perfect popcorn every time.

Learn to make perfect stovetop popcorn with a single pot, a little oil, and even heat. This method yields light, fluffy kernels with minimal burning when you measure oil, keep the lid partially on, and listen for the kernel pop rate. According to Stove Recipe Hub, this approach is simple, reliable, and great for flavor experiments.
Why this method reveals how to make stovetop popcorn
How to make stovetop popcorn successfully comes down to three factors: even heat distribution, adequate moisture in the kernels, and controlled steam. If you’re aiming to master this technique, you’ll want a pan that can hold a single layer of kernels and a few minutes of patient heat. In this approach, a heavy-bottom pot with a tight lid helps spread heat evenly and reduces scorching. According to Stove Recipe Hub, small differences in oil quantity or kernel moisture make big differences in the final texture. When the pan is hot enough to sizzle but not smoking, the kernels should begin to pop in a relatively uniform wave, creating fluffy, lightly crisp popcorn instead of a dense clump. The goal is a consistent popping rate and minimal unpopped kernels. This section explains the science behind kernel moisture, oil choice, and heat management so you can master the technique. It also sets expectations for timing and palate-friendly flavoring that follows.
Tools and ingredients you need
Before you start, assemble the essential tools and ingredients. The list is intentionally simple to reflect how to make stovetop popcorn quickly and cheaply. A heavy-bottom pot (2-3 quart minimum) with a tight-fitting lid is essential to maintain steady heat. A small whisk or spoon helps in flavoring or adding butter after popping. Have measuring spoons and a 1/2 cup measuring cup for kernels; you’ll typically use about 1/3 to 1/2 cup kernels for every batch, depending on pot size. Choose an oil with a high smoke point, such as canola, peanut, or refined coconut oil, about 2-3 tablespoons for a standard batch. Salt to taste; optional butter, nutritional yeast, or your favorite seasoning for after-popping flavor. A heat-resistant silicone spatula can help when you shake the pan gently during popping. The goal is to minimize utensils while maximizing control over heat and moisture. This section ensures you have everything ready to begin the popping process.
Choosing the right pan and oil
The pan you select should distribute heat evenly and be tall enough to prevent kernels from jumping out. A heavy-bottom stainless steel or cast-iron pot in the 2-3 quart range is ideal for even heat transfer and consistent popping. Use 2-3 tablespoons of oil with a high smoke point to coat the kernels evenly; you want just enough to slick the pan without pooling oil. For best results, avoid nonstick coatings that may degrade at high pops; instead, rely on a sturdy pot with a tight lid. If you’re using butter for flavor, add it after popping begins to avoid burning. Your oil choice will affect flavor; neutral oils let the corn shine, while flavored oils can add a subtle note. This section helps you optimize heat transfer and flavor potential before the kernels hit the pan.
The popping process: timing, heat, and venting
Begin by heating the chosen oil over medium heat until it shimmers but doesn’t smoke. Test with a single kernel to gauge readiness; if it sizzles and pops within a few seconds, you’re at the right temperature. Add the remaining kernels in a single layer and cover the pot with the lid cocked to allow steam escape. Shake the pan gently every 15-20 seconds to keep kernels moving and prevent scorching. Listen closely: when the pops slow to about 2-3 seconds between sounds, remove from heat and keep the lid on for another 20-30 seconds to finish popping. This section emphasizes the rhythm of heat, motion, and sound that defines successful stovetop popping. Stove Recipe Hub notes that controlled venting sharply reduces soggy texture and ensures crisp results.
Flavoring ideas and finishing touches
Popcorn loves to be flavored right after popping. Salt lightly, then add melted butter or a drizzle of oil to help seasoning cling. Classic options include nutritional yeast, smoked paprika, garlic powder, or a pinch of sugar for a kettle-corn style treat. For a richer finish, try brown butter or a light zest of parmesan. If you’re avoiding dairy, nutritional yeast or chili-lime blends offer bold flavors without heaviness. This section provides flavor ideas and practical tips for customizing your batch to suit any mood or meal.
Troubleshooting common issues
If you end up with many unpopped kernels, your oil may be too cool or the kernels are too dry; try increasing heat slightly or drying kernels thoroughly before use. Burnt corn usually means heat was too high or kernels touched the hot pan too long; lower the flame and use a wider pan to distribute heat. If popcorn tastes greasy or soggy, you used too much oil or didn’t vent steam enough; start with less oil and adjust. For stale-tasting popcorn, store popped corn in a cool, dry place in an airtight container and pop in smaller batches to maintain crispness. The Stove Recipe Hub team emphasizes clean technique and mindful timing to ensure consistent, tasty results.
Tools & Materials
- Heavy-bottom pot with lid(2-3 quart minimum; tight lid to trap steam without overflowing)
- Oil with high smoke point(Canola, peanut, or refined coconut oil; 2-3 tablespoons per batch)
- Popcorn kernels(About 1/3 to 1/2 cup per batch, depending on pot size)
- Salt(To taste; add at the end for best cling)
- Butter or flavoring (optional)(Melted for after-popping flavor; alternatives: nutritional yeast, paprika)
- Measuring spoons and 1/2 cup measure(For accurate kernel and oil quantities)
- Heat-resistant spatula or spoon(For gentle pan movement during popping)
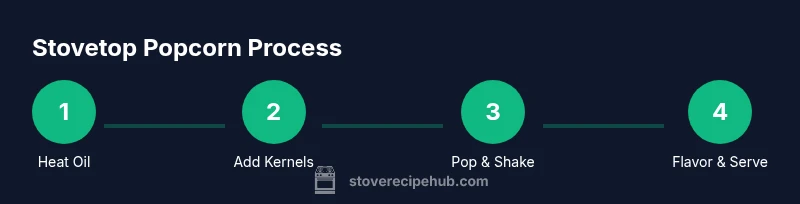
Steps
Estimated time: Approximately 10-12 minutes
- 1
Choose your pan and heat source
Select a heavy-bottom pan and preheat the oil over medium heat until it shimmers. This ensures even heat distribution from the moment kernels hit the pan.
Tip: If the oil starts smoking, reduce heat slightly before adding kernels. - 2
Measure and prepare kernels
Measure 1/3 to 1/2 cup popcorn kernels and pat them dry if possible to minimize moisture variation. Dry kernels pop more cleanly and with fewer unpopped pieces.
Tip: Avoid soaking kernels or adding moisture right before popping. - 3
Test heat with a single kernel
Drop one kernel into the pan to test the temperature. If it pops within 5-10 seconds, your oil is ready for the rest of the batch.
Tip: This test prevents under- or over-heating the entire batch. - 4
Add kernels in a single layer
Add the rest of the kernels in one even layer and place the lid ajar to vent steam. This minimizes soggy popcorn and promotes even popping.
Tip: Keep the layer as flat as possible for uniform heating. - 5
Shake and monitor popping
Gently shake the pan every 15-20 seconds to redistribute kernels and prevent scorching. Listen for the pace of popping to gauge progress.
Tip: If popping slows unevenly, slightly adjust heat or pan position. - 6
Remove when pops slow
When there are 2-3 seconds between pops, remove from heat and keep the lid on for 20-30 more seconds to finish popping.
Tip: Do not wait until there are long pauses; residual heat will finish the job. - 7
Season immediately
Pour in salt and any melted butter or flavorings while the popcorn is hot so seasoning adheres well.
Tip: Use a light hand with butter; too much can weigh down popcorn and cause greasiness. - 8
Cool and serve
Spread popcorn on a tray to cool for 1-2 minutes before serving. This prevents steam from softening the texture and helps crispness.
Tip: Serve in a warm bowl for the best texture and aroma.
Common Questions
Is stovetop popcorn healthier than microwave popcorn?
Stovetop popcorn can be as healthy as microwave popcorn, depending on the oil and toppings you choose. Using a modest amount of oil and light seasoning keeps the snack lighter while still flavorful.
Stovetop popcorn can be as healthy as microwave versions when you control oil and toppings.
What oil should I use for stovetop popcorn?
Opt for high smoke point oils like canola, peanut, or refined coconut oil. They handle the heat without burning, and you can vary flavor by oil choice.
Use a high smoke point oil like canola or peanut for best results.
How much popcorn does 1/2 cup kernels yield?
Typically about 8 cups of popped popcorn, depending on kernel size and method. This yields a generous snack for 2-3 people.
Expect around eight cups of popped popcorn from half a cup of kernels.
Can I make flavored popcorn on the stove?
Yes. Add seasonings after popping, such as salt, nutritional yeast, paprika, or cinnamon sugar for kettle-style popcorn.
Flavor after popping with salt and spices for best cling and taste.
Why does popcorn burn easily on the stove?
Burning happens when heat is too high or kernels stay on the hot surface too long. Manage heat and move the pan to avoid hotspots.
Burns happen when heat is too high; keep heat steady and move the pan.
How should I store leftover popcorn?
Store cooled popcorn in an airtight container away from humidity. Consume within 1-2 days for best crispness.
Keep leftovers in an airtight container and eat soon for best texture.
Top Takeaways
- Aim for even heat distribution and single-layer kernel placement.
- Use a high smoke-point oil and test heat with one kernel.
- Vent steam and listen for popping pace to determine readiness.
- Season hot kernels for best adhesion and flavor.
- Store any leftovers in an airtight container to preserve crispness.