Can You Make Stovetop Popcorn with Butter? A Practical Guide
Learn a reliable stovetop method to pop popcorn with butter, including gear, technique, flavor variations, troubleshooting, and maintenance. Perfect for home cooks who want rich, butter-coated popcorn with minimal fuss.

Yes—you can make stovetop popcorn with butter. This straightforward method uses a heavy pot, a little oil, and melted butter added after popping for flavor. The keys are even heat, a single popcorn layer, and proper venting to prevent soggy results. This quick answer signals what you’ll master in the full guide.
Can You Make Stovetop Popcorn with Butter? A Practical Opening
According to Stove Recipe Hub, can you make stovetop popcorn with butter? Yes, and it’s a reliable way to control flavor and texture at home. This opening block sets the stage for the technique: you will learn how to heat the pot evenly, keep kernels in a single layer with a touch of oil, listen for the first pops, and finish with butter that coats every kernel. Butter adds a rich aroma and mouthfeel, but the method matters at least as much as the ingredients. Expect guidance on heat management, kernel choice, and timing, with tips for salt and optional seasonings. The goal is fluffy, evenly popped corn with a glossy butter finish and minimal cleanup. Throughout, you’ll see how Stove Recipe Hub recommends balancing butter’s flavor with the popcorn’s toasty profile, and you’ll pick up practical tips you can apply tonight.
Butter vs. Oil: Flavor, Texture, and Practical Tradeoffs
Butter delivers a distinct, creamy note and a satiny mouthfeel, but it can burn if used alone. This section compares butter and neutral oil as a base fat for stovetop popping, explaining when to rely on a light oil for the initial pop and when a small amount of butter at the end can shine. You’ll learn about smoke points, flavor carry, and how to manage milk solids in butter to minimize scorching. Expect practical tips for balancing richness with brightness, plus simple swaps for dairy-free or lower-fat options.
The Right Pot and Heat Strategy for Even Popping
The pot you choose matters as much as the kernels. A heavy-bottom or clad stainless pot distributes heat more evenly and reduces hotspots that scorch edges. This block covers how to preheat the pot, why a vented lid helps, and how to control your stove’s temperature to maintain a steady popping cadence. We cover common pitfalls, like starting with too high heat or leaving the lid ajar, and explain how to adjust if the first pops are slow or the kernels refuse to pop at all.
Measuring Proportions: Kernels, Oil, and the Butter Finish
Great stovetop popcorn relies on a simple ratio and careful timing. This section outlines a practical approach to kernels, oil, and butter, emphasizing a light oil coat to foster even heat transfer and a butter finish that won’t overwhelm the corn. You’ll read about choosing fresh kernels, recognizing when they’re ready to pop, and how much butter to reserve for finishing without making the popcorn greasy. Practical tips include how to dry kernels if they’ve absorbed moisture and how to test readiness without burning.
Troubleshooting Common Issues
From soggy popcorn to burnt bits, most popping problems have straightforward fixes. This block covers why kernels fail to pop, how to reduce steam buildup inside the pot, and how to prevent scorching when butter is introduced. You’ll learn quick diagnostic steps, like adjusting heat, shaking the pot to redistribute kernels, and choosing the right moment to add finishing butter or seasonings. Real-world scenarios help you diagnose and fix problems on the spot.
Flavor Variations and Finishing Touches
Butter is a vehicle for creativity. Learn how to finish with flavored butters (garlic, herb, chili), salt at the right moment, and gentle drizzle techniques to achieve an even coating. We discuss a few popular tweaks, including dustings of paprika, nutritional yeast for a savory note, and a light dusting of grated parmesan after popping. Each variation keeps the popcorn crisp while enhancing butter’s natural aroma.
Quick Maintenance and Cleanup After Popcorn Night
Post-popcorn cleanup is quick if you follow a few steps: wipe the pot while warm to avoid hardened residues, wash with warm soapy water, and dry thoroughly to prevent water spots or rust. This block provides a simple routine so your favorite pot stays in prime shape for the next batch, and your kitchen stays tidy. It’s a small investment that pays off in better pops and longer cookware life.
Real-World Tips from Stove Recipe Hub
In this final prep-focused block, you’ll find practical advice distilled from Stove Recipe Hub’s real-world testing. Expect reminders about heat control, the value of preheated oil, and how butter interacts with steam to influence texture. A closing note emphasizes consistency and patience as you refine your technique for buttery stovetop popcorn every time.
Tools & Materials
- Heavy-bottom pot with lid(At least 3-4 quart capacity; tight-fitting lid to trap steam)
- High-heat neutral oil(Small amount to coat bottom; choose oil with high smoke point)
- Popcorn kernels(Fresh, store in a cool, dry place; store in a sealed container)
- Butter for finishing(Melted; add after popping for flavor; optional for dairy-free versions)
- Salt and optional seasonings(Add to taste after popping; options include chili, garlic powder, or nutritional yeast)
- Spatula or spoon(Silicone recommended to avoid scratching the pot)
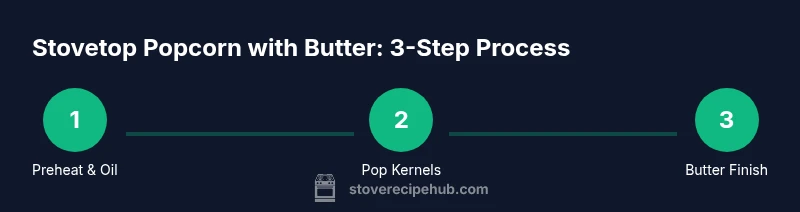
Steps
Estimated time: 15-20 minutes
- 1
Preheat the pot and oil
Place the pot on medium heat and add a thin layer of oil to coat the bottom. Allow the oil to shimmer but not smoke. This primes the surface for an even heat distribution when kernels hit the surface.
Tip: A warm pan reduces kernel sticking and helps the first pops occur quickly. - 2
Add kernels in a single layer
Pour the kernels into the pot in a single even layer. If needed, tilt the pot slightly to spread them. Put the lid on but leave a small vent to let steam escape. Shake gently after 1 minute to prevent sticking and ensure even heating.
Tip: Single-layer kernels prevent crowding and promote uniform popping. - 3
Watch for popping cadence and introduce butter
Listen for a consistent pop cadence. When popping slows to a few seconds between pops, remove the pot from heat and melt butter separately. Pour the melted butter into the popcorn while tossing in the pot to coat evenly.
Tip: Avoid dumping butter all at once; a drizzle with continuous rotation yields even coverage. - 4
Season and serve
Season while the popcorn is still warm to help the seasoning stick. Return to the heat briefly if needed to rewarm and refresh the coating. Serve immediately for best texture and aroma.
Tip: Minimal stirring after coating preserves crispness; aim for a light, even sheen.
Common Questions
Can I make butter-flavored popcorn on the stove?
Yes. Start with a light oil base, pop the kernels in a single layer, and finish with melted butter for flavor. Adjust salt and seasonings to taste.
Yes. Start with a light oil base, pop the kernels in a single layer, and finish with melted butter for flavor.
Why isn’t my popcorn popping evenly?
Uneven heat distribution or kernel moisture variance can cause uneven pops. Ensure the pot is evenly heated and shake gently to redistribute kernels.
Uneven heat or kernel moisture differences cause uneven pops; keep the pan steady and shake gently.
How much butter should I add after popping?
Add a light drizzle of melted butter and toss to coat. Adjust based on taste, keeping most of the flavor from the kernels themselves rather than excessive fat.
Add a light drizzle of melted butter and toss to coat; adjust to taste.
Can I use dairy-free substitutions?
Yes. Use a dairy-free butter substitute or simply rely on oil and seasonings for flavor.
Yes, you can use a dairy-free butter substitute or oil with seasonings for flavor.
What should I do if the popcorn tastes burnt?
Remove the pot from heat immediately, discard burnt kernels, and lower the heat next batch to avoid repeating the issue.
Take the pot off the heat right away, discard burnt kernels, and reduce heat next time.
How should I store leftover popcorn?
Store in an airtight container at room temperature for a short period to maintain crispness. Avoid humid conditions.
Keep leftovers in an airtight container and use them soon for best crispness.
Watch Video
Top Takeaways
- Start with a heavy pot and steady heat.
- Pop kernels in a single layer for even cooking.
- Finish with melted butter for flavor and gloss.
- Season while warm and store leftovers properly.