How to Know When Stovetop Chicken Is Done
Master stovetop chicken doneness with safe internal temps, visual cues, and proper resting to keep meat juicy, flavorful, and safe to eat.

Knowing when stovetop chicken is done hinges on a safe internal temperature, not color alone. Use a digital instant-read thermometer to verify the thickest part reaches 165°F (74°C). Check for clear juices and a firm, opaque texture. Rest the chicken for a few minutes to finish cooking and redistribute moisture.
The Science of Doneness on the Stovetop
Doneness is a function of heat penetration and moisture retention. On the stovetop, the interior of a piece of chicken finishes cooking as heat moves from the surface toward the center. Thicker cuts take longer, and bone-in portions retain heat differently than boneless breasts. Resting after heat is removed lets residual heat finish the job and helps juices redistribute, resulting in a juicier final product. While color and exterior browning contribute to flavor, they are not reliable indicators of safety. Your safest, most repeatable method is a precise temperature check paired with sensible resting times. The goal is a safe, juicy bite, not a fully brown exterior alone.
Temperature Thresholds That Matter
The only safe and repeatable way to know chicken is done is the internal temperature. The USDA recommends cooking chicken to an internal temperature of 165°F (74°C) in the thickest part of the meat. This target applies whether you are cooking boneless breasts, thighs with bone, or cutlets. Use an instant-read thermometer to verify, inserting the probe into the center of the thickest portion, away from bone. If you see a temperature just under 165°F but the juices run clear and the texture is firm, finish cooking and recheck for safety. Carryover cooking can raise the temperature a few degrees after you remove heat.
Visual and Juiciness Cues You Can Trust
Color alone is not a reliable signal due to lighting and poultry variances. Look for opaque meat with no translucent pink areas in the thickest part. Juices should run clear or pale, not pink, when you pierce the surface. The flesh should feel firm yet yield to gentle pressure. These cues complement temperature checks; if you’re unsure, rely on the thermometer for the final decision.
Doneness By Cut and Cut-Through Tests
Cutting into chicken to judge doneness is not the most reliable method, but it can be used sparingly as a backup. When you do cut, examine the center of the thickest piece; if it looks opaque and the juices are clear, you are near the target temperature. Avoid repeatedly cutting the meat, which dries it out. The thermometer remains the most accurate indicator for stovetop cooking, especially for smaller pieces that cook quickly. For safety, always recheck with a thermometer after any resting period or follow-up heating.
How Pan Cooking Techniques Influence Doneness
Searing on high heat creates a crust and can help you gauge doneness more predictably than boiling. Start with a hot pan and a thin film of oil for a quick sear; then lower the heat to cook through evenly. Covering the pan traps heat and speeds interior cooking but requires careful temperature control to avoid overcooking the exterior. The cut type matters: boneless breasts finish faster than bone-in thighs, so tailor heat and time to the piece you’re cooking.
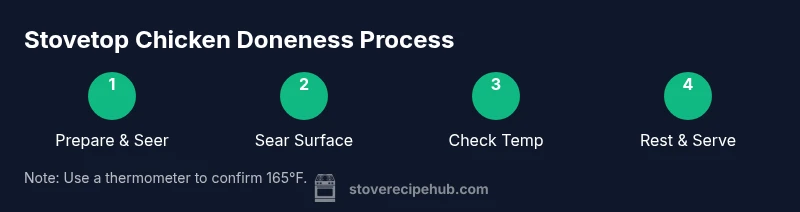
Step-by-Step Doneness Verification
- Pat dry the chicken and season as desired. This promotes even browning and helps the thermometer read accurately. 2) Preheat a heavy skillet with a thin layer of oil over medium-high heat until shimmering. 3) Sear the chicken on one side until a rich crust forms, about 1–3 minutes per side depending on thickness. 4) Reduce heat to medium and continue cooking, flipping as needed, until the thickest part nears 165°F. 5) Remove from heat and rest for 3–5 minutes before checking a final temperature and slicing to serve. 6) Recheck the thickest part after resting to confirm safe doneness.
Resting: Why a Short Wait Improves Juiciness
Resting allows juices to redistribute and reabsorb, making the meat more succulent and easier to slice. For small boneless pieces, rest briefly; for larger bone-in portions, aim for 5 minutes. During resting, the internal temperature may rise a few degrees due to carryover cooking, so plan accordingly. Resting also helps the meat stay juicy when sliced.
Safety Practices and Common Pitfalls
Keep raw chicken separate from ready-to-eat foods to prevent cross-contamination. Wash hands, utensils, and surfaces after handling raw poultry. Use a clean plate for cooked meat and avoid reusing marinade that contacted raw chicken unless you boil it first. Don’t rely on color alone; always verify temperature. Finally, choose even-thickness pieces when possible to obtain uniform doneness and predictable results.
Practical Quick-Check List for Home Cooks
- Use a digital thermometer; target 165°F in the thickest part.
- Pat chicken dry and preheat your pan for a good sear.
- Let the meat rest 3–5 minutes before slicing.
- Avoid piercing meat during cooking to retain juices.
- If using bone-in pieces, allow a little extra time and check near the bone.
- Calibrate your thermometer regularly and run a quick test with a small piece before cooking a full portion.
Tools & Materials
- Digital instant-read thermometer(Probe into the thickest part, away from bone, read within 5 seconds)
- Heavy skillet or deep sauté pan(Cast iron or stainless with a lid for even browning and heat retention)
- Tongs or spatula(For turning without piercing the meat to preserve juices)
- Paper towels(Pat chicken dry for crispier sear and accurate readings)
- Neutral oil with high smoke point(Olive oil works, but consider avocado or canola for higher heat tolerance)
- Cutting board and sharp knife(For optional visual checks or slicing after resting)
- Oven mitts or heat-resistant gloves(Helpful when handling hot pans or transferring to an oven finish)
- Measuring tools (optional)(Useful for marinades or precise portioning)
Steps
Estimated time: 20-40 minutes
- 1
Prepare chicken and tools
Pat the chicken dry, season as desired, and arrange tools within easy reach to streamline the cooking process. Pre-measure oil and have your thermometer ready so you can verify doneness promptly.
Tip: Dry surface ensures a better sear and more accurate temperature readings. - 2
Preheat pan and add oil
Place a heavy skillet on medium-high heat with a thin film of oil until shimmering. A ready pan sears evenly and reduces sticking, which helps you achieve a uniform crust.
Tip: If the oil smokes, reduce the heat slightly to prevent burnt flavors and uneven cooking. - 3
Sear the surface
Lay the chicken in the hot pan and sear until a deep crust forms on one side, usually 1–3 minutes depending on thickness. Flip carefully to avoid tearing the crust.
Tip: Do not move the pieces too soon; a good crust forms when they release easily from the pan. - 4
Finish with temperature control
Reduce heat to medium and continue cooking, turning as needed, until the thickest part nears 165°F. If using bone-in pieces, you may need a bit more time; cover partially if needed to trap heat.
Tip: Covering accelerates interior doneness but increases crust softness—balance with a lifted lid if the exterior browns too fast. - 5
Rest and recheck
Remove from heat and rest for 3–5 minutes. Recheck the temperature at the thickest point; rest allows carryover cooking to finish without drying the meat.
Tip: During rest, juices redistribute; slicing too soon leads to noticeable moisture loss. - 6
Serve or hold
Slice against the grain and serve promptly, or hold warm for a short time in a low-heat oven (about 200°F) to maintain moisture without further cooking.
Tip: Slicing after resting keeps slices juicy and easier to eat.
Common Questions
Can I tell if chicken is done by color alone?
Color is not a reliable indicator of doneness. Always verify with a thermometer and check the thickest part for 165°F.
Color alone isn’t reliable; use a thermometer to confirm the chicken is 165 degrees.
What is the safe internal temperature for stovetop chicken?
The safe internal temperature for chicken is 165°F (74°C) in the thickest part of the meat, regardless of cut.
Always cook to 165 degrees in the thickest part.
Does bone-in chicken require a different doneness check than boneless?
Bone-in pieces often take longer to reach 165°F. Check near the center and around the bone, and use the thermometer to verify.
Bone-in can take longer; use the thermometer near the bone.
How long does stovetop chicken typically take?
Time varies with thickness and cut. Breasts cook faster than thighs; rely on the thermometer rather than a fixed time.
Time varies; use a thermometer to decide.
Is it safe to cut into chicken to check doneness?
Cutting can release juices and spread bacteria. Use a thermometer as the primary check and cut sparingly only as a backup.
Avoid cutting to check doneness; use a thermometer instead.
What should I do with leftovers from stovetop chicken?
Cool promptly, store in a shallow container, and refrigerate within two hours. Reheat to at least 165°F before eating.
Cool and refrigerate quickly; reheat to 165°F.
Watch Video
Top Takeaways
- Measure with a thermometer for safety.
- Target 165°F in the thickest part.
- Rest 3–5 minutes before slicing.
- Rely on temperature, not color alone.