What Stove Heat to Cook Chicken: A Practical Home Guide
Master stove-top chicken with smart heat control, searing and finishing techniques, safety checks, and practical tips for reliable results in a home kitchen.

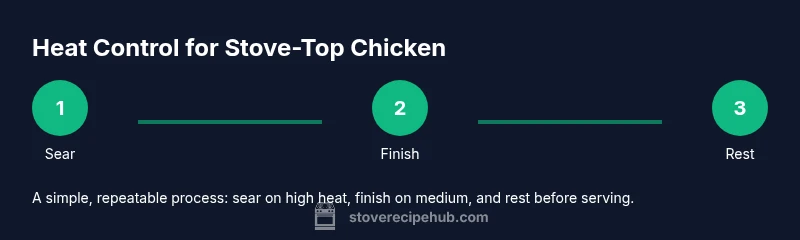
You can reliably cook chicken on the stove by searing over medium-high heat to form a crust, then lowering to medium or medium-low to finish through. Use a hot, oiled pan and avoid overcrowding. Maintain steady sizzle rather than a hard boil, and verify doneness with a cut test or thermometer.
Why heat level matters for chicken
Juicy, flavorful chicken on the stove comes from controlling heat as you cook. If the pan is too hot, the exterior can burn before the interior tenderizes; if it's too cool, you lose browning, moisture, and aroma. The right balance helps you build a crust and finish with an evenly cooked center. According to Stove Recipe Hub, mastering the switch between searing heat and finishing heat is the foundation of reliable stove-top results. In practice, most home cooks benefit from starting at a medium-high pace to initiate browning, then backing off to a steadier medium or medium-low as the chicken cooks through. This approach works across cuts, from boneless breasts to bone-in thighs, and supports safe handling by keeping the surface hot enough to prevent bacterial growth without lingering in a mushy pan. The rest of this guide walks you through how to choose heat levels, how to read the pan, and how to adapt heat across stove types, utensils, and kitchen layouts.
Understanding heat levels on common stoves
Different stove types respond differently to the same setting. Gas burners flare and can vary in intensity; electric coils warm more slowly; induction heats through magnetic fields with precise, fast changes. Regardless of the heat source, the concept remains: you can generate a hot sear with high heat, then sustain cooking with medium or medium-low heat. On gas, you often feel an active flame; on electric, you watch the pan for a steady shimmer of oil. Induction gives crisp control and less residual heat in the pan once you turn it down. The key is to preheat the pan and oil so that when the chicken touches the surface, you hear a satisfying sizzle. A good rule of thumb is to time your actions with the pan's behavior: a shimmering sheen indicates heat ready for sear; a gentle, quiet sizzle means it's time to lower the heat for finish. This section helps you translate heat settings to what your pan actually does.
Searing, then finishing: a practical method
The core method is simple: pat dry the chicken, season generously, and preheat a heavy skillet with a thin coat of oil until it shimmers. Place the chicken in the pan and resist the urge to move it for the first minutes; you want a deep crust. Flip once to sear the opposite side, then reduce the heat to medium or medium-low to finish cooking through. The goal is a crust that stays intact while the interior reaches doneness. If the pan cools too much, briefly lift the chicken to gauge heat, then re-sear before continuing. Pro tip: keep space between pieces so they brown instead of steaming.
Adjusting heat for different chicken cuts
Breasts, thighs, and drumsticks respond differently to heat and time. Boneless, skinless breasts finish quickly and benefit from a gentle finish heat to avoid drying out. Bone-in pieces require a longer finishing phase, so keep the heat steady and moderate. If skin is on, you may start with a higher sear to develop color, then lower heat to finish without burning the skin. For thin cutlets, a shorter sear on each side is enough; for thicker pieces, be patient with the finish heat and consider finishing briefly with a lid to trap steam.
Practical cues to gauge heat without a thermometer
If you don’t have a thermometer handy, let the pan guide you. A rapid, consistent sizzle signals that the surface is hot enough to sear; a quieter, steady simmer indicates finish heat. Look for browning along the edges and a crust that detaches slightly when you lift a corner with tongs. Juices that run clear (not pink) from the thickest part also signal progress, though color alone is not a guarantee. When in doubt, pause and check by cutting into the thickest section or using a thermometer to confirm safe doneness.
Essential tools and setup for consistent results
A heavy-bottom skillet (cast iron or stainless steel) ensures even heat distribution. Use a light, high-smoke-point oil to minimize splatter and promote browning. Have salt, pepper, and any preferred seasonings ready, and keep tongs nearby for quick turns. A thermometer is highly recommended for safety and accuracy. For multiple batches, keep the pan at a steady temperature by letting it recover briefly between additions and using a paper towel to wipe away any burnt bits that could affect taste.
Troubleshooting common heat problems
If the exterior browns too quickly and the center remains undercooked, you’re likely using too much heat or overcrowding the pan. Reduce heat sooner and keep pieces spaced apart. If the chicken sticks to the pan, the surface wasn’t hot enough when the meat touched it or the pan needs a touch of oil. If you notice excess splatter, lower the heat slightly and give the pan time to reheat between batches. Clean, dry pans brown better and stick less, improving control over heat.
Food safety, doneness, and resting
Chicken should reach a safe internal temperature before serving. After cooking, rest the meat for a few minutes to redistribute juices and improve slicing. A thermometer reading of the safe internal temperature confirms doneness, and a clean slice that shows no pink confirms safety. Always practice safe handling: wash hands and utensils after raw chicken, and avoid cross-contamination by using a clean plate for the cooked meat.
Quick weeknight plan: a starter routine
For busy evenings, consider a repeatable routine: pat dry and season; preheat a heavy pan with oil; sear both sides; lower heat and finish; rest briefly. This routine keeps heat management predictable and helps you build confidence with stove-top chicken over several weeks. Adjust seasonings to taste and explore simple sauces that complement the crust without masking the chicken's surface browns.
A starter recipe idea you can customize
Try a simple pan-seared chicken breast with olive oil, salt, and pepper, finished with a squeeze of lemon and a small spoon of butter for gloss. If you prefer thighs, add a garlic-and-herb finish after searing, then finish on moderate heat. This approach emphasizes heat control as the core skill, allowing you to vary flavor while keeping doneness consistent.
Tools & Materials
- Skillet or frying pan (prefer heavy-bottom, e.g., cast iron or stainless)(Even heat helps browning and prevents scorching)
- Oil with high smoke point (e.g., canola, corn, or grapeseed)(Thin coating to prevent sticking and promote crust)
- Kosher salt and freshly ground black pepper(Season generously and evenly before cooking)
- Tongs(For turning without piercing the meat)
- Instant-read thermometer(Probe into thickest part to confirm doneness)
- Paper towels or clean plate(Pat dry before cooking to improve sear)
- Lid (optional)(Useful to trap steam on thicker cuts)
Steps
Estimated time: 25-35 minutes
- 1
Prepare chicken and preheat pan
Pat dry the chicken pieces, season generously, and preheat the skillet with a thin coat of oil until it shimmers. The dry surface promotes browning, and a hot pan helps prevent sticking. Have your tongs ready for quick handling.
Tip: Dry surfaces create a stronger crust; preheating prevents sticking. - 2
Place chicken in pan and sear first side
Lay the pieces in a single layer without crowding. Let the bottom brown fully before checking for color; avoid moving the meat too early, which can tear the crust. A crust develops best when the surface is hot and unconstrained.
Tip: Avoid peeking too often; resist the urge to flip until you see a crisp edge. - 3
Flip and sear opposite side
Turn the pieces with tongs to sear the other side until color develops. You should see an even crust across the surface. If the pan seems dry, add a light touch of oil, then keep watching for browning.
Tip: A well-seared crust improves flavor and reduces sticking on the second side. - 4
Reduce heat to finish cooking through
Lower the heat to a steady medium or medium-low to finish cooking without burning the exterior. Maintain a gentle sizzle and monitor interior texture. If using thicker pieces, the pan may need longer finish time.
Tip: The goal is a crust that stays intact while the interior reaches doneness. - 5
Check doneness and remove from heat
Verify the thickest part reaches safe doneness with a thermometer or through slicing. Once done, transfer to a plate and let rest briefly. Resting helps redistribue juices and keeps the meat moist.
Tip: Resting time matters; slice too early and juices escape, drying the meat. - 6
Optional glaze or sauce finish
If desired, add a quick sauce or glaze in the last minute of cooking for extra flavor. This should not overpower the crust you built during searing. Remove from heat promptly after applying.
Tip: Keep sauce light to avoid steaming the crust.
Common Questions
What heat should I use to cook chicken on the stove?
Start with medium-high to sear for color, then reduce to medium or medium-low to finish. This balance avoids burnt exteriors and undercooked interiors.
Begin with medium-high heat to sear, then lower to finish cooking through.
Is it safe to cook chicken on high heat all the way through?
High heat all the way through can burn the outside while leaving the inside underdone. A two-step approach—sear then finish—reduces this risk.
High heat all the way through often burns the outside and undercooks the inside.
Should I cover the pan while cooking chicken on the stove?
Covering is useful to finish thicker cuts, but for searing, keep the pan uncovered to promote browning. Use a lid selectively to trap steam if needed.
Cover only when you need to finish thick pieces; otherwise, leave it uncovered to brown.
How can I tell when chicken is done without a thermometer?
Look for a fully opaque center and juices that run clear. A firm texture and color change indicate doneness, but thermometer confirmation is best for safety.
Opaque center, clear juices, and firm texture suggest doneness; confirm with a thermometer for safety.
Does bone-in chicken require different heat management?
Bone-in pieces take longer to finish; start with a good sear and maintain steady finish heat to ensure the interior cooks through without burning the exterior.
Bone-in parts need more finishing time; keep heat steady to cook through.
Watch Video
Top Takeaways
- Sear with higher heat to develop crust, then finish on lower heat.
- Avoid overcrowding to ensure even browning and cooking.
- Rest the chicken after cooking to lock in juices.
- Use a thermometer to confirm doneness and safety.