Can You Cook on a Solo Stove? A Practical Outdoor Guide
Learn how to safely cook on a Solo Stove with fuel and cookware guidance, step-by-step instructions, and practical tips for outdoor stove-top meals.

Yes—you can cook on a Solo Stove by using a proper pot or pan placed securely over the top ring and controlled fuel. Start with a stable surface, use dry, small wood pieces, and adjust airflow for a steady flame. Keep a safe distance from flammables, monitor the heat, and never leave it unattended. Plan for low to medium heat, avoid high-simmer boiling, and use a windscreen or sheltered area to protect the flame.
Can you cook with a solo stove? A practical introduction
If you ask can you cook with a solo stove, the answer is yes, with the right setup. A Solo Stove is a compact, wood-burning stove designed for efficient airflow and minimal smoke; not a full kitchen range, yet it can handle simple stove-top meals in outdoor settings. According to Stove Recipe Hub, you can transform a campfire into a reliable cooktop by choosing the right pot, keeping the flame under control, and reducing wind disruption. The philosophy is simple: stable support, clean heat, and steady airflow.
In practice, the way you cook matters as much as what you cook. Use a flat-bottom pot or pan that sits securely on the stove’s top ring, avoid oversized or warped cookware, and avoid materials that can overheat or warp under direct flame. Dry wood will burn more predictably than damp logs, and splitting wood into small pieces speeds ignition and allows finer heat control. Plan for low-to-medium heat rather than aggressive boiling. This approach minimizes scorching, preserves nutrients in soups or stews, and reduces fuel consumption. With the right care, you can boil water, simmer sauces, reheat leftovers, or cook simple one-pot meals—on a compact, portable stove that's easy to pack for camping, backcountry trips, or emergency preparedness.
Safety and best practices
Stove safety is not optional when cooking outdoors. The very nature of a wood-burning stove means heat, embers, and wind can create unpredictable conditions. According to Stove Recipe Hub analysis, approaching outdoor stove-top cooking with a safety-first mindset reduces accidents and waste. Always set the stove on a flat, noncombustible surface away from tents, dry leaves, and loose gear. Keep a safe radius around the flame, and ensure children or pets are kept away. Use heat-resistant gloves when handling pots, and never reach over an active flame. Water or a fire extinguisher should be close at hand in case you misjudge wind or fuel. When finished cooking, extinguish embers completely and store all wood scraps responsibly. If you’re cooking near dry grass or in windy weather, choose a sheltered corner or use a windbreak to maintain stable heat. Finally, check local burn bans and follow manufacturer guidelines for fuel use and safety; outdoor stoves are efficient, but they demand respectful handling.
Equipment and fuel choices
Choosing the right cookware and fuel is as important as the flame itself. Use flat-bottom cookware that sits solidly on the top ring; cast iron, stainless steel, or aluminum pots with even bases work best. Avoid glass or fragile dishes that can crack from thermal shock. For fuel, rely on dry hardwood pieces, kindling, and small sticks. Wet wood or manufactured fuels can smoke, foul heat, or foul taste. Start with a small fire and gradually add fuel to maintain a steady flame. Keep a small metal cup of water or sand nearby to address flare-ups, and use a windscreen if wind is a constant factor. When the meal is done, let the stove cool on its own autonomous flame before moving it, to prevent burns or damage to the surface underneath. Remember: the goal is consistent heat, not fierce, erratic flames.
Recipe ideas and technique: simple meals
Outdoor stove-top meals don’t have to be complex. Start with one-pot dishes that benefit from a gentle simmer and a short cook time. Oatmeal with dried fruit and cinnamon makes a hot breakfast, while a small pot of rice and vegetables can serve as a flexible base for toppings. A simple pasta dish with a light sauce and cooked vegetables can be prepared with minimal stirring. When cooking, preheat the pot briefly, then add liquids and ingredients in order of cooking time to avoid scorching. If water is scarce, rehydrate dehydrated ingredients or use broth to add flavor. Finish with a lid to trap heat and reduce evaporation. These routines emphasize efficiency, reduce fuel use, and improve flavor by retaining aroma and moisture in the food.
Heat management and wind considerations
Wind can dramatically influence burn rate, heat output, and cooking times on a small stove. Position your stove in a sheltered area or behind a natural windbreak to maintain a stable flame. Adjust the opening of the top vent or the amount of fuel to move between simmer and boil as needed. A tight lid on the pot helps retain heat, speeds cooking, and reduces fuel consumption. If the flame grows too tall or the pan vibrates, lift the pot slightly to cool the bottom, or add a small amount of water to prevent scorching. Monitor cooking progress closely; outdoor heat is less predictable than indoor stoves, so plan for longer cooking times when conditions are windy, cold, or humid. Finally, never use accelerants; a steady, efficient flame is safer and easier to manage.
Outdoor planning and practical tips
Plan meals with your trips or tasks in mind: shorter meals for day hikes or longer meals for camping trips. Pack essential safety gear: waterproof matches, a windbreak, and a compact fire extinguisher or water supply. Practice the setup at home before traveling to reduce uncertainty in the field. Maintain a clean cooking area and store ashes safely to prevent wildfires. If you’re preparing meals for a group, prioritize recipes that adapt to crowd size and can be cooked in a single pot. Finally, respect the environment and pack out all waste; stoves are convenient, but leaving a mess behind defeats their purpose. The Stove Recipe Hub team recommends testing your setup at home first and always prioritizing safety.
Tools & Materials
- Portable wood-burning stove (e.g., Solo Stove)(Stable on a heat-safe surface; use dry fuel)
- Dry hardwood fuel (kindling and sticks)(Dry, seasoned wood pieces 1-3 in; avoid green or treated wood)
- Heat-resistant gloves(To handle cookware safely)
- Cast iron or stainless steel pot/pan with flat bottom(3- to 4-quart size ideal; use a lid if available)
- Lid or heat-safe windscreen(Traps heat and protects flame from wind)
- Water for extinguishing(Keep within arm's reach; use to douse embers if needed)
- Tongs or long-handled spoon(Helpful for stirring without reaching over flame)
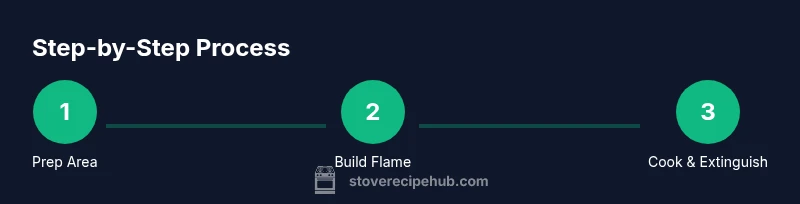
Steps
Estimated time: 35-60 minutes
- 1
Set up a safe cooking area
Choose a flat, nonflammable surface away from dry vegetation. Clear a 3-foot radius, place the stove on a heatproof base, and position a windscreen if gusts are expected.
Tip: Double-check stability before placing cookware. - 2
Prepare and light the fuel
Stack dry wood pieces with small kindling to encourage a controlled flame. Light with a match or lighter and allow the fire to establish a gentle, steady flame.
Tip: Avoid overloading fuel; a small, steady flame works best for cooking. - 3
Position cookware and preheat
Place your pot on the top ring or a compatible support, ensuring even contact. Preheat for 1–2 minutes to improve heat transfer and reduce sticking.
Tip: Use a lid when possible to trap heat. - 4
Cook your meal with controlled heat
Add ingredients and adjust fuel to maintain a simmer or gentle boil. Stir as needed and monitor for scorching; keep water or stock handy for adjustments.
Tip: Move the pot slightly if logs smoke or flames surge. - 5
Finish and extinguish safely
When done, shut off airflow and allow coals to burn out or slowly douse with water. Move the stove to a safe spot and let it cool before packing.
Tip: Never leave hot embers unattended.
Common Questions
Can you cook directly on the Solo Stove surface?
Direct cooking on the metal surface is not recommended. Use cookware that rests on the top ring and provides a flat, stable cooking surface.
It's not recommended to cook directly on the stove surface; use cookware that sits on top.
Is it safe to leave a Solo Stove lit while cooking?
No. Monitor the flame and never leave the stove unattended, especially in wind or dry conditions.
No—never leave it unattended.
What cookware works best with a Solo Stove?
Flat-bottom pots and pans made of cast iron or stainless steel with a secure lid work best.
Flat-bottom cookware works best.
Can you simmer or boil with a Solo Stove?
Yes, but keep the flame low and control the airflow to maintain a gentle simmer or steady boil.
Yes, with careful heat control.
What foods are ideal to cook on a Solo Stove?
One-pot meals like oatmeal, rice, soups, and vegetables are well-suited for outdoor stove-top cooking.
Oatmeal, rice, soups, and vegetables.
How do you extinguish a Solo Stove safely after cooking?
Douse the embers with water or let them cool completely in a safe area before packing.
Douse with water or wait until cool.
Watch Video
Top Takeaways
- Master a stable, heat-controlled flame for reliable stove-top cooking.
- Use flat-bottom cookware designed for outdoor stoves with lids.
- Always prioritize safety: wind protection, stable surface, and extinguishing readiness.
- Plan for heat management rather than trying to boil everything at once.
- Practice makes safe: rehearse setup before cooking a full meal.