How to Make Boiled Eggs on the Stove
Learn a reliable stove-top method to boil eggs perfectly every time. This guide covers timing for soft, medium, and hard results, plus cooling, peeling, and storage tips for best texture.

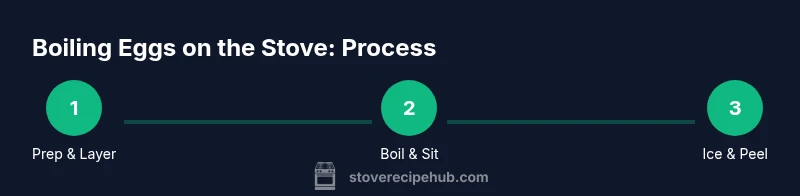
You’ll boil eggs on the stove by placing them in a single layer in a pot, covering with water, heating to a rolling boil, then turning off the heat and letting them sit for the desired doneness before cooling in an ice bath. This method minimizes cracking and yields soft, medium, or hard-boiled eggs.
Selecting Eggs and Equipment
For consistent results, start with eggs that aren’t brand-new. Older eggs peel more easily after a cool-down. Use a sturdy, medium-to-large pot with a lid and a slotted spoon to lift eggs when hot. Having a timer and a bowl of ice water ready ensures you hit the exact doneness you want and stop the cooking at the right moment.
The Core Method: Water-First Boil on the Stove
The standard stove-top method begins with a single layer of eggs in a pot. Cover them with water by about one inch, then place the pot on the stove over high heat. This approach reduces the risk of cracking by avoiding sudden temperature shocks and provides uniform cooking across the batch.
Timing for Doneness: Soft, Medium, and Hard
Timing is everything. Once the water reaches a rolling boil, remove the pot from heat and cover. Soft-boiled eggs typically sit for 3-4 minutes, medium for 6-7 minutes, and hard-boiled for 9-12 minutes depending on altitude and egg size. Use a timer and label batches to prevent mix-ups in future cooks.
The Ice Bath: How to Stop Cooking and Peel Easily
Immediately after your timer ends, drain the hot water and plunge the eggs into an ice bath for at least 5 minutes. The cold shock stops the cooking and helps separate the shell from the membrane, making peeling simpler. Peel under running water for best results if shells cling.
Peeling Like a Pro: Techniques that Work
Peel eggs under cool running water to seep under the shell’s membrane. Start at the wider end where a small air pocket sits, then slide the shell away in sections. If a spot sticks, re-center the egg in water and gently coax the shell off. This reduces frustration and preserves the egg’s surface.
Salt, Vinegar, and Flavoring: Small Tweaks with Big Impact
A pinch of salt in the cooking water can help with firm whites, while a splash of vinegar may ease peeling for very fresh eggs. If you like seasoned eggs, gently roll them in a bowl with a light coating of olive oil and your favorite seasonings after cooling.
Practical Batch Management: How Many Eggs at Once?
You can boil a dozen or more eggs at once as long as they sit in a single layer or slightly crowded with space. Avoid stacking. If your pot is crowded, consider cooking in two batches to ensure even heating and easier peeling.
Storing Boiled Eggs Safely
Refrigerate boiled eggs within two hours of cooking. Store them unpeeled in a container for up to one week. If peeled, keep them in an airtight container with a damp paper towel to prevent dryness and flavor absorption from other fridge items.
Troubleshooting Common Issues
If the yolk is greenish, it's usually from overcooking. If the shell sticks, the egg may have been fresh or not fully cooled. Cracked shells can happen if eggs are placed in vigorously boiling water; avoid this by starting with gently heated water and a gradual climb to temperature.
Altitude and Adjustments
Higher altitude can subtly alter timing. If you notice undercooked centers at sea level, add 30 seconds to the soft/medium ranges when cooking at higher elevations. Conversely, reduce time slightly if you notice overcooked flavors at lower elevations.
Everyday Uses: Quick Ideas After Boiling
Hard-boiled eggs are great in salads, sandwiches, or chopped with mayo for deviled eggs. Soft-boiled eggs pair well with toast or a steamed vegetable bowl. Having a reliable stove method makes these quick meals accessible any day of the week.
Clean-Up and Maintenance
Let the pot cool before washing. If shells debris cling to the pot, a quick soak with a little dish soap helps dissolve mineral buildup from water hardness. Wipe down the stove top to keep the cooking area tidy for your next batch.
Tools & Materials
- Eggs (as many as you plan to cook)(Prefer eggs at least a week old for easier peeling.)
- Medium to large pot with lid(Flat bottom for even heat; the lid traps steam for consistent cooking.)
- Slotted spoon(Used to lower eggs gently and lift them after boiling.)
- Timer (phone or kitchen timer)(Set separately for each doneness target.)
- Ice and cold water for ice bath(Chills eggs quickly to stop cooking.)
- Bowl for peeling or placing cooled eggs(Wide, not too deep to ease peeling.)
Steps
Estimated time: 25-30 minutes
- 1
Gather ingredients and equipment
Assemble eggs, pot, lid, spoon, timer, and a bowl of ice water. Having everything ready before you start prevents pauses during cooking.
Tip: Count on 10 minutes to prep if you’re new to batch cooking. - 2
Place eggs in a single layer in the pot
Arrange eggs in one layer to ensure even heat exposure. Avoid stacking, which can lead to uneven cooking.
Tip: Use eggs of similar size for uniform results. - 3
Add cold water to cover by about one inch
Cold water helps the eggs heat gradually, reducing the chance of cracking. A level pot depth keeps timing consistent.
Tip: Keep water level consistent across batches. - 4
Put pot on stove and bring to a boil on high heat
Warm the pot until the water reaches a rolling boil. A rapid boil ensures agitation that helps prevent cracking from sudden high heat.
Tip: If your stove is temperamental, monitor closely to avoid overflow. - 5
Remove from heat and cover; start timing
Once boiling, turn off heat and seal with the lid. Begin timing for your desired doneness (soft, medium, hard).
Tip: Don’t lift the lid during the timing window. - 6
Wait for the timer to signal completion
Keep eggs in the hot water as the residual heat finishes cooking. This yields consistent textures across the batch.
Tip: If you’re unsure, use a test egg to gauge doneness next time. - 7
Prepare an ice bath while cooking progresses
Fill a bowl with ice and water. This cool-down step quickly halts cooking and helps peeling.
Tip: Ice bath should be ready before you end the timer. - 8
Transfer eggs to the ice bath for 5–10 minutes
Cold immersion stops cooking and facilitates easier peeling. The timing varies slightly with egg size.
Tip: Leave the eggs fully submerged for even cooling. - 9
Drain and peel eggs under running water
Peel starting at the wider end and use water to loosen stubborn shells. Water helps separate membrane for easier removal.
Tip: Peel gently to maintain a smooth surface. - 10
Store peeled or unpeeled eggs properly
Refrigerate unpeeled eggs up to 1 week; peeled eggs should be kept in a container with a damp towel for moisture.
Tip: Label batches by doneness to avoid mix-ups. - 11
Consider flavoring or using in recipes
Use soft-boiled eggs for ramen or toast; hard-boiled eggs shine in salads or deviled egg plates. Plan ahead if you prep for meals.
Tip: Hard-boiled eggs last longer when stored whole. - 12
Clean up and reflect on results
Wipe the pot and stove, noting any adjustments for next time. Small tweaks improve repeatability for future batches.
Tip: Keep notes on timing and shell quality.
Common Questions
How long should I boil eggs for soft, medium, and hard results?
Soft: about 3-4 minutes after the boil-and-cover step. Medium: 6-7 minutes. Hard: 9-12 minutes. Times can vary with egg size and altitude, so start with these baselines and adjust by small increments.
Aim for 3 to 4 minutes for soft eggs, 6 to 7 for medium, and 9 to 12 for hard. Adjust slightly for your altitude and egg size.
Can I boil a lot of eggs at once without crowding?
Yes, you can boil a larger batch as long as eggs sit in a single layer. If space is tight, split into two pots or batches to ensure even cooking and easier peeling.
Absolutely—keep them in a single layer. If crowded, use two pots or do two batches.
Is it necessary to pierce eggs before boiling?
Piercing is optional and not required for most eggs. It can slightly reduce cracking in some very fresh eggs, but modern practice often skips this step altogether.
Piercing isn’t required; most cooks skip it unless cracking is a concern with very fresh eggs.
Why do some eggs peel badly after boiling?
Freshness affects peeling; older eggs peel more easily. Cooling quickly in an ice bath and peeling under running water also helps separate the shell from the membrane.
Fresh eggs can be trickier to peel; older eggs usually cooperate better, especially with a cool-down rinse.
How can I tell if an egg is fresh before boiling?
A simple float test helps: fresh eggs sink in water; older eggs may float due to air pocket expansion. Use the test along with shell inspection for best results.
Float tests are handy: sink means fresher; float suggests older eggs.
How should I store boiled eggs for safety and freshness?
Store unpeeled boiled eggs in the fridge for up to one week. Peeled eggs should be kept in a sealed container with a damp towel or kept submerged in water change daily.
Keep them in the fridge; unpeeled lasts about a week, peeled a bit less unless stored properly.
Watch Video
Top Takeaways
- Prep eggs and equipment before starting
- Use a water-first method for even cooking
- Time precisely for soft, medium, or hard yolks
- Ice bath stops cooking and eases peeling
- Store eggs properly to maximize shelf life