Boiling Eggs on the Stove: A Practical Guide
Master boiling eggs on the stove with precise timings, peeling tips, and safe handling for soft, medium, and hard-boiled results. A complete, step-by-step guide from Stove Recipe Hub.

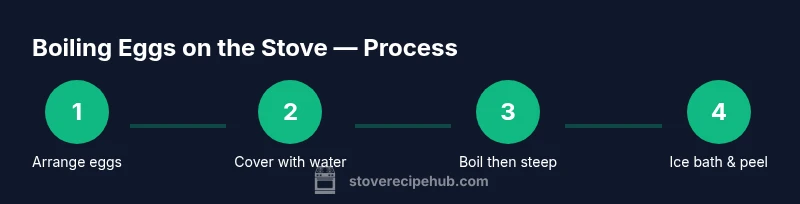
Start by placing eggs in a single layer in a pot, cover with cold water, and bring to a rolling boil on the stove. Remove from heat, cover, and let sit for the time needed for your preferred doneness, then shock in an ice bath. Gather a pot, eggs, water, timer, and ice.
Why boiling eggs on the stove is a reliable method
Boiling eggs on the stove is a reliable, controllable technique that yields consistent results when you manage heat, water depth, and timing. The method is simple, uses common kitchen equipment, and allows you to tailor the finish from ultra-soft to fully hard-boiled. The phrase boil eggs stove captures the classic approach many home cooks rely on, especially when precise doneness matters for salads, deviled eggs, or meal-prep. By starting with cold water, you reduce the risk of cracking the shells from a sudden temperature swing, and a careful simmer prevents overcooking. For beginners and seasoned cooks alike, the stove-top method offers tactile feedback: you hear the water reaching a gentle boil, observe the bubbles, and adjust as needed. This hands-on control is often preferable to electric gadgets because it teaches how heat interacts with eggs in real-time.
According to Stove Recipe Hub, mastering stove-top techniques for boiling eggs begins with a structured plan: store eggs at room temperature, choose a pot that fits them in a single layer, and have timing tools ready. The Stove Recipe Hub team emphasizes that reliability comes from consistency in water coverage, heat management, and rapid cooling after cooking. By sticking to a simple sequence, you can produce dependable eggs for any recipe.
To set expectations: soft-boiled eggs require shorter steep times, while hard-boiled eggs require longer, steady exposure to heat. The stove-top method is forgiving if you monitor carefully and use an ice bath to halt cooking fast. As you practice, you’ll intuit the ideal waiting times for your stove’s heat, altitude, and egg size, building a routine that reliably delivers your preferred doneness every time.
Understanding egg size, temperature, and altitude effects on boil time
Egg size matters. Large eggs generally take a bit longer to heat through than medium eggs, and extra-large eggs may require a minute or two more for the same level of doneness. Temperature also plays a role: starting with eggs at room temperature vs. straight from the fridge can shift timing by a minute or two. Altitude affects boiling points, which means you may need to adjust your steeping time slightly if you live at elevation. While these factors seem small, they compound across batches, so consistency matters more than chasing a perfectly exact minute. A practical approach is to standardize on eggs from the same size category and always begin with water that just covers the eggs by about one inch. That coverage helps heat distribute evenly and reduces shell cracks caused by uneven contact with heat.
At Stove Recipe Hub, the recommendation is to keep the pot sufficiently filled to cover the eggs by about 1 inch. If you’re cooking at altitude or with noticeably cold eggs, give yourself a minute or two more for the initial boil and adjust the steeping times accordingly. Use a gentle rolling boil instead of a roaring boil, which can jostle the shells and increase the chance of cracks. Your goal is steady heat that brings the water to a boil without violent agitation.
Water, heat, and timing: how to zone in on doneness
The core elements for perfect stove-top eggs are water depth, heat control, and precise timing. Start with a pot that holds all eggs in a single layer and enough water to cover them by about 1 inch. Bring the water to a full boil over medium-high heat, then reduce to a gentle simmer before you start the timing. The moment you reach the desired doneness, remove the pot from heat and switch to an ice bath to stop cooking. Timing varies with your preferred finish:
- Soft-boiled: 4–6 minutes after the water reaches a gentle boil and you’ve reduced heat.
- Medium: 7–9 minutes for a set white and partially runny yolk.
- Hard-boiled: 10–12 minutes for a fully set yolk with no creaminess.
If you go a minute or two over the target, you risk overcooking and developing a gray-green ring around the yolk. The ice bath is critical: it instantly cools the eggs and halts carryover cooking, preserving the exact texture you aimed for. Keep a timer handy and note the exact times for your stove so you can repeat your results consistently on future batches.
A practical guide to soft, medium, and hard textures without guesswork
Soft-boiled eggs require the least cooking time, which yields a bright, partially runny yolk. Medium eggs have a mostly firm yolk with a creamy center, while hard-boiled eggs are fully set. The stove-top method gives you the best chance to hit these textures by controlling the steeping time after the boil. A common approach is to bring the water to a rolling boil, reduce heat to a gentle simmer, then turn off the heat and cover for the precise interval needed for your target texture. Using a consistent batch size, water depth, and starting egg temperature makes the process predictable. If you are reusing eggs from a previous batch, be mindful that prior cooking can slightly alter the interior texture of new eggs. When in doubt, start with the softest target and move up to harder textures in subsequent batches.
Remember: the alloy of your stove, pot, and egg size influences exact times. Keep notes on your stove’s behavior to refine your personal timing curve.
Peel-friendly technique and post-cooking handling
Peeling can be the trickiest part of boiled eggs. An ice bath is your best friend here, as it cools the shells and tightens the membranes away from the shell. After the eggs have cooled for several minutes, crack the shell by gently rolling the egg on a counter, then peel under cool running water. The water helps loosen the shell and removes tiny membrane fragments that cling to the egg surface. If you plan to peel in advance, store peeled eggs in a container with a damp paper towel to keep them from drying out. For deviled eggs or salads, peeled eggs can be prepared in advance and refrigerated for up to a week. A quick rinse before use can remove any residual shell bits and ensure a clean presentation. This peeling technique works well with eggs boiled on the stove and kept in good conditions.
Pro tip: older eggs peel more easily than very fresh eggs because their pH is higher, which reduces the bonding between shell and membrane. If you’re buying eggs specifically for peeling, let them age a few days before boiling.
Troubleshooting: cracks, green rings, and flavor loss
Shell cracks during boiling are usually caused by sudden temperature changes or crowded pots where eggs collide. To minimize cracking, ensure eggs are in a single layer, avoid rapid boiling, and use room-temperature eggs when possible. The greenish-gray ring around the yolk occurs when eggs overcook and the iron in the yolk reacts with sulfur in the white; this can be avoided by not exceeding the recommended steeping times and by plunging eggs into ice water immediately after cooking. Flavor loss is rare with plain boiled eggs, but overcooking can lead to a sulfurous odor. If you find the flavor off, check the freshness of your eggs and ensure your water isn’t overly hard or heavily chlorinated. Occasionally, a slight rubbing of salt on the shell before boiling can help reduce cracking, but it’s not essential.
If peeling proves stubborn, give the eggs another minute in the ice bath and re-start peeling under running water. Small adjustments in timing and cooling can make a big difference in texture and ease of peeling.
Variations and serving ideas: beyond plain boiled eggs
Boiled eggs are versatile. For a quick protein boost, slice boiled eggs onto salads with a drizzle of olive oil and lemon, or mash them with a pinch of paprika for a simple filling. Soft-boiled eggs shine in Asian-inspired ramen or toast toppings, while hard-boiled eggs pair well with a classic deviled-egg recipe. You can also experiment with flavor by adding a pinch of salt, pepper, and herbs after cooking. If you’re meal-prepping, peel and store boiled eggs in a sealed container in the fridge for up to a week. For a quick snack, serve peeled eggs with a sprinkle of everything bagel seasoning or a dash of hot sauce to brighten the yolk. The key is to keep a basic method and vary serving ideas to suit your meals.
Safety, cleanup, and best practices after boiling eggs
After boiling, handle hot eggs with care. Use a slotted spoon to remove them from the water and transfer to an ice bath. When you’re finished cooking, drain the hot water safely and wash the pot and tools with warm, soapy water. Don’t leave hot water unattended, and keep kids away from the cooking area while the pot is on the flame. Storing boiled eggs should be done in a clean container with a tight lid, ideally with the shells on to preserve freshness. If you peel them for later use, keep them in a sealed container with a damp towel to maintain moisture. By following these steps, you’ll maintain safety and cleanliness in your kitchen while enjoying consistently perfect eggs.
Putting it all together: a repeatable stove-top method you can trust
The stove-top method for boiling eggs combines simple steps with reliable results. Begin with cold water, place eggs in a single layer, bring to a boil, reduce heat and cover, then remove from heat and hold for the exact time needed for your desired doneness. Ice bath promptly cools the eggs and stops cooking. Peel and store as needed. With a consistent approach to egg size, water depth, and heat control, you’ll have a dependable routine that makes hard-boiled eggs, soft-boiled eggs, and everything in between repeatable and easy.
Final note on flavor and texture control
Flavor and texture are closely tied to timing and cooling. Small adjustments in the steeping time, egg size, and water depth can yield noticeably different yolk textures. The key is to practice with a few batches, record your times, and standardize your process. Once you have a reliable routine, you can tailor it to your favorite recipes and personal preferences.
If you’re cooking for a crowd, boil eggs in bulk using the same method and coordinate a quick ice-water bath to ensure uniform results across all eggs.
Tools & Materials
- Saucepan or medium pot with lid(2- to 3-quart capacity; eggs fit in a single layer; water depth about 1 inch)
- Eggs(Room temperature if possible; choose similar sizes for consistent results)
- Water(Enough to cover eggs by ~1 inch, plus extra for safety if you’ll blanch in batches)
- Timer(Set for the exact steeping times; helps ensure reproducible results)
- Ice and bowl for ice bath(Ice bath stops cooking immediately and helps with peeling)
- Slotted spoon or tongs(Gentle handling to avoid cracking shells)
- Colander or clean kitchen towel(Drain water safely and dry eggs after cooling)
- Optional: salt or vinegar(Can help with peeling or flavor; not essential)
- Storage container(For storing peeled eggs in the fridge)
Steps
Estimated time: 15-20 minutes
- 1
Place eggs in pot
Lay eggs in a single layer in a pot and add cold water until they are covered by about 1 inch. This ensures even heating and reduces cracking from temperature shock. Turn on the stove to medium-high heat and bring to a gentle boil.
Tip: Starting with room-temperature eggs helps reduce shocking the shells. - 2
Heat to a rolling boil
Allow the water to reach a rolling boil. Once achieved, reduce heat to maintain a gentle simmer rather than a vigorous boil to prevent cracks and shell damage.
Tip: A calm boil reduces shell stress and yields more consistent results. - 3
Turn off heat and cover
Remove the pot from direct heat and cover it. Let the eggs steep in the hot water for the target time based on the desired doneness (soft, medium, or hard).
Tip: Keep the lid in place to trap heat and promote even cooking. - 4
Ice bath the eggs
While the eggs steep, prepare an ice bath. After the steeping time, transfer eggs to the ice bath to stop cooking instantly and to aid peeling.
Tip: The ice bath is crucial for stopping carryover cooking and easing peeling. - 5
Peel or chill for later
Peel immediately under cool running water for best results or store unpeeled in the fridge for later use. Peeled eggs store best in a container with a damp towel.
Tip: Peeling under water helps remove shell fragments cleanly. - 6
Variations and serving
Use peeled eggs in salads, deviled eggs, or snack platters. For soft-centered eggs, serve promptly while yolks are still creamy.
Tip: Surface moisture is fine; pat dry before serving to avoid soggy textures. - 7
Cleanup safely
Discard cooking water safely and wash cookware with warm, soapy water. Dry and return utensils to storage to prevent rust and contamination.
Tip: Let the pot cool before washing to avoid scalding or warping the surface.
Common Questions
What is the best method to boil eggs on the stove?
The best method is to start with eggs in a single layer, cover with cold water, bring to a rolling boil, remove from heat, cover, and steep for the target time. Finish with an ice bath to stop cooking and preserve texture.
Place eggs in a single layer, cover with water, bring to a boil, turn off heat, cover, steep, then ice bath for best results.
How long should I boil eggs for soft, medium, and hard textures?
Soft: about 4-6 minutes after the boil and heat reduction; Medium: 7-9 minutes; Hard: 10-12 minutes. Adjust slightly for egg size and altitude.
Soft is 4-6 minutes, medium 7-9, hard 10-12. Adjust for size and altitude.
Why do eggs crack during boiling and how can I prevent it?
Cracks usually come from temperature shock or overcrowding. Use room-temperature eggs, keep a single layer, and avoid a violent boil. Let the boil settle to a gentle simmer before cooking.
Cracks come from temperature shock or crowding. Use room-temp eggs and a gentle simmer.
How can I peel boiled eggs quickly and cleanly?
Ice bath, then crack and roll the egg to loosen shells before peeling under cool running water. Peeling under water helps remove stubborn shell fragments.
Ice bath, crack, roll, and peel under running water for clean shells.
Can I boil eggs straight from the fridge?
Yes, but allow a brief warming period if possible to reduce cracking from temperature shock. If not, start with cold water and monitor the boil carefully.
You can, but plan for a slightly longer cook time and watch for cracking.
How should I store boiled eggs after cooking?
Keep unpeeled eggs in the fridge for up to a week. If peeled, store in a sealed container with a damp towel to maintain moisture.
Unpeeled last up to a week in the fridge; peeled should stay moist in a sealed container.
Watch Video
Top Takeaways
- Use cold water and a single-layer setup for consistency.
- Timing depends on desired yolk texture: soft, medium, or hard.
- Ice bath quickly stops cooking and eases peeling.
- Peel under running water to remove stubborn shells.