Corn on the Cob on the Stove: Mastering Juicy Cob in Minutes
Learn how to cook corn on the cob on the stove with simple, reliable methods—boiling, steaming, and flavoring tips for juicy kernels every time. Stove Recipe Hub shares practical steps for home cooks seeking stovetop perfection.

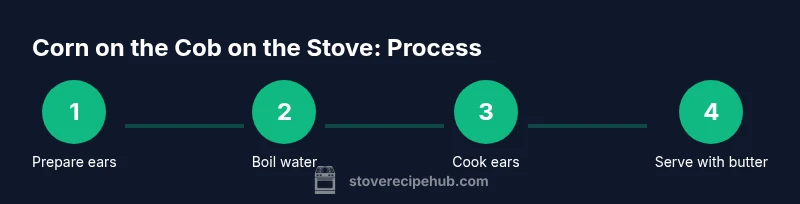
Goal: cook corn on the cob on the stove with a juicy, evenly tender bite. Steps in brief: 1) husk, trim, and rinse the ears; 2) bring a wide pot of salted water to a boil; 3) add corn and simmer 4–6 minutes; 4) drain and serve with butter. According to Stove Recipe Hub, this approach keeps flavor bright.
Selecting and Preparing Corn for the Stove
Choosing ears for corn on the cob on the stove is a small step with big payoff. Look for ears with plump kernels under bright, fresh husks, and avoid ears that feel dry or dull. If the weather is hot, corn can sweeten quickly, so try to buy within a day or two of cooking. For the best flavor on the stovetop, prepare the ears by removing the husks, silk, and trimming the ends. Rinse with cool water to remove silk remnants. If you plan to boil immediately, you can skip soaking. However, if you will steam or parboil, you might leave the husk on until just before cooking to protect moisture. The Stove Recipe Hub team notes that selecting crisp, sweet corn yields the tastiest corn on the cob on the stove, with kernels that pop when chewed. We’ll cover three primary stovetop approaches—boiling, steaming, and a quick finish on the grill—so you can choose based on timing, equipment, and preferred texture. Remember that the goal with corn on the cob on the stove is bright sweetness, a tender bite, and minimal water-logged texture.
The Core Method: Boil Method on the Stove
The most straightforward way to cook corn on the cob on the stove is the classic boil. Start by selecting large, heavy-bottomed pot and filling with water to cover the ears by about an inch. Bring the water to a rolling boil, then add the corn. Keep the pot at a lively simmer rather than a full rolling boil to prevent water from foaming and potentially washing flavor away. In a few minutes, the kernels will exhale a bit of sweetness and the color will brighten. For the best texture, set a timer for 4–6 minutes after the ears return to a boil. Remove with tongs and drain promptly to stop the cooking process. Return to the warm pot briefly to rest if you are serving soon. This method preserves crunch and sweetness in the corn on the cob on the stove, and is forgiving if you’re new to stovetop cooking. According to Stove Recipe Hub, timing matters more than the exact temperature in this method, so keep an eye on the ears and test a kernel near the tip for doneness.
Alternatives and Variations: Steaming, Parboiling, and Quick Finish Methods
Steaming keeps the corn on the cob on the stove bright and juicy without submerging it in water. Use a steamer basket or a rack above 1–2 inches of simmering water. Cover the pot to trap steam, and check for tenderness after 6–8 minutes. If you prefer a brisk finish or extra char, you can briefly grill the ears after steaming. Parboiling—briefly boiling for 2–3 minutes before finishing—softens the kernel and speeds up total cook time when you’re short on time. This approach also reduces the risk of overcooking. Regardless of method, the key is to maintain steady heat and avoid an overly aggressive boil that can leach flavor. For corn on the cob on the stove, steaming or parboiling helps retain natural sweetness and prevents waterlogged texture.
Timing, Texture, and Doneness: How to Tell When It's Ready
Understated but essential, doneness for corn on the cob on the stove is a balance of tenderness and snap. The kernels should be plump, bright, and slightly shiny, with a crisp bite when pierced with a fork. If the kernels resist at all, they are underdone; if they collapse under pressure, they’re likely overcooked. A quick press near the tip is often enough to judge. Remember that cooking times vary with ear size and freshness. The Stove Recipe Hub team emphasizes tasting one ear for sweetness as guidance; adjust your timing slightly if you notice a chalky or gummy texture.
Seasoning and Serving: Butter, Herbs, and Toppings
Serving corn on the cob on the stove invites simple seasonings. A generous pat of butter, a pinch of salt, and a crack of pepper highlight natural sweetness. For a more complex profile, try smoked paprika, chili powder, fresh chives, or a squeeze of lime. If you’re cooking for kids, a touch of grated Parmesan can be a crowd-pleaser. When the corn is hot, toss with butter and herbs in a warm dish to ensure melting. The phrase corn on the cob on the stove recurs here as a reminder of the core dish being prepared, and the resulting kernels should glisten with butter and steam.
Common Mistakes and How to Fix Them
One common mistake with corn on the cob on the stove is overcooking, which dulls sweetness and makes kernels tough. To avoid this, rely on a timer and test a kernel from the middle of the ear. Another pitfall is using water that’s not salted; salt helps flavor permeate the kernels. If your pot is too crowded, ears may steam rather than boil, resulting in uneven texture. If you notice foaming, lower the heat and remove a lid briefly. Finally, avoid peeling back leaves too early if you’re steaming, or you risk letting moisture escape and dulling flavor.
Safety, Cleanup, and Storage
Always handle hot pots with dry towels or oven mitts to prevent burns. Steam rises quickly, so keep hands away from the lid and vent. After cooking, rinse the pot to remove starch and let it air dry or towel dry. If you have leftover corn, refrigeration is best done soon after cooking; reheat gently on the stove or in a skillet with a little butter. The flavor remains most vibrant when consumed within a day or two.
Quick Weeknight Plan for Corn on the Cob on the Stove
With a few well-chosen ingredients and a simple sequence, you can have corn on the cob on the stove ready in about 20–25 minutes. Gather ears, butter, salt, and a large pot. Shuck and rinse, fill a pot with water, bring to a boil, add corn, and simmer 4–6 minutes. Drain, season, and serve with extra butter. This approach keeps things simple and satisfying for busy weeknights.
Tools & Materials
- Large pot (6-8 quarts)(Wide enough to hold ears upright and submerged)
- Tongs(For safe handling of hot corn)
- Sharp knife(To trim ends or shuck kernels if needed)
- Salt(To season boiling water)
- Butter or toppings(For serving)
- Steamer basket (optional)(For steaming method)
- Lid for pot(To trap steam when steaming or simmering)
- Chill-to-serve container (optional)(For storing leftovers)
Steps
Estimated time: 25-35 minutes
- 1
Prepare ears
Shuck the ears and remove silk. Rinse under cool water. Trim the ends to ensure uniform cooking. This ensures the corn browns evenly and cooks through in the same window.
Tip: Keep husks and silk handy for steaming if you change methods mid-cook. - 2
Choose your pot and water
Select a wide pot large enough to hold ears in a single layer. Add enough salted water to cover the corn by about an inch. Bring to a boil before adding corn.
Tip: A wide pot reduces crowding and promotes even cooking. - 3
Boil to cook
Gently lower ears into the boiling water using tongs. Return to a boil, then reduce to a simmer to prevent water loss of flavor. Cook for 4–6 minutes.
Tip: A gentle simmer preserves texture and sweetness. - 4
Test for doneness
Remove one ear and test a kernel—it should be tender but still crisp. If firm, continue cooking in 1-minute increments.
Tip: Tasting a kernel is the most reliable doneness test. - 5
Drain and rest
Carefully drain the pot and set ears on a warm rack or plate. Let rest for a minute so juices redistribute.
Tip: Resting helps prevent loss of moisture when biting into the cob. - 6
Season and serve
Add butter and a pinch of salt just before serving. Offer additional toppings on the side, like herbs or chili powder.
Tip: Butter should melt into the kernels for best flavor. - 7
Optional finish
If you want a slight char, transfer ears to a hot dry pan or grill for a minute per side.
Tip: Watch closely to avoid burning; char adds a nice depth. - 8
Storage and leftovers
Store cooled corn in the refrigerator. Reheat gently in a skillet with a touch of butter to regain sweetness.
Tip: Reheat with moisture to avoid drying out the kernels.
Common Questions
What is the best way to choose corn for the stovetop method?
Select ears that feel firm with plump kernels under fresh husks. Fresh corn yields sweeter, crisper kernels when cooked on the stove. Avoid ears that look dry or have limp silk.
Choose ears with plump kernels and fresh husks for best stovetop results.
Can I refrigerate corn after cooking on the stove?
Yes, cool leftovers promptly and store in an airtight container. Reheat gently in a skillet or with a splash of water to restore moisture.
Cool leftovers promptly and reheat gently to preserve moisture.
Is boiling the only method for corn on the cob on the stove?
No. You can steam or parboil before finishing on the grill. Each method offers different textures and intensities of sweetness.
You can steam or parboil before finishing on the grill for different textures.
How long does corn on the cob on the stove take compared to microwave?
Stovetop corn typically cooks in 4–6 minutes after water returns to a boil, which is comparable to microwaving but often tastier. Timing depends on ear size and freshness.
About 4–6 minutes on the stovetop after boiling, depending on ear size.
Can I add flavorings to the cooking water?
Yes. Salt is traditional; you can also add a pinch of sugar or a splash of milk for creaminess in some regional styles. Avoid overpowering flavors that mask corn sweetness.
You can salt the water, and add optional flavorings, but keep it balanced.
What are signs of overcooked corn?
Overcooked corn becomes mushy, kernels lose snap, and the sweet aroma fades. If in doubt, remove a kernel early and test.
Overcooked corn is mushy and lacks snap.
Watch Video
Top Takeaways
- Choose fresh corn for best flavor
- Use a wide pot and maintain gentle boil
- Test tenderness by kernel rather than time alone
- Finish with butter for best taste