How to Check If an Oven Works
Learn practical at-home checks to verify your oven heats accurately, test bake and broil, and know when to call a professional. This concise guide from Stove Recipe Hub keeps you safe and confident in everyday cooking.

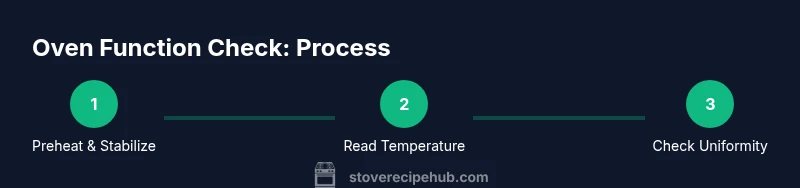
By the end of this guide you will confidently verify whether your oven operates correctly. You’ll learn safe preheat checks, how to read a thermometer, and how to test bake and broil elements. You’ll also know how to interpret readings from multiple shelves and what to do if readings drift, so you can cook with consistent results.
Why Verifying Your Oven's Functionality Matters
Testing your oven ensures meals aren’t spoiled, appliances safe, and energy used efficiently. According to Stove Recipe Hub, small calibration drift can lead to undercooked foods or wasted energy. This guide walks you through safe at-home checks and tells you when to call a pro. The oven is a central tool in home cooking, and knowing how to verify its operation gives you confidence in every bake, roast, and holiday meal. From safety checks to temperature accuracy, a systematic approach helps you catch problems early and avoid surprises when guests arrive.
Safety First: Electrical, Gas, and Heat Risks
Ovens combine electricity, gas (in many homes), and high heat. Before touching any controls, switch the oven off, unplug if safe, and ensure the area is dry and clean. If you smell gas, hear hissing, or notice burning odors, stop immediately, turn off the appliance at the wall if possible, and ventilate the area. Use heat-resistant gloves when handling racks or trays, and never bypass safety devices or ignore visible damage. Safe testing means planning for a cool-down period and wearing proper protective gear.
Quick Pre-Checks Before Powering On
Start with a clean interior: wipe away crumbs, check for rips in the door seal, and inspect the racks for secure placement. Ensure the display or knobs respond normally and that the oven will hold a steady temperature without temperamental fluctuations when idle. If your oven has a light, check visibility inside to observe heat buildup. These low-effort checks prevent misreading results later and can help you spot issues such as a faulty door seal or misaligned racks.
Bake Temperature Test: Reading the Reading
A reliable bake test uses an accurate oven thermometer placed in the center of the rack. Preheat to your target bake temperature and wait for 10-15 minutes for stabilization. Read the thermometer and compare it with the setting. If the reading is consistently off by a noticeable margin, you may need to calibrate the thermostat or consult a technician. Keep a log of readings, including the ambient room temperature, to identify patterns over multiple tests.
Temperature Uniformity Across Shelves
Move the thermometer to the top, middle, and bottom shelves to check how evenly heat distributes. If you notice consistent hot spots or cold spots, you’ll know that the oven might need coil replacement, a fan repair (in convection models), or door seal attention. For best results, verify readings within a few degrees of each other on each shelf and document any drift. Extreme drift usually signals a malfunction or miscalibration.
Broil Element Check and Visual Cues
Switch to broil and observe the top element’s behavior. It should heat quickly and glow evenly without flickering. If the element remains cool, glows faintly, or cycles irregularly, the broil element or control board may be failing. Use a temperature probe to remotely gauge surface temperature and avoid placing yourself directly over an active element. If you see smoke or unusual odors, shut down and inspect.
Troubleshooting Common Signs of a Faulty Oven
If preheating takes unusually long, if temperature readings drift persistently, or if heat stops at any setting, that’s an early warning signal. Common causes include a faulty thermostat, worn-out heating element, a damaged door seal, or a miscalibrated control. For gas ovens, irregular flame or weak ignition can also indicate a problem. Always rule out simple fixes like a loose plug, dirty sensors, or a blocked vent before scheduling service.
When to Calibrate or Replace Components
Many ovens allow user calibration in the settings. If your readings are consistently off, refer to your model’s manual to calibrate the thermostat. If calibration fails or drift recurs, professional service is recommended. Replacing a heating element or thermostat can restore accuracy and energy efficiency, while a damaged door seal may affect both safety and performance. Consider service if the cost of repair approaches the appliance’s value.
Maintenance Tips to Keep Your Oven Working
Regular maintenance reduces drift and extends life. Clean the interior after heavy use, inspect door seals twice a year, and use the right cookware to avoid hot spots. Keep vents clear of dust, test the oven’s temperature monthly during periods of heavy use, and schedule professional checks every year or two depending on usage. Preventive care helps you maintain reliable performance and reduces surprises during holidays.
Tools & Materials
- Oven thermometer (analog or digital)(Place in the center of the oven to read bake temperature accurately)
- Digital temperature probe thermometer(Use to monitor stable readings or test internal temperatures)
- Timer or smartphone timer(Track preheat and test intervals)
- Oven-safe baking tray(Place thermometer on tray or use as a test surface)
- Oven mitts / heat-resistant gloves(Protect hands when handling hot racks)
- Infrared thermometer (optional)(Helpful for surface temps but not a replacement for air temps)
- Notepad and pen (optional)(Record readings for comparisons)
Steps
Estimated time: 45-75 minutes
- 1
Power down and prepare for testing
Ensure the oven is off and cool before starting. Clear the area of flammable items and wear heat-resistant gloves to handle hot racks if needed.
Tip: Double-check that the appliance is not plugged in if you are performing any live electrical work. - 2
Preheat to the target temperature
Set the oven to your typical bake temperature (commonly 350°F/175°C) and allow it to preheat for 10-15 minutes until the thermometer reads steady.
Tip: Avoid opening the door during the first 5-7 minutes to prevent heat loss. - 3
Place thermometer and monitor stability
Position the oven thermometer in the center of the middle rack and wait 5-10 minutes for the reading to stabilize.
Tip: Keep the thermometer away from walls or racks that may distort the reading. - 4
Test bake temperature accuracy
Read the thermometer and compare it to the set temperature. If consistently off, note the drift and decide if calibration or service is needed.
Tip: Record readings with timestamps for trend analysis. - 5
Check heat distribution across shelves
Move the thermometer to the top and bottom racks to assess uniformity. If readings differ by more than a few degrees, adjust placement or inspect seals.
Tip: Open the door slowly to minimize heat loss. - 6
Broil element check and quick probe
Switch to broil and observe the top element’s heat. Use a probe to gauge surface temperature carefully and avoid direct contact with the element.
Tip: Do not leave the broil element unattended. - 7
Summarize findings and decide next steps
Review all readings. If drift is present or heating stops intermittently, plan calibration or professional service depending on the model.
Tip: Budget for a professional check if repairs exceed a practical threshold.
Common Questions
How can I verify my oven temperature is accurate?
Use an oven thermometer placed in the center of the rack and compare its reading with the set temperature after preheating. Record multiple trials to see if drift is consistent.
Place a thermometer in the middle of the oven and compare the reading to what you set. Do several trials to confirm consistency.
Can I safely test a gas oven without a professional?
Yes, with caution. Ensure proper ventilation, turn off the oven if you detect gas smell, and follow the manual’s safety steps. If you suspect a gas issue, contact a licensed technician.
You can test gas ovens safely by following safety steps and turning to a pro if you smell gas or hear hissing.
What should I do if my oven preheats but never stores heat?
That usually points to a thermostat or control board issue. Check the door seal for leaks, and consider calibration if supported by your model. If unresolved, professional service is advised.
If it preheats but won’t hold temperature, you likely have a thermostat or control problem.
Is it okay to use an infrared thermometer for oven testing?
Infrared thermometers can help assess surface temps but aren’t a substitute for air temperature readings inside the oven. Use them as a supplementary check.
An infrared thermometer is helpful for quick surface temps but not for the oven’s internal temperature.
How often should I check my oven?
Check at least once or twice a year, or more often during heavy cooking periods. Regular checks reduce the chance of surprises during holidays.
Do a quick check a few times a year or when you notice cooking issues.
What is the first sign of a failing bake element?
If the oven won’t heat evenly, takes too long to preheat, or the baking results are inconsistent, the bake element may be failing and needs inspection.
A failing bake element often shows uneven heating or slow preheating.
Watch Video
Top Takeaways
- Verify oven temperature with a thermometer.
- Test across multiple shelves for even heating.
- Document readings to detect drift over time.
- Calibrate or service if readings remain inconsistent.
- Practice safe testing and use proper protective gear.