Why Does the Stove Top Work but Not the Oven? Troubleshooting Guide
Urgent guide to diagnose why your stove top works but the oven won’t heat, with safe checks, common causes, and step-by-step fixes. Learn when to call a pro and how to prevent future issues.

When you notice why does the stove top work but not the oven, begin with safety checks and basic power/gas tests. Confirm the outlet, breaker, and gas supply are active, then reset the oven control. If heat still won’t appear, inspect the igniter, bake element, and thermostat, or call a licensed technician.
Why the Oven and Stove Top Differ: Separate Systems, Shared Risks
The question why the oven works on the stove top but not in the oven is more common than you might think, and it’s not just about heat sources. The stove top uses burners that rely on gas or electric coils, delivering heat to the pan quickly, while the oven operates inside a sealed chamber controlled by a thermostat, heating elements, igniters (for gas ovens), and safety interlocks. When the stove top functions but the oven stalls, the culprit is usually a component that governs heat delivery to the oven cavity, not the surface. As home cooks, you want practical, safe steps you can perform with confidence. This guide helps you distinguish symptoms from root causes and stay focused on fixes you can do without specialized tools. Safety first: if you smell gas, hear hiss, or feel unsure, stop and call a licensed professional.
According to Stove Recipe Hub, understanding the different pathways to heat in each part of your range allows you to triage efficiently. By keeping the focus on actionable diagnostics, you can often restore oven heat or know when it’s time to seek professional service. The Stove Recipe Hub team found that many oven heating issues stem from simple, approachable components that homeowners can verify safely.
Safety-First Checks You Can Do Before You Dig Deeper
Before you dive into diagnostics, ensure you are operating safely and within your comfort zone. Power down the unit and disconnect from power, then verify that gas supplies are secure if you have a gas oven. Check the circuit breaker or fuse box for a tripped breaker that could affect the oven’s control board but not the stove burners. If the oven is electric, confirm the 240V supply is stable and the outlet is not damaged. Do not use metal tools near heating elements. After safety checks, a simple reset can clear minor electronic glitches: unplug the unit for 60 seconds or switch the circuit breaker off and on. If you’re in doubt or you detect gas leaks, fumes, or sparking, stop and call a professional immediately.
Next, inspect basic mechanicals: the oven door latch and door seal, the oven light (if present), and wiring harness connections at the back of the control panel. On many models, a failed door switch can cause the oven to think it’s not closed properly, preventing heating. A blown fuse or failed timer can also stop heat from reaching the cavity.
Common Causes in Everyday Kitchens (Non-Professional Diagnosis)
There are several everyday culprits that cause an oven not to heat even when the stove top works. Distinguishing between electric and gas ovens helps target the likely fix:
- Electric ovens: a faulty bake or broil element, a burnt-out thermal fuse, a defective thermostat, or a malfunctioning control board can prevent heat from reaching the oven cavity. Visual signs include a visibly burnt element or an oven that won’t preheat.
- Gas ovens: a weak or failed igniter, a gas valve issue, or a faulty flame sensor can stop heat from being produced, even though the stove top derives heat normally. If you smell gas or hear a hiss, evacuate and call emergency services.
- Temperature sensor or thermostat: a faulty sensor can misreport temperature, causing the oven to shut off or never reach target heat.
- Wiring and harness problems: loose or damaged wires behind the control panel can interrupt power to heating elements or igniters.
Top tip: always test with model-specific diagnostic steps in the user manual; components and layouts vary by brand and year.
Electrical, Gas, and Control System Considerations
The root cause often lies in differences between how the oven is controlled vs how the stove top is heated. Electrical ovens rely on a dedicated 240V circuit; a tripped breaker or a blown fuse can affect the oven’s power while leaving the stove top unaffected. Gas ovens depend on gas supply, valve operation, and ignition systems; a poor ignition results in no flame and no heat. Control boards manage oven function, timing, and temperature regulation. When the oven won’t heat, it’s essential to distinguish whether the issue is power-related, gas-related, sensor-related, or a faulty heater element. If you’re not comfortable testing electrical components or gas valves, do not attempt these checks—call a pro.
Keep an eye on safety features: certain faults can trigger a fault code or error message on modern ovens. A failed self-clean cycle can also affect performance. While some issues are straightforward, others require specialized testing equipment and replacement parts.
The Diagnostic Flow in Practice
Putting the symptoms into a structured diagnostic flow helps you avoid unnecessary parts replacement and keeps you safe. Start with the low-risk checks, then progress to component tests only if you’re comfortable:
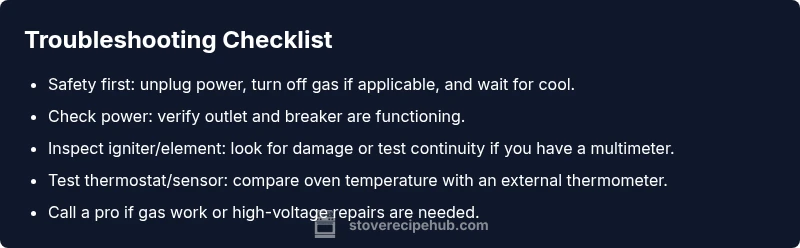
- Symptom confirmation: oven fails to heat despite a functioning stove top. 2) Immediate safety check: power off, gas off if applicable, unplug or switch off circuit. 3) Power and control: verify the outlet, circuit breaker status, and the control panel for error codes. 4) Heating pathway testing: for electric ovens, check bake/broil elements; for gas ovens, check igniter and gas valve operation. 5) Sensor and board: test sensors or refer to codes; consider resetting the control board if the model supports it. 6) If heat remains absent, call a licensed technician—particularly for gas or electrical work.
Document symptoms, notes, and any codes before you call a pro so the technician can work efficiently.
Step-by-Step: Detailed Fix for the Most Common Cause
- Safety first: unplug the oven, switch off the circuit breaker, and if gas, turn off the gas supply. 2. Visual inspection: look for obvious signs of damaged wiring, burnt elements, or melted insulation around the bake element or igniter. 3. Test heating elements or igniter: for electric ovens, check the bake element for continuity; for gas ovens, verify the igniter glows and the flame lights. 4. Thermostat and sensor: compare oven temperature with a separate oven thermometer; if temperatures diverge, replace the sensor or calibrate the thermostat if the model allows. 5. Control board and wiring: reseat and inspect wire harness connections; replace if any terminal pins are burned or loose. 6. Reassembly and test: plug back in, restore power, select bake and preheat to verify heat. If issues persist, escalate to a professional with model specifics and codes.
Tip: keep a log of steps you perform and any error codes displayed so the technician has a clear starting point.
Tips & Warnings
- Pro_tip: Always cut power and isolate gas before touching any electrical or gas components.
- Warning: Do not attempt to bypass safety interlocks or fire up gas lines without proper training.
- Note: Modern ovens can store fault codes; document any displayed codes before contacting support.
- Pro_tip: Have your model, serial number, and purchase date ready when seeking help or ordering parts.
- Warning: If you smell gas, exit the area immediately and contact emergency services.
Key Takeaways
- Prioritize safety and gradual testing over random part replacement.
- Electric ovens most often fail due to heating elements or thermostats; gas ovens more often due to igniters or gas valves.
- A proCheck is required for gas work or complex electrical diagnostics.
Video Embed
Frequently Asked Questions
Where to Start If You’re Short on Time
Steps
Estimated time: 45-60 minutes
- 1
Power down safely
Unplug the oven or switch off the dedicated circuit. If gas, shut the gas supply. Wait for all coils to cool before handling. This prevents accidental shocks or gas exposure and sets a safe baseline for testing.
Tip: Always start with safety—unplug and cool before touching any components. - 2
Check power and gas supply
Verify the outlet or circuit is live by testing a known working device on the same circuit. For gas ovens, ensure the gas supply valve is open and that there are no gas leaks in the area before proceeding.
Tip: A simple outlet tester can confirm 120V presence if the oven requires a secondary control input. - 3
Test igniter and heating elements
For electric ovens, inspect the bake and broil elements for visible damage and test continuity with a multimeter if you have one. For gas ovens, observe if the igniter glows and lights the flame within a reasonable time; a stuck or weak igniter is a common fault.
Tip: If you’re unsure how to test with a multimeter, skip to manual inspection or call a pro. - 4
Check thermostat and sensor
Compare oven temperature with an independent thermometer placed inside the oven. If there’s a persistent discrepancy, the sensor or thermostat may be out of spec and require replacement.
Tip: Document any temperature readings and codes to help the technician diagnose faster. - 5
Inspect door seal and wiring
Look for gaps in the door gasket and check wiring harness connections at the back of the control panel. A damaged door seal can cause heat loss and poor heating performance; loose or burnt wiring can interrupt power to heating components.
Tip: Take photos of wiring before disconnecting anything so you can reassemble correctly. - 6
Call a pro if not resolved
If the oven still won’t heat after these checks, it’s time to contact a licensed technician. Provide make, model, symptoms, and any error codes to streamline service.
Tip: Have your model number and purchase info on hand when scheduling service.
Diagnosis: Oven won't heat while stove top functions normally
Possible Causes
- highIgniter or bake element failure
- mediumThermostat or sensor fault
- mediumFaulty control board or clock
- lowElectrical supply issues or tripped breaker
- lowGas valve or safety valve issue (gas ovens)
Fixes
- easyTest and replace igniter or baking element as needed
- mediumCalibrate thermostat or replace faulty sensor
- hardReset or replace control board; check wiring harness
- easyRestore power (breaker) or correct electrical supply; check outlet
- hardIf gas-based, call licensed technician and verify gas line and safety valve
Common Questions
Why does the oven not heat but the stove top still works?
Oven heating is controlled by separate heating elements, a thermostat, and possibly an igniter or sensor. The stove top uses its own burners. A fault in the oven’s heating path, such as a blown bake element or faulty igniter, can stop oven heat while the stove top remains unaffected.
Oven heat is a separate system from the stove top. If the oven won’t heat, check the bake element, igniter, thermostat, and electrical or gas supply. A professional may be needed for gas and electrical components.
What should I check first if the oven won’t heat?
First confirm power to the unit and, if applicable, the gas supply. Check for error codes on the display, verify the oven is set to a valid bake temperature, and ensure the door is properly closed. If these basics fail, proceed to component checks such as elements and sensors.
Start with safety power checks and look for error codes. If nothing obvious appears, inspect the heater elements and sensors next.
How can I tell if the bake element or igniter is faulty?
For electric ovens, a visibly damaged bake element or a failed continuity test indicates replacement. For gas ovens, a non-glowing igniter or delayed flame suggests ignition issues. If unsure, testing with a multimeter or professional inspection is advised.
Look for physical damage on the bake element or igniter and check continuity if you have the tools. If the flame won’t ignite in a gas oven, consider calling a pro.
Is it safe to reset the oven control panel myself?
Yes, as a first step, you can reset the control by unplugging the unit or turning off the circuit breaker for a minute or two. If the oven still won’t heat after a reset, the problem likely lies with a sensor, element, or control board that needs professional service.
A simple reset can clear minor errors, but if heating doesn’t return, consult a technician.
When should I definitely call a professional?
Call a licensed technician if you detect gas smells, if there’s no ignition after trying safe resets, or if electrical work is required. Gas and high-voltage components require specialized tooling and safety protocols.
If you smell gas or can’t safely diagnose electrical issues, it’s time to call a pro.
Watch Video
Top Takeaways
- Start with safety and simple power checks.
- Electric ovens usually fail due to heating elements or thermostats.
- Gas ovens most often fail at ignition or gas valve level.
- A structured diagnostic flow saves time and parts.
- Know when to call a licensed pro for gas or electrical work.