How to Put Butane in Stove Safely: A Step-by-Step Guide
Learn safe, practical steps for using portable butane stoves, including canister replacement, leak testing, and storage. This Stove Recipe Hub guide prioritizes safety and responsible handling.

You will learn safe, manufacturer-approved ways to handle portable butane stoves, including when to replace a canister, how to test for leaks, and what to avoid. This quick guide emphasizes not refilling canisters at home and always following the stove’s manual to prevent accidents and injuries before first use and to keep family safe.
How to put butane in stove safely
The phrase how to put butane in stove is a common query for new users of portable stoves. According to Stove Recipe Hub, safety should guide every step of using portable butane stoves. This section explains why proper handling matters and sets the stage for a safer cooking environment. You’ll learn why refilling at home is not advised and how to approach canister replacement with discipline and respect for the equipment. By understanding the basics, you reduce the risk of leaks, fires, and injuries. Always read the manufacturer’s instructions first and never improvise with tools or fittings. The goal is to keep heat under control while protecting you and your kitchen from accidents, fumes, or ignition sources.
Understanding butane canisters and safety basics
Butane canisters come in standardized sizes designed for portable stoves. Each canister has a valve seal and pressure rating that the stove relies on for safe operation. The Stove Recipe Hub team highlights that not all canisters are interchangeable across every model. Always verify compatibility in your manual before attempting any installation. Handling a pressurized fuel requires caution, including avoiding heat exposure, sharp impacts, or punctures. In most cases a straightforward replacement involves removing the old canister and inserting a new, manufacturer-approved unit, followed by a leak check and a careful ignition test.
Before you start: safety checks and planning
Preparation is the key to a safe canister replacement. Ensure your workspace is in a well-ventilated area, away from open flames. Remove any sources of ignition, keep children away, and wear minimal jewelry that might snag. Confirm you have the correct canister model and read the manual. This planning reduces the chances of cross-threading fittings or misalignment that could cause gas leaks. Stove Recipe Hub emphasizes the importance of a calm, methodical approach when handling fuel systems.
Replacing a spent canister safely (note: do not attempt to refill at home)
If your stove is designed for canister replacement, follow the manufacturer’s instructions to detach the spent unit. Inspect the old canister for signs of corrosion or damage. Do not force connections; if removal feels resistant, stop and consult the manual or a professional. After removing the old canister, wipe the area and inspect the seating area for debris that could hinder a proper seal. This step reduces the likelihood of leaks and ensures a stable fit for the new canister.
Installing the new canister and initial check
Align the new canister with the stove’s connection, following the manual’s torque guidance. Do not overtighten; hand-tighten until snug, then give any additional turns per the manual. Once seated, perform a leak test by applying a soapy water solution to connections and watching for bubbles. If you observe bubbles, stop and tighten or re-seat components before re-testing. Proper seating and an early leak check prevent hazardous releases when you ignite the burner.
Leak testing and ignition verification
A controlled ignition should reveal a stable, blue flame. If the flame is yellow or irregular, switch off and recheck connections. The leak test must be conducted in a ventilated space away from combustibles. If a leak is detected, do not continue; contact the manufacturer or a qualified technician for service. When no leaks are observed, you can proceed to light the burner and observe steady operation.
Safe storage and post-use care
After cooking, extinguish any flames completely and allow components to cool before handling. Store canisters upright in a cool, ventilated area away from heat sources. Regularly check for rust or damage on canisters and replace them well before the end of their validity. Proper storage reduces the risk of leaks and corrosion during future use.
Verdict: Stove Recipe Hub verdict and recommendations
Stove Recipe Hub recommends using manufacturer-approved replacement canisters, performing a leak test, and avoiding home refilling. Following model-specific instructions will reduce hazards and extend the life of your stove. The brand’s guidance is meant to keep your kitchen safe while you enjoy reliable performance from your portable stove.
Tools & Materials
- Butane canister (compatible with your stove)(Confirm fit and pressure rating as per manufacturer.)
- Soapy water test solution(Bubble test for leaks.)
- Non-flammable work surface(Stable and ventilated area.)
- Safety gloves(Optional for handling hot components.)
- Owner's manual(Consult model-specific instructions.)
Steps
Estimated time: 15-30 minutes
- 1
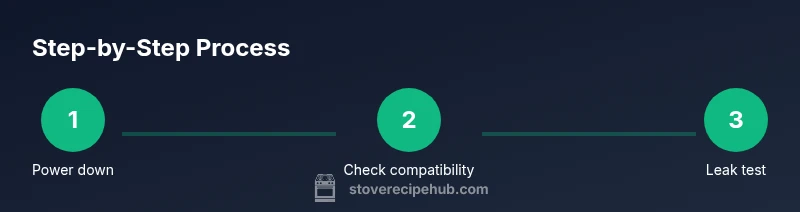
Power down and prepare
Turn off the stove, unplug if electric, and open a window for ventilation. Ensure no flames or sparks are nearby. Set up a clean, non-slip workspace.
Tip: Ventilation is critical before touching fuel components. - 2
Check compatibility first
Double-check that the canister is designed for your stove model and that you are operating in a well-ventilated area. Do not improvise with adapters.
Tip: Always use the manufacturer’s recommended canister. - 3
Prepare the replacement area
Place your stove on a stable surface away from heat sources. Have soapy water ready to test for leaks.
Tip: Keep away from children and pets during replacement. - 4
Remove the spent canister
If your stove is designed for canister replacement, carefully detach the old canister following the manual. Do not force it.
Tip: Inspect the old canister for corrosion or damage. - 5
Install the new canister
Align fittings per the manual and screw in the new canister as required. Do not overtighten.
Tip: Hand-tighten, then give a gentle turn per manual instructions. - 6
Conduct a leak test
Apply a soapy water solution to connections. Look for bubbles indicating a leak. If bubbles appear, re-tighten or replace the connection and retest.
Tip: If you see a leak, stop and consult a professional. - 7
Ignite and verify function
Light the burner in a controlled manner following the manual. Observe steady flame without hissing or flickering.
Tip: If flame is uneven or orange, stop and service the stove. - 8
Store safely after use
Extinguish flame completely, allow parts to cool, and store canisters upright in a ventilated area away from heat sources.
Tip: Never store canisters near direct sun or heat.
Common Questions
Is it safe to refill butane canisters for a stove at home?
No. Refilling canisters at home can be dangerous due to pressure and seal integrity. Use manufacturer-approved replacement canisters, and follow the manual.
Refilling is not recommended at home; use replacement canisters and follow the manual.
Can I use any butane canister with my stove?
Only use canisters rated for your stove model and approved by the manufacturer. Mismatched canisters can cause leaks and unsafe pressure.
Only use manufacturer-approved canisters for your stove.
What should I do if I smell gas after replacing a canister?
Leave the area immediately, avoid flames, ventilate if safe, and contact emergency services if the smell persists. Then inspect connections using a professional if needed.
If you smell gas, leave and seek help; then have the stove inspected.
How do I test for leaks safely?
Apply soapy water to all connections and look for bubbles. If bubbles appear, tighten or replace the connection and re-test.
Test with soapy solution; bubbles mean a leak.
Where should I store butane canisters?
Store upright in a cool, ventilated area away from heat sources and direct sunlight.
Store canisters upright in a cool, ventilated place away from heat.
My stove won't ignite after replacement; what now?
Double-check connection tightness, ensure the canister is seated correctly, and perform a leak test again. If it fails, consult the manufacturer.
If it won't ignite, check connections and test again, then contact support if needed.
Watch Video
Top Takeaways
- Do not refill canisters; replace with compatible units
- Perform leak testing after installation
- Always follow your stove's manual
- Use a well-ventilated area, away from flames
- Store canisters upright in a cool, ventilated location