How to Stop a Stove from Clicking: Safe, Practical Fixes
Learn practical, step-by-step methods to stop your stove from clicking. Diagnose ignition issues, clean the igniter, and prevent future sparks with safe stove-top maintenance guidance from Stove Recipe Hub.

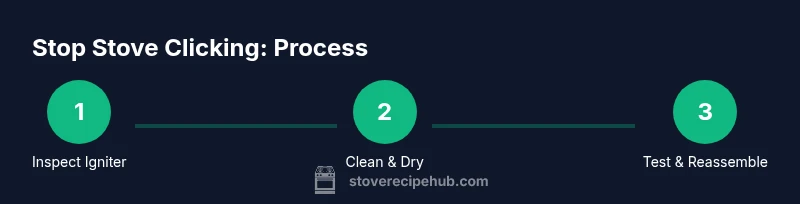
This guide helps you stop a stove from clicking by pinpointing ignition causes, cleaning the igniter, and restoring proper burner operation. You'll learn a quick safety checklist, a practical step-by-step fix, and maintenance routines to prevent future sparks.
Why a Stove Clicks
A stove click is usually the ignition sparking as the burner attempts to light. In many cases, the click is harmless, but persistent or loud sparking can indicate a deeper issue. According to Stove Recipe Hub, understanding the root cause is the first step toward a safe and reliable fix. Factors like moisture, spilled liquids, food debris, or a misaligned burner cap can disrupt the ignition sequence and cause repeated sparks. Recognizing these signals early helps prevent gas buildup or accidental ignition and keeps your stove performing at its best.
Common Causes of Ignition Clicking
Several common culprits can make a gas stove click endlessly. Dirty or corroded igniter electrodes can fail to light efficiently, prompting repeated sparking. Moisture from spills or steam can short-circuit the ignition path, while a loose or misaligned burner cap can redirect the spark away from the gas flow. A cracked igniter or damaged wiring is a more serious issue that typically requires component replacement. Regularly inspecting these parts reduces unnecessary clicking and improves reliability.
Safety-First Checks Before You Touch the Burner
Before digging into fixes, perform a quick safety check. If you smell gas, leave the area immediately and ventilate, then call emergency services if the odor persists. Do not operate any electrical switches or flames while gas is present. Ensure the oven and stove controls are off, and disconnect the appliance if you can safely do so. These precautions protect you from potential gas leaks and fire hazards while you troubleshoot.
Cleaning and Maintenance Steps to Reduce Sparking
Clean the burner head and igniter with a dry microfiber cloth to remove loose debris and moisture. For stubborn residues, dampen a cloth lightly with isopropyl alcohol and wipe the igniter contacts gently, then allow them to dry completely. Avoid applying liquids directly to the ignition area, and never use abrasive cleaners on the electrodes. Once clean and dry, reassemble any burner caps and components, ensuring a snug, even seating.
How Moisture, Spills, and Dirt Affect Ignition
Water and spills can create a temporary insulating layer between the igniter and gas outlet, causing weaker sparks or mislighting. Food grease and sugar residues can also form a sticky film that interferes with the electrode's arc. Regular wiping after cooking, especially around the burner bases, minimizes these effects. If you notice consistent issues after cleaning, deeper electrical or mechanical problems may be present and deserve professional attention.
Routine Maintenance to Prevent Future Clicks
Create a simple maintenance routine: wipe down the burner heads after each use, inspect the igniter for cracks, and check burner caps for proper alignment every few weeks. Keep the ignition area dry, especially after boiling water or steaming vegetables. Schedule a yearly check of wiring insulation and connections if you notice loose parts or escalating sparking. Small, proactive steps save time and reduce risk.
When to Call a Professional and What to Expect
If clicking persists after cleaning and basic checks, or if you detect a gas smell, contact a licensed technician promptly. A pro will diagnose ignition circuitry, electrode integrity, and gas supply lines with specialized tools. Expect a safety assessment, potential igniter replacement, and verification of gas pressures and valve operation to restore safe operation.
Tools & Materials
- Isopropyl alcohol (70% or higher)(For gentle cleaning of igniter contacts)
- Microfiber cloths(Soft, non-abrasive surfaces to avoid scratches)
- Soft brush or old toothbrush(Loosen debris from burner head and igniter area)
- Dry rag or paper towels(Dry surfaces after cleaning to prevent moisture)
- Safety gloves(Protect hands during inspection and cleaning)
- Screwdriver set (Phillips and flathead)(Only if you need to remove burner caps or panels)
- Flashlight(Better visibility for inspecting igniter and wiring)
Steps
Estimated time: 20-45 minutes
- 1
Power down and assess safety
Turn off the stove and, if gas is involved, switch off the gas supply at the valve. Do not attempt any fixes if you smell gas strongly. Wait for any lingering gas to disperse before proceeding.
Tip: If you smell gas, evacuate immediately and call the utility or emergency services. - 2
Inspect the ignition electrode and burner cap
Remove the burner cap and inspect the igniter for cracks, corrosion, or loose mounting. Ensure the burner cap sits evenly and is not tilted or misaligned.
Tip: A loose cap can shift the spark away from the gas outlet, causing ineffective lighting. - 3
Clean igniter and burner surfaces
Wipe the igniter contacts and surrounding burner area with a dry microfiber cloth. Lightly dampen a cloth with isopropyl alcohol if residues persist, then dry completely.
Tip: Never pour liquid directly onto the igniter; moisture can worsen sparking or damage components. - 4
Check for moisture and dryness
Ensure all ignition components are fully dry before testing. If moisture remains after cleaning, wait several minutes and re-check.
Tip: Use a hair dryer on a cool setting briefly if moisture lingers in a stubborn area—not on electrical parts. - 5
Reassemble and test the burner
Place the burner cap back correctly, ensure everything sits flush, and turn on the burner to observe whether the click stops after lighting.
Tip: If the burner lights but continues to click, the issue may be deeper than surface cleaning. - 6
Inspect for gas leaks and wiring integrity
While the unit is off, visually inspect exposed gas lines and wiring for wear or damage. Do not use tools that could puncture lines; call a pro if you notice anything unusual.
Tip: Never test for leaks with a flame; use a soap solution and look for bubbles instead. - 7
Consider ignition component replacement
If ignition continues to misfire after cleaning and checks, the igniter or control module may be failing. Replacement by a professional is typically safer and more reliable.
Tip: Record model numbers and take photos before purchasing replacement parts. - 8
Establish a preventive routine
Adopt a quick post-cooking wipe-down and a monthly ignition inspection to minimize recurrent issues.
Tip: Sticking to a routine reduces the chance of buildup that causes future sparking.
Common Questions
Why does my stove click constantly even after cleaning?
If cleaning doesn’t stop the clicking, the issue may be a cracked igniter, loose wiring, or a failing control module. A professional inspection is recommended to prevent gas exposure risks.
If cleaning doesn’t help, the problem could be a damaged igniter or wiring, so contact a professional for a safe check.
Is it safe to keep using a stove that keeps clicking?
Short-term use may be possible if the burner lights quickly and there’s no gas smell, but persistent clicking is a warning sign. Stop using it and seek professional help to avoid risk.
Persistent clicking is a warning sign. Stop using the burner and get a professional check.
Can I fix the igniter myself?
Basic cleaning is safe, but sparking issues from damaged components or wiring require professional replacement. Do not attempt to replace electrical parts without proper training.
You can clean safely, but replacing parts should be done by a professional.
What should I do if I smell gas when the stove clicks?
Leave the area immediately, don’t operate switches, and call the gas company or emergency services. Gas smells indicate a potentially dangerous leak.
If you smell gas, leave quickly and call for help right away.
How long does it typically take a technician to diagnose ignition problems?
Most professional assessments take 30-60 minutes, depending on the stove model and the complexity of the ignition system.
Most checks take about half an hour to an hour.
Are there preventive maintenance steps I can do monthly?
Yes. Wipe the burner heads, inspect igniters for wear, ensure caps sit flush, and dry all components after cleaning to minimize future issues.
Clean monthly and keep everything dry to prevent recurring sparking.
Watch Video
Top Takeaways
- Identify root cause before disassembly.
- Regular cleaning reduces sparking and improves reliability.
- Moisture and misaligned caps are common culprits.
- Never ignore gas odors; safety first.
- When in doubt, consult a professional.