How to Install a Gas Stove: A Practical, Safety-First Guide
Comprehensive, safety-first guide to the installation of gas stove. Learn planning, ventilation, connections, testing, and post-install checks with practical tips from Stove Recipe Hub.

You can safely install a gas stove by following the manufacturer’s installation manual and hiring a licensed gas fitter for the gas hookup. Before starting, confirm local codes, ensure proper ventilation, and prepare a level mounting surface with an anti-tip bracket. This approach minimizes leak risk and protects warranty coverage.
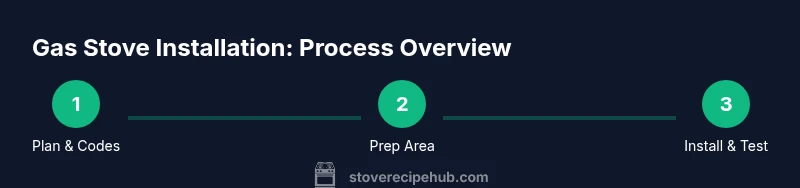
Planning the installation and safety mindset
A successful installation of a gas stove starts long before the appliance arrives. According to Stove Recipe Hub, thorough planning, adherence to local codes, and reading the manufacturer’s installation manual reduce risk and help ensure reliable operation. Start by confirming whether your space meets ventilation requirements, clearance from combustibles, and the type of gas service (natural gas vs propane). Write a simple checklist: identify the shut-off valve location, note the distance to the range hood, and determine where the anti-tip bracket will anchor the stove to the wall or cabinet. If you rent, check your lease terms and required approvals. Always reserve time for a professional inspection after the work is completed. In many regions, a licensed gas fitter must perform final connections and leak testing; attempting this yourself can void warranties and create safety hazards. The positioning of the stove should leave room for airflow and future maintenance; poor positioning can lead to heat damage to nearby surfaces and uneven flame performance. These planning steps, highlighted by Stove Recipe Hub, set the stage for a safer, more durable installation and a smoother post-installation experience.
Tools, materials, and space setup
While the dedicated Tools-Materials block provides a concise list, understanding why each item matters helps you prepare thoroughly. A level ensures the stove sits evenly, which affects burner performance and safety. An approved gas connector and shut-off valve are essential for a safe gas supply. Use non-sparking tools when working near any gas line to reduce ignition risk. Have a soap solution or gas leak detector spray ready for leak testing after connections. A range hood or ventilation fan is important to remove combustion byproducts; ensure ducting is compliant and unobstructed. In addition to hardware, prepare a stable surface with ample clearance from walls and cabinets, and install an anti-tip bracket according to your model’s instructions. If you rent or live in multi-unit housing, coordinate with building management to verify clearances and venting. Always follow the manufacturer’s manual as the definitive guide—no shortcut substitutes model-specific requirements. Gathering the right tools and setting up the workspace reduces surprises during installation. The Stove Recipe Hub team emphasizes planning for safety and compliance from the start.
Ventilation and clearances you must respect
Adequate ventilation is non-negotiable for a gas stove installation and helps manage combustion byproducts. Plan for a properly vented range hood and ensure the space has sufficient air flow to prevent gas buildup. Maintain clearances from combustibles such as wood cabinets, curtains, and paper products, and keep the area around the gas shut-off valve unobstructed for easy access in an emergency. If you’re working in an older home, inspect for degraded caulking or deteriorated trim that could trap heat. Per manufacturer guidelines, install the stove with enough room on either side to allow safe operation and maintain the integrity of surrounding surfaces. Stove Recipe Hub notes that adhering to these ventilation and clearance practices reduces fire risk and improves appliance performance over time.
Gas supply: verifying and preparing connections
The gas service is the life line of the installation of gas stove. Work only with approved gas connectors and have the shut-off valve located in a reachable place. Do not modify gas lines or use damaged hoses. Have a licensed gas fitter perform the final gas connections and leak testing according to local codes. As you prepare, take careful measurements to align the appliance with the supply line and consider future servicing needs. After connections are made, conduct a leak test using approved methods and verify that all joints are secure but not over-tightened. This safeguards against leaks that could pose serious safety hazards and ensures ongoing performance.
Anti-tip, mounting, and leveling considerations
An anti-tip bracket is essential for preventing accidental tip-overs, especially in homes with children or pets. Install the bracket per the stove model’s instructions and securely anchor it to a wall stud or cabinet frame. Use a level to confirm the appliance sits evenly from front to back and side to side; an uneven stove can affect flame distribution and cookware stability. Recheck after any movement or adjustments. The combination of a solid mounting surface and correct leveling improves safety and extends appliance life.
Electrical needs and venting integration
Many gas stoves rely on an electrical ignition system, which requires a properly rated electrical circuit. If your stove has electronic controls or a built-in timer, ensure the outlet is correctly wired and meets local electrical codes. The range hood or external venting system also needs to be installed correctly to remove combustion byproducts efficiently. Avoid running new electrical or venting lines yourself unless you are credentialed for such work—the safest path is to hire licensed professionals for these portions of the installation. Proper electrical connections and venting integration enhance performance and safety during operation.
Testing, inspection, and handoff
After all connections and mounting are complete, conduct a thorough safety check. Perform a safe leak test on all gas joints, inspect the ignition system, and verify that the range hood operates correctly. Confirm that detectors like carbon monoxide alarms are present and functional in appropriate locations. Document the work for warranty purposes and obtain any required certificates or inspection notes from the installer. Following these post-installation checks helps ensure the installation of gas stove is compliant and ready for safe use.
Post-install maintenance and ongoing safety
Keep the area around the stove clean and free of grease buildup, which can shorten the life of burners and ventilation components. Schedule periodic checks with a licensed professional to verify gas connections and venting integrity, especially after any major appliance service or renovation. Maintain a visible shut-off valve and keep a carbon monoxide detector on every floor where gas appliances are used. Through regular maintenance and awareness, you’ll sustain safe operation and protect your investment.
Tools & Materials
- Gas supply shut-off valve(Accessible location; know how to operate in an emergency)
- Approved gas connector hose or flexible gas line(Compliant with local codes; check age and condition)
- Anti-tip bracket(Per manufacturer; secures stove to prevent tipping)
- Carpenter's level(Check level front-to-back and side-to-side)
- Adjustable wrench and screwdriver set(For fittings, brackets, and mounting hardware)
- Soap solution or gas leak detector spray(Used to verify joints after connections)
- Ventilation hood or exhaust with ducting(Ensure proper exhaust and compliance with codes)
- Carbon monoxide detector(Place per local code away from direct flame)
- Personal protective equipment(Gloves and eye protection recommended)
Steps
Estimated time: 2-6 hours
- 1
Review local codes and hire a pro
Consult local building and gas codes and confirm that a licensed gas fitter will perform final connections and leak testing. Review the stove model’s installation manual to identify model-specific requirements.
Tip: Document permit requirements and keep copies of manufacturer instructions handy. - 2
Shut off utilities and prepare the area
Turn off the gas supply at the shut-off valve and disconnect electricity to the area if needed. Clear the workspace of combustibles and ensure adequate lighting for inspection and handling.
Tip: Do not resume gas until a professional confirms all connections are safe. - 3
Position, level, and brace the stove
Move the stove into place and check its level. Install the anti-tip bracket according to the manufacturer’s guidelines and fasten to a solid surface.
Tip: A level appliance reduces uneven burner flame and improves performance. - 4
Connect the gas supply with approved fittings
Have a licensed gas fitter connect the gas line to the stove using approved fittings. Avoid over-tightening joints and use sealant only where specified by the manufacturer.
Tip: Never modify gas lines yourself; improper connections can cause leaks. - 5
Check for leaks
Perform a leak test using a soap solution or a leak detector spray on all joints. Look for bubbles that indicate a leak and tighten or reseal as needed, then re-test.
Tip: If you see any sign of a leak, stop and contact a professional immediately. - 6
Arrange electrical connections and venting
Ensure any ignition system has power from a dedicated circuit if required and that the range hood is properly vented.
Tip: Avoid running new electrical lines yourself unless qualified. - 7
Test operation and safety devices
Turn on burners to ensure reliable ignition and clean flame. Test the range hood and verify CO detectors are functioning.
Tip: Keep a close eye on flame color and avoid yellow tips indicating incomplete combustion. - 8
Finalize and document
Record the installation details, including the installer, date, and any permits or inspection notes. Store manuals and warranty information for future reference.
Tip: Save the manufacturer’s troubleshooting guide for quick reference.
Common Questions
Is it safe to install a gas stove myself?
Gas stove installation involves gas piping and combustion byproducts. For safety and compliance, rely on a licensed gas fitter and follow local codes and the manufacturer’s manual. Do not bypass required safety systems.
Gas stove installation requires professional gas work and code compliance; it's best to hire a licensed fitter and follow the manual.
What codes govern gas stove installation?
Codes vary by location and jurisdiction. Check local building and gas codes and work with the authority having jurisdiction to ensure all steps meet safety standards.
Local building and gas codes differ by area; check with the local authority having jurisdiction to ensure compliance.
How long does installation typically take?
Time depends on space, accessibility, and professional availability. A typical installation can take several hours, especially when including commissioning and inspections.
Installation usually takes several hours, depending on the space and professional scheduling.
Do I need ventilation when installing a gas stove?
Yes. Proper ventilation is essential to remove combustion byproducts and maintain air quality. Use a compliant range hood and ensure adequate air flow.
Yes, proper ventilation is required; use a range hood and ensure good air flow.
What safety checks should follow installation?
Perform a leak test on all joints, verify ignition operation, and ensure CO detectors are functioning. Keep records of inspections and install certificates if provided.
Do a leak test, check ignition, and verify CO detectors; keep installation records.
Will installation affect the warranty?
Warranties often require professional installation or verification by a licensed technician. Consult the manufacturer and installer for terms and documentation.
Warranties may require professional installation; check terms with the manufacturer.
Watch Video
Top Takeaways
- Hire a licensed pro for gas connections and leak testing.
- Plan ventilation and clearances before setup.
- Test joints for leaks with soap solution or detector spray.
- Secure anti-tip bracket and ensure the stove is level.
- Document the installation and follow local codes.