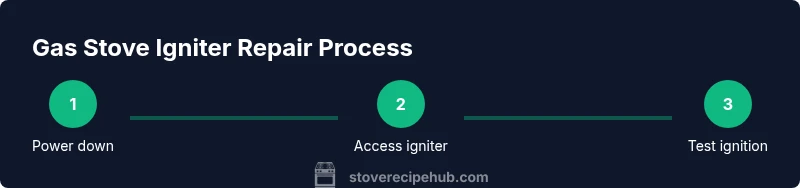
Repair Gas Stove Igniter: A DIY Guide for Home Cooks
Learn to diagnose, clean, and replace a faulty gas stove igniter with safe, step-by-step guidance, including tools and safety tips.

A faulty gas stove igniter is often fixable by diagnosing spark gaps, cleaning debris, and replacing the igniter or electrode if necessary. First ensure the stove is off and cool, unplug or disconnect power, remove the burner cap, and inspect the electrode for buildup. If cleaning and reseating the part doesn't restore ignition, install a compatible replacement.
Understanding the gas stove igniter: how it works and common failure modes
The gas stove igniter is a small electronic device that creates a spark to ignite the gas at the burner. On most residential stoves, a short delay and click precede ignition as the electrode fires and gas flows. The igniter is usually embedded under the burner head, with a ceramic insulator and metal electrode positioned near the gas ports. Failures commonly arise from dirt buildup, worn electrodes, damaged insulation, or loose electrical connections. When you start diagnosing a failure, look for a visible spark when you trigger the burner; if you hear buzzing without a spark, that indicates an ignition module issue. In many cases, cleaning the electrode or reseating components restores operation. However, persistent issues after cleaning may require a replacement igniter or professional service. According to Stove Recipe Hub, repairs like these are among the most common stove-top fixes homeowners attempt, provided they follow proper safety steps.
Safety first: prerequisites before attempting repairs
Before you touch any stove components, power off and unplug the appliance. Lift burners and remove grates in a well-lit area, keeping screws and parts organized. If you smell gas, leave the area immediately and call emergency services. Wear protective gloves and eye protection, and keep a clear workspace to avoid accidental contact with hot surfaces or exposed wiring. If your model requires you to shut off a gas valve, follow the manufacturer’s instructions carefully, or contact a professional. Safety is the priority, and taking a methodical approach reduces the risk of a dangerous mishap.
Diagnosing ignition problems: symptoms and checks
Common signs of igniter trouble include no spark, weak or intermittent sparks, frequent clicking without ignition, or inconsistent burner flames. Start by triggering ignition and watching the electrode tip closely for a blue or purple spark. If you see a visible bloom of flame without a spark, that indicates gas is reaching the burner but ignition isn’t happening. Check for soot, corrosion, or loose wires on the igniter assembly. A quick electrical check with a multimeter (if you have one) can confirm whether the igniter or ignition module is receiving power. Based on Stove Recipe Hub analysis, many failures stem from dirt buildup and misalignment rather than a dead part.
Cleaning vs. replacing: when to clean and when to replace
Cleaning the electrode and its contacts can resolve many issues caused by cooking grime. Use a lint-free cloth with isopropyl alcohol to wipe the electrode, then gently scrub the surrounding area to remove baked-on residue. Do not use water near electrical components, and avoid aggressive scrubbing that could bend the electrode. If cleaning has no effect after a thorough re-seat, the ignition module or electrode may be worn and require replacement. Replacements should match the model number and be performed following the manufacturer’s instructions to ensure a proper fit.
Basic maintenance to prevent igniter failure
Regular maintenance can extend the life of your igniter. Wipe down burners after use to prevent soot buildup and check electrode alignment quarterly. Keep the area around the igniter dry and free of cleaners that could corrode connections. If your stove has an exposed wiring harness, inspect it for signs of wear or damage and replace if needed. Using high-quality replacement parts reduces recurring failures and keeps ignition reliable longer.
Troubleshooting scenarios and common fixes
If cleaning and reseating doesn’t restore ignition, replace the igniter with a model-compatible part. When purchasing, verify compatibility with your stove’s brand and model. After replacement, reassemble the burner, restore power, and perform several ignition attempts to confirm consistent sparks. If the burner lights but the flame is yellow or uneven, adjust the burner cap seating and ensure the ports are clean.
What to do after repairs: testing and maintenance
After any repair, test the ignition several times in quick succession to confirm reliability and avoid extended gas exposure. Reinstall all components securely and replace any burner caps or heads exactly as they were. Keep a basic maintenance schedule and address any signs of wear promptly. The result should be a fast, dependable ignition that lights within a second or two.
Tools & Materials
- Screwdriver set (Phillips and flat-head)(model-dependent screws)
- Replacement igniter or electrode(match model number)
- Isopropyl alcohol (99%) or contact cleaner(for cleaning)
- Cleaning brush or old toothbrush(to scrub grime)
- Lint-free cloth or microfiber towel(for wiping)
- Gloves and eye protection(safety gear)
- Multimeter (optional)(for electrical checks)
Steps
Estimated time: Estimated total time: 60-90 minutes
- 1
Power down safely
Ensure the stove is cool, switch off the power at the outlet or breaker, and unplug if possible. Remove the grate and burner head to access the igniter. Set aside components in an organized tray so you can reassemble easily.
Tip: Take a quick photo of wiring before disconnecting wires. - 2
Access igniter
Lift and remove the burner cap and housing to expose the igniter and electrode. If there are screws or a shield, remove them with the appropriate screwdriver. Note connector orientation if wiring is present.
Tip: Keep screws in a labeled container to prevent loss. - 3
Inspect electrode and wiring
Look for visible cracks in the ceramic insulator, bent electrode, or loose wires. Check for soot buildup around the tip and along the wiring harness. Gently reposition the electrode if it’s noticeably out of alignment.
Tip: Avoid forcing parts; small adjustments are enough. - 4
Clean igniter area
Dampen a cloth with isopropyl alcohol and wipe the electrode tip and nearby contacts. Use a dry brush to remove baked-on grime from surrounding surfaces. Let everything dry before testing.
Tip: Do not use water near electrical components. - 5
Check spark gap and alignment
Verify the electrode sits close to the burner ports but does not touch metal surfaces. Small misalignment can prevent spark transfer. Adjust gently and recheck clearance.
Tip: Follow the model’s recommended gap if available. - 6
Reinstall components and reconnect wiring
Secure the igniter back in place, reconnect any plugs, and replace the burner cap and shield as designed. Ensure all fasteners are snug but not overtightened.
Tip: Ensure wiring is routed away from hot surfaces. - 7
Power up and test ignition
Restore power and turn the burner knob to ignite. Observe whether a consistent blue spark appears and whether gas lights promptly. If nothing happens, proceed to replacement.
Tip: If you smell gas, stop and ventilate immediately. - 8
Replace igniter if needed
Install a model-compatible replacement following the manufacturer’s instructions. Connect connectors securely and confirm no loose wires. Re-test ignition several times to confirm reliability.
Tip: Verify replacement part matches your stove model. - 9
Final test and cleanup
Reassemble all parts completely, do a final ignition test, and wipe down the work area. Store tools and keep spare parts in a safe place for future maintenance.
Tip: Document any parts replaced and note the date for future reference.
Common Questions
Can I repair a gas stove igniter myself?
Yes, for many models you can clean or replace the igniter yourself, but avoid gas leaks and always follow safety precautions.
Yes, you can usually fix it yourself, but be careful with gas and electricity.
What are common signs the igniter is failing?
No spark, weak or intermittent sparks, frequent clicking without ignition, or inconsistent burner flames.
Common signs are no spark or delayed ignition.
Do I need to unplug the stove before starting?
Yes, unplug the appliance or switch off the circuit breaker before touching electrical components.
Always power off before working on electrical parts.
Is replacing the igniter difficult?
Replacement difficulty varies by model; some parts are plug-and-play, others require more disassembly.
It depends on your stove; some replacements are straightforward.
When should I call a professional?
If you smell gas, notice a gas leak, or if your igniter is integrated with gas lines or appears damaged, seek professional help.
Call a pro if you smell gas or there's uncertainty.
Watch Video
Top Takeaways
- Diagnose spark issues before replacing parts.
- Clean electrode and contacts before replacement.
- Use model-matched parts for safety and reliability.
- Test ignition after each fix.
- Call a pro if gas smells or you’re unsure.