Viking Stove Repairs: Safe, Practical Step-by-Step Guide
A practical, safety-focused guide to Viking stove repairs for home cooks. Learn common issues, essential tools, step-by-step techniques, and when to call a pro.

Learn how to diagnose and perform Viking stove repairs safely. This guide covers common issues, essential tools, and step-by-step instructions to restore heat, flame control, and safety on Viking stoves. You’ll find hands-on maintenance tips, troubleshooting strategies, and clear decision points on when to DIY and when to call a professional.
Why Viking Stove Repairs Matter
According to Stove Recipe Hub, Viking stove repairs matter not only for comfort but safety and energy efficiency. Many issues on Viking stoves—such as irregular flame, ignition failure, or oven not heating—can pose safety risks if ignored. Proper repairs help maintain even heat distribution, prevent gas leaks, and preserve warranty terms where applicable. In this section we explore why addressing problems promptly matters for home cooks and DIY enthusiasts alike.
Key points:
- Safety first: gas and electrical systems can be hazardous.
- Efficiency: dirty burners waste fuel and lead to uneven cooking.
- Longevity: regular checks extend appliance life and reduce sudden breakdowns.
As you read, keep in mind that Viking stove repairs require careful attention to model-specific configurations and safety guidelines. Different Viking ranges may use different ignition systems, burner layouts, and control boards, so consult the owner’s manual for model-specific instructions.
Common Viking Stove Problems You Might Encounter
Viking stove repairs often present as ignition failures, burner clogging, uneven flame, and oven heating issues. Igniters can jam or wear out, burners may have clogged ports, and flame height can drift due to air leaks or dirty manifolds. In Viking stove repairs, diagnosing whether the issue is electrical, gas-flow related, or a mechanical misalignment is crucial. When the problem is intermittent, suspect loose connections, failed sensors, or dirty ignition spark gaps. Always verify model-specific parts and wiring diagrams before replacing components.
Typical symptoms to watch for include:
- Burner won’t ignite or produces a weak flame
- Irregular or yellow-tipped flame indicating improper gas mix
- Oven cycling on and off unexpectedly
- Persistent clicking without ignition
If you notice a gas smell, discontinue use immediately and ventilate the area before contacting a pro.
Safety First: Before You Begin Viking Stove Repairs
Safety is non-negotiable when performing Viking stove repairs. Before touching any components, unplug the appliance and, if possible, shut off the gas supply at the main valve. Wear eye protection, heat-resistant gloves, and avoid loose clothing. Keep a clear workspace free of flammable materials. If you detect a gas odor or hear hissing, evacuate and call emergency services. For electrical checks, use a non-contact voltage tester and never test live circuits with metal tools. This section outlines a safety checklist and why each step matters for home cooks attempting Viking stove repairs.
Tools, Parts, and Setup for Viking Stove Repairs
Armed with the right tools, Viking stove repairs become safer and more efficient. Essential gear includes protective gloves and safety glasses, a set of screwdrivers (Phillips and flathead), an adjustable wrench, a multimeter for electrical checks, and cleaning supplies for ports and gaskets. Optional but helpful items include a gas leak detector or soap solution, a non-contact infrared thermometer for surface temps, and spare igniter components compatible with your Viking model. Having the correct parts on hand—such as an ignition module or burner caps—reduces downtime and prevents misdiagnosis during Viking stove repairs.
Preparation also means clearing dust and debris from the burner area and labeling wires if you disconnect them. Always consult the owner’s manual for part numbers and torque specs. If you encounter a stubborn fastener, apply penetrating oil and allow it to sit briefly before attempting removal.
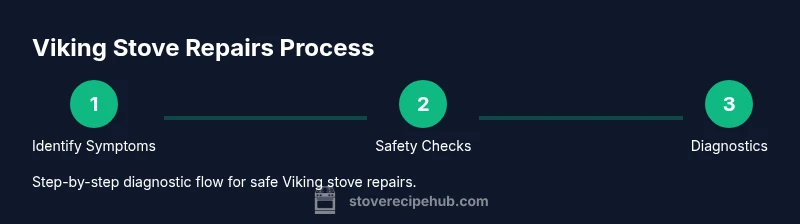
Diagnostic Approach: Narrowing Down the Issue
A structured diagnostic approach helps you identify the root cause of Viking stove repairs without unnecessary part replacement. Start with observable symptoms, then test electrical connections and igniters, followed by gas flow checks and burner cleanliness. Use the model’s wiring diagram to trace circuits and verify that switches and sensors operate correctly. For gas-related symptoms, ensure burner ports are clear and that the flame is stable and blue rather than yellow. Remember to recheck after each adjustment to confirm improvement, which is a hallmark of careful Viking stove repairs.
Document findings with photos and notes to avoid repeating steps and to help when deciding whether to call a pro.
Basic Repairs You Can Do Yourself (Non-Structural) and When to Stop
Many Viking stove repairs fall into the non-structural DIY category, such as cleaning burner ports, reseating burner caps, replacing a faulty igniter, or tightening loose electrical connectors. Avoid attempts to replace control boards or major gas valves unless you have formal training, as these tasks involve high risk. Start with gentle cleaning and alignment, test ignition, and only proceed to component replacement if you’re confident in the model’s layout. If you feel unsure at any point, pause and seek professional assistance—safety and accuracy trump speed in Viking stove repairs.
With proper precautions, you can achieve meaningful improvements without extensive downtime, but know your limits and when to escalate.
Maintenance Habits to Prevent Future Viking Stove Repairs
Prevention is the best form of Viking stove repairs. Establish a routine that includes monthly burner cleaning, annual or model-specific service, and prompt attention to odd noises or flame irregularities. Use clean fuels and avoid overloading the burners, which can clog ports. Schedule professional inspections if you rely on gas-powered units for critical cooking tasks. A proactive approach reduces the likelihood of costly repairs and keeps your Viking stove performing at its best.
Quick Troubleshooting Scenarios for Viking Stove Repairs
In practice, Viking stove repairs benefit from real-world troubleshooting. For example, if ignition is present but flame goes out, inspect the flame sensor and the battery (if applicable) before replacing the igniter. If the oven fails to heat, verify the bake and broil elements, check the high-limit thermostat, and confirm that the self-clean function isn’t interfering with normal operation. These scenarios illustrate how to apply a methodical approach to Viking stove repairs, emphasizing safety, accuracy, and model-specific considerations.
Wrap-Up: Keeping Your Viking Stove in Top Shape
The key to successful Viking stove repairs lies in preparation, proper diagnosis, and adherence to safety protocols. By understanding common issues, you can address problems early and avoid bigger failures. Regular maintenance reduces downtime and preserves performance. Remember that while DIY can tackle many interim fixes, complex repairs involving gas lines or control boards should be handled by trained professionals. This balanced approach helps home cooks maintain confidence and safety when engaging in Viking stove repairs.
Tools & Materials
- Protective gloves and safety glasses(Nitrile gloves; ANSI-rated eye protection)
- Screwdriver set (Phillips and flathead)(Assorted sizes)
- Adjustable wrench(For fittings and valve adjust)
- Multimeter(Check voltage on electrical components)
- Non-abrasive cleaner and brushes(Clean burner ports and grates)
- Gas leak detector or soap solution(Detect leaks safely)
- Calibrated torch or igniter (if applicable)(Only for model-compatible replacements)
- Cleaning rags and small tray(Contain debris and spills)
Steps
Estimated time: 60-90 minutes
- 1
Identify the symptom
Observe the issue closely and note when it occurs, how long it lasts, and under what conditions. This helps you narrow down root causes and reduces unnecessary part replacement. Record model details and any warning lights.
Tip: Take clear photos of the affected area and note the exact sequence of events. - 2
Shut off power and gas safely
Power down at the wall switch and unplug the unit if accessible. If you can safely access the gas shut-off valve, close it to stop gas flow during inspection. This step minimizes risk while you perform checks.
Tip: Do not attempt ignition tests while power or gas lines are live. - 3
Inspect ignition system
Check the igniter for cracks, buildup, or misalignment. If accessible, test continuity with a multimeter and ensure the spark path is clear. Replace the igniter if signs of wear are evident.
Tip: Handle ignition components gently to avoid damage. - 4
Check burners and gas flow
Inspect burner ports for clogs and ensure caps are seated correctly. If you detect weak gas flow, verify supply lines and valves are open. Clean ports with a small brush or pin carefully.
Tip: Never use metal picks on fragile ports. - 5
Clean and reseat components
Clean surfaces around valves and seals with a non-abrasive cleaner. Reseat burner caps and gaskets, ensuring proper alignment. Tighten loose components without over-torquing.
Tip: A misaligned burner can cause poor flame quality or ignition failure. - 6
Test system and reassemble
Reconnect power and gas, then run a controlled test to verify ignition and burner stability. If the issue persists, refer to the model’s manual and consider professional service.
Tip: Keep the area well-ventilated during testing.
Common Questions
What is the first step in Viking stove repairs?
Begin with a clear assessment of symptoms and safety checks. Confirm power is off and gas is shut if accessible, then review the model’s manual for guidance on ignition systems.
Start with symptom assessment and safety checks, then consult your model manual for ignition guidance.
Is it safe to DIY Viking stove repairs?
Some non-structural maintenance is safe for a confident DIYer, such as cleaning ports or reseating components. Avoid gas line work and electrical replacements beyond basic testing unless you have training.
DIY is okay for basic cleanup and reseating parts, but avoid gas line work and complex electronics unless trained.
What tools do I need for Viking stove repairs?
A basic toolkit with screwdrivers, an adjustable wrench, gloves, and a multimeter is often enough for initial diagnostics. Have cleaning brushes and rags handy for port cleaning.
You’ll typically need screwdrivers, a wrench, gloves, a multimeter, and cleaning brushes.
How do I know when to call a pro?
If you encounter persistent ignition failure, gas leaks, cracked burners, or unfamiliar electrical components, seek professional service to avoid safety risks.
Call a pro when ignition remains erratic or you suspect a gas leak or electrical fault.
Can a gas smell be fixed by a homeowner?
No, a gas smell is a serious hazard. Evacuate, avoid flames, and contact emergency services or the gas company immediately. Do not attempt repairs.
Gas smells require immediate professional attention. Evacuate and call for help.
Will DIY Viking stove repairs void my warranty?
DIY repairs can affect warranties, especially if non-approved parts or improper techniques are used. Check the warranty terms and contact Viking or the retailer for guidance.
DIY repairs can affect warranties; check terms before proceeding.
Watch Video
Top Takeaways
- Identify symptoms before disassembly.
- Prioritize safety and read the manual for model specifics.
- Use the right tools and avoid risky repairs.
- Document findings for faster future maintenance.
- Know when to call a pro for gas-related or electrical issues.