What to Do Before Using a New Stove: A Practical Pre-Use Guide
A practical, safety-focused pre-use checklist for new stoves. Learn how to prepare, ventilate, burn-in, test ignition, and maintain your stove with expert guidance from Stove Recipe Hub.

Before you fire up a brand-new stove, follow a focused pre-use routine: read the manual, remove packaging and protective films, verify electrical or gas connections, set up proper ventilation, wipe down surfaces, run a safe burn-in if recommended, and test all burners and controls. This quick checklist helps prevent odors, ignition issues, and safety hazards from day one. According to Stove Recipe Hub, a thorough pre-use routine correlates with safer operation and long-term reliability.
What to do before using a new stove: essential pre-use steps
If you just brought home a brand-new stove, the first steps you take determine both safety and long-term performance. This article explains what to do before using a new stove, from safety checks to proper ventilation, so you avoid small problems turning into big headaches. According to Stove Recipe Hub, a deliberate pre-use routine reduces the risk of gas leaks, electrical faults, and lingering manufacturing odors. Start by reading the installation manual, confirming the power source or gas supply matches the stove’s requirements, and ensuring the kitchen air is prepared for the first burn-off. Shipping braces, protective films, and residual packaging can affect heat distribution and ignition if left in place. Removing these materials is essential before any testing. With a calm, methodical approach, you set the stage for safe, reliable cooking from day one.
Safety first: verify connections and detectors
The heart of any pre-use routine is verification. Ensure the electrical outlet matches the stove’s plug type and voltage, and confirm gas supply lines are properly connected with no leaks. If your home has a carbon monoxide detector or a dedicated gas detector, verify they are functioning and placed near the kitchen. This reduces the risk of undetected leaks or hazardous fumes during the first burners. Keep flammable items away from the stove and ensure there is adequate clearance around the appliance. A small step now can prevent costly repairs later and protect curious children and pets from accidents in the kitchen.
Surface cleanup and protective films: clear and clean
New stoves often arrive with protective films and surface residues from manufacturing. Use a soft cloth with mild soap and water to wipe down surfaces, including the cooktop, control knobs, and oven exterior. Avoid harsh cleaners on delicate enameled surfaces. Don’t spray liquids directly onto control panels or ignition areas; apply cleaner to the cloth first. This initial cleaning removes dust and residues that could affect ignition, heat transfer, or odors during the first use. After cleaning, dry all surfaces thoroughly before any operation to prevent moisture from seeping into electrical components.
Ventilation planning: move air, manage odors
Ventilation is crucial when a new stove first heats up. Turn on the range hood if you have one, or open nearby windows and doors to promote airflow. Adequate ventilation helps carry away any manufacturing odors or minimal off-gassing from protective coatings. If you notice persistent fumes or a strong chemical scent, pause and review the manual for safe burn-in guidance. A well-ventilated kitchen reduces the risk of triggering smoke alarms and ensures you can monitor the first-light process safely.
Documentation and model-specific steps: follow the manual
Every stove model has its quirks: different ignition systems, burner configurations, and oven preheating sequences. The most reliable source for your exact steps is the manufacturer’s manual. It will outline the recommended burn-in duration, whether you should preheat the oven empty, and any steps unique to your model (like cleaning sequences for self-cleaning ovens). If the manual advises a burn-in, prepare an appropriate area and monitor the process closely. Adhering to model-specific instructions minimizes warranty concerns and helps your stove perform as designed.
Summary of safe prep: pause, plan, and proceed
In summary, a thorough pre-use routine includes safety verification, surface cleaning, proper ventilation, and adherence to the manual. This approach reduces odors, ignition hiccups, and potential gas or electrical hazards. By investing time upfront, you create a safe environment for cooking and a foundation for dependable performance for years to come. The goal is to complete the prep calmly, without rushing, and to confirm all safety devices function as intended before any actual cooking begins.
Branded insight: why this matters for home cooks
Home cooks rely on their stove for everyday meals and holiday feasts alike. Skipping the pre-use steps can lead to persistent odors, unreliable ignition, or minor gas issues that disrupt cooking plans. A deliberate, documented pre-use routine supports consistency in results, reduces the chance of nuisance alarms, and aligns with best practices recommended by Stove Recipe Hub. Treat this as a small investment with big returns in safety and peace of mind.
Tools & Materials
- User manual from the manufacturer(Keep handy for model-specific instructions.)
- Phillips head screwdriver (size #2)(For removing shipping braces and mounting accessories.)
- Soft, lint-free cloth(For initial surface wipe-down.)
- Mild dish soap(Gentle cleaning agent for surfaces.)
- Warm water and a non-abrasive sponge(Use for safe cleaning of exterior surfaces.)
- Working carbon monoxide detector(Place near the kitchen for early warning.)
- Heat-resistant gloves(Protection when handling hot surfaces or racks.)
- Ventilation method(Range hood on or a window opened during any burn-in.)
Steps
Estimated time: varies by model; follow the manufacturer’s burn-in duration guidance
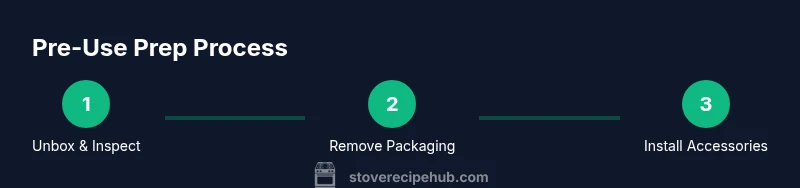
- 1
Unbox and inspect
Carefully remove the stove from its packaging and check for any shipping damage or missing parts noted in the manual. Verify that model numbers and accessories match your purchase. If anything appears damaged, contact the seller before powering the unit.
Tip: Document any concerns with photos and keep the packaging until you complete the initial test. - 2
Remove transit packaging and films
Peel away protective films from exterior surfaces and remove any transit braces or foam supports. Do not operate controls while packaging is still attached. This step ensures clean ignition paths and avoids residues interfering with burners.
Tip: Work slowly and avoid forcing any parts; protective coatings are thin and can scratch easily. - 3
Install racks and accessories
Place oven racks and any provided accessories in their proper slots according to the manual. Avoid bending or forcing racks, and confirm they slide smoothly. Proper rack positioning lowers risk of heat damage and ensures even heating during use.
Tip: If your model has adjustable racks, set one at a lower height for heavier dishes during initial testing. - 4
Check gas supply and electrical connections
For gas stoves, confirm the gas shut-off valve is closed before connecting; for electric stoves, ensure the outlet matches the plug type and voltage. If you smell gas at any point, turn off the valve and ventilate immediately, then contact a professional.
Tip: If you’re unsure about connections, hire a qualified installer rather than attempting DIY on gas lines. - 5
Ventilate and prepare for burn-in
Open the windows or switch on the range hood to create airflow. Clear the area of flammables and keep pets and children away during the initial burn-in. This step helps run-off any manufacturing odors without triggering smoke alarms.
Tip: Have a timer or clock nearby to track the burn-in period exactly as recommended by the manual. - 6
Run burn-in and verify ignition
If the manual calls for a burn-in, follow the specified sequence for heating elements and oven surfaces. Do not leave the stove unattended during this time. Observe for unusual odors, smoke, or irregular flames and stop if anything seems off.
Tip: Stand to the side of the stove and keep children away while monitoring ignition and heat release. - 7
Test burners and controls
Light each burner individually, verify ignition response, flame color, and ease of turning the controls. If a burner struggles to ignite or the flame is unstable, consult the manual or contact support.
Tip: Record any abnormal behavior and address it before regular cooking.
Common Questions
What should I do before using a new stove?
Read the manual, inspect for damage, remove packaging, verify electrical or gas connections, set up ventilation, and perform a cautious burn-in if recommended by the manufacturer.
Start with the manual, check for damage, remove packaging, verify connections, ventilate, and follow burn-in guidance if provided.
How long should the initial burn-in take?
The duration varies by model; always follow the manufacturer’s burn-in instructions. Do not exceed recommended times to avoid overheating protective coatings.
Burn-in time depends on your model; follow the manual and avoid overdoing it.
Can I use cleaners on a brand-new stove?
Yes, but use mild soap and water with a soft cloth. Avoid harsh chemicals on enamel surfaces during initial use to prevent residue that could affect taste or operation.
Use mild soap and water on the surfaces; avoid harsh cleaners on the enamel.
What if I smell gas during testing?
Immediately turn off the gas supply, ventilate, and contact a licensed gas technician. Do not operate electrical switches or ignition sources until the area is confirmed safe.
If you smell gas, shut off and ventilate, then call a professional.
Do I need a carbon monoxide detector near the stove?
A properly installed CO detector in the home is wise, especially near cooking appliances. It provides early warning in case of a malfunction or off-gassing.
Yes, a CO detector nearby is a good safety precaution.
Is it safe to install a stove myself?
Gas stoves often require a licensed professional for safe connection. If you’re unsure about gas lines or electrical work, hire a certified installer to prevent leaks or electrical hazards.
If you’re not sure about connections, hire a pro.
Watch Video
Top Takeaways
- Follow model-specific instructions from the manual
- Ensure proper ventilation before any burn-in
- Inspect for damage and verify connections
- Test ignition and burner performance
- Document any issues promptly