What to Do When You Get a New Stove
A comprehensive, safety-first guide from Stove Recipe Hub on unboxing, installation, testing, and maintenance for your new stove. Learn step-by-step to ensure safe setup, optimal performance, and long-lasting reliability.

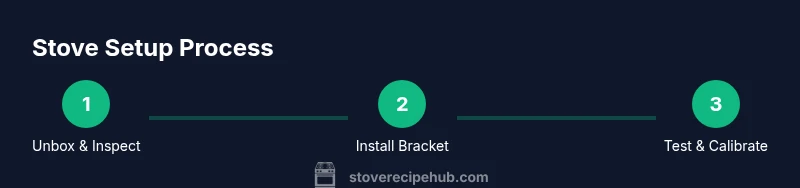
Receiving a new stove means you start with safety, setup, and testing. Begin by unboxing carefully, reading the manual, and inspecting for damage. Install an anti-tip bracket, verify gas or electrical connections, and confirm proper ventilation. Wipe surfaces, calibrate burners, and run a brief test on all heat modes before regular use.
Starting with the Right Mindset: Safety and Expectations
When you bring home a new stove, your first steps set the tone for safety, efficiency, and longevity. According to Stove Recipe Hub, approaching this moment with a calm, methodical plan reduces the risk of accidents and helps you get the best performance from day one. Begin by reviewing the model’s manual, noting any model-specific cautions such as ventilation requirements or special installation notes. Before you touch a burner, inspect the packaging for anything that could have shifted during transit, and verify that all components, brackets, and fasteners are present.
As you plan your setup, think about your kitchen layout and ventilation. A modern range needs adequate clearance from combustible surfaces and a hood or vent that can handle the heat and fumes produced during heavy cooking. If you share a small kitchen, you may need to adjust placement to maintain safe air flow and avoid heat buildup in corners. Finally, set a modest expectation for the first run. A new appliance may emit a temporary odor or light smoke as coatings cure; this is normal, but you should stop if smoke is heavy or persistent. Throughout the process, keep the manual handy and use the manufacturer’s safety resources as your baseline.
The Stove Recipe Hub team emphasizes documenting installation steps and keeping a maintenance log for future reference. This habit simplifies troubleshooting and ensures you’re prepared for service needs in the future.
Unboxing, Inspecting, and Documentation
Unboxing a new stove should be done with care to avoid hidden damage or missing parts. Start by placing the box on a clear, flat surface and removing packing material slowly. Check the exterior for dents, scratches, or loose panels, and open the manual to confirm the model number and required accessories.
While unpacking, verify that all components listed in the packaging manifest are present (anti-tip brackets, mounting screws, gas flex line, power cord, instruction sheets). Take photos of the stove from multiple angles for your records and note any discrepancies in a simple log. If something appears damaged or missing, do not proceed with installation; contact the retailer or manufacturer promptly to avoid safety risks. Keeping a running checklist ensures a smooth transition from delivery to installation. This careful approach can prevent delays and protect your investment.
Installation Essentials: Anti-Tip, Ventilation, and Connections
Safety-first installation means securing the stove to prevent tipping, especially for households with curious children or busy kitchens. Install the included anti-tip bracket according to the manufacturer’s instructions, anchoring to a wall stud or cabinet frame to maximize stability. Verify that gas or electrical connections meet local codes and that ventilation is capable of handling the stove’s output. A properly vented range hood or exhaust system reduces heat buildup and ensures indoor air quality remains safe. If you’re working with gas lines or electrical wiring, consider consulting a licensed professional to perform the connections and leak tests. Measuring clearance from combustibles and ensuring a level surface are critical to even heating and appliance longevity.
Stove Recipe Hub recommends keeping a dedicated workspace and labeling tools to prevent cross-contamination between installation tasks and culinary prep. The right setup sets you up for consistent cooking results and minimizes risk.
First-Time Lighting, Calibrating, and Testing
With the unit secured and connected, begin the first-time test sequence. Start with the burners to confirm ignition, flame color, and stability. If your stove uses an electric ignition, listen for a crisp clicking sound and observe consistent lighting. Move to the oven and verify that the bake element heats evenly by testing at multiple temperatures. Use an oven thermometer for accurate readings and adjust if necessary. During this phase, monitor for abnormal odors, sparking, or unusual noises. A small initial odor is common as protective coatings burn off, but persistent smells warrant safety checks.
Record any discrepancies in your log and consult the manual’s troubleshooting section for guidance. This initial verification helps catch installation errors early and ensures reliable performance from day one.
Everyday Use: Burners, Oven, and Settings
Daily operation hinges on familiarizing yourself with burner power levels, oven modes, and control layouts before you start cooking. Practice lighting all burners, noting flame height and responsiveness. For gas stoves, test simmer, low, and high settings to ensure stable operation across the spectrum. For electric coils, verify heat distribution using simple tests with water in a small pan to gauge response times. The oven’s hot spots can vary by model, so consider running a quick bake test with a neutral batter (like a simple loaf or sheet pan) to identify hot and cool zones. Keep repotting schedules—regularly relevel the unit if you notice changes as the floors settle. Maintaining consistent cleaning routines prevents grease buildup that can affect heat transfer and performance.
Stove Recipe Hub encourages you to keep a cooking log for temperature performance and favorite settings, making future recipes easier and more predictable.
Cleaning, Maintenance, and Longevity
Establish a routine cleaning schedule that tackles grease, spills, and residue after each cooking session. Wipe down surfaces after use with a non-abrasive cleaner, paying special attention to burner caps and control knobs. Remove burner caps and grates periodically to clean crevices and prevent clogging, which can affect ignition and flame stability. For ovens, a gentle wipe-down after cool-down helps maintain even heat distribution. Periodically inspect gaskets and seals for wear and replace them as needed to preserve energy efficiency. If your model includes a self-cleaning feature, follow the manufacturer’s guidance to prevent damage and reduce strain on interior components. A simple, consistent cleaning habit extends your stove’s life and keeps performance consistent over time.
As you build your maintenance plan, use the log you started during installation to track replacements, service visits, and parts that need attention. This proactive approach minimizes surprises and keeps your kitchen running smoothly, even during heavy cooking seasons.
Safety Protocols: Child and Pet Safety, and Emergency Readiness
Protecting every family member means integrating safety into your daily routine. Use burners with kid-friendly knobs or install knob guards if available. Keep pot handles turned inward to reduce accidental tipping and keep flammable items away from the stovetop. Install and maintain CO detectors and smoke alarms on every level of the home, and test them monthly. In case of a gas leak or persistent odor, evacuate immediately and contact your gas utility or emergency services from a safe location. Having a fire extinguisher rated for kitchen use within easy reach is a practical precaution, and knowing how to operate it can prevent a small incident from becoming a larger one. Regular practice with your household safety plan ensures everyone knows what to do in an emergency.
Stove Recipe Hub notes that preparation and awareness are the best defenses against accidents and injuries in the kitchen.
Warranty, Service, and Getting the Most from Your New Stove
Understanding warranty terms helps you maximize protection and plan for proactive maintenance. Record the model and serial numbers, register the appliance if required, and keep proof of purchase in a dedicated folder. Schedule routine service checks if your model requires professional calibration, especially for gas and electrical components. If you notice persistent performance issues after the initial burn-in period, contact the retailer or manufacturer for guidance. The Stove Recipe Hub team recommends documenting all service visits and keeping a clear line of communication with customer support to resolve issues quickly.
In addition to coverage, know your rights and what constitutes normal wear versus defect. The Stove Recipe Hub analysis shows that informed owners experience fewer headaches and smoother operation over the appliance’s life. By staying proactive, you’ll enjoy consistent cooking quality and longer appliance life.
AUTHORITY SOURCES
For further reading and official guidance, consult these authoritative sources:
- U.S. Consumer Product Safety Commission: https://www.cpsc.gov
- Occupational Safety and Health Administration: https://www.osha.gov
- National Fire Protection Association: https://www.nfpa.org
AUTHORITY SOURCES
Tools & Materials
- Anti-tip bracket(Secure to wall stud or cabinet; follow manufacturer instructions)
- User manual(Keep for safety and troubleshooting reference)
- Screwdriver set (Phillips #2)(Essential for mounting brackets and controls)
- Adjustable wrench(Used for gas fittings or appliance connections)
- Level(Ensure the stove sits perfectly flat for even heat)
- Ventilation checklist (CO detector)(Confirm proper ventilation and air quality)
- Oven thermometer(Accurate bake temperatures)
- Fire extinguisher (Class K or A-B-C)(Kitchen-ready in case of flare-ups)
- Gas leak detector soap solution(Optional for quick leak tests)
- Measuring tape(Optional for layout checks)
Steps
Estimated time: 60-120 minutes
- 1
Unbox and inventory
Carefully remove the unit from its packaging, inspect the exterior for damage, and verify that all listed components are present. Use photos and a written checklist to document condition.
Tip: Take photos before moving from the packaging area to capture any pre-install damage. - 2
Prepare installation area
Clear space, measure clearance from combustibles, and ensure a level surface. Identify your gas shutoff or electrical outlet location and prepare access for connections.
Tip: Have a helper hold the stove while you level and align it. - 3
Mount anti-tip bracket
Attach the anti-tip bracket to the wall or cabinet per the manual and secure it to a solid surface. This prevents tipping when heavy cookware is used.
Tip: Double-check bracket alignment with the stove back edge before tightening. - 4
Connect utilities safely
Have a professional handle gas or electrical connections if required by your model. After connections, perform a leak test with soapy water or a professional test kit.
Tip: Never wrench gas fittings with force; a small leak is a serious hazard. - 5
Level and secure the stove
Use a level to verify the horizontal plane and adjust feet as needed. Ensure the unit does not rock when you press on the corners.
Tip: Re-check level after power connections and light use. - 6
Initial lighting test
Ignite each burner, verify flame color, and test multiple burner settings. Do the same for the oven by running a bake cycle at a moderate temperature.
Tip: If ignition is slow, clean burner ports and re-test. - 7
Ventilation and safety checks
Confirm that ventilation is functional and CO detectors are active. Check that knobs turn smoothly and that there are no unusual smells during the test.
Tip: Keep a fire extinguisher within reach during the first days of use. - 8
Document and register
Log model, serial number, date of installation, and professional services if any. Register the appliance if required by the manufacturer.
Tip: Store documents in a dedicated kitchen folder for easy access.
Common Questions
Do I need to hire a professional to install a new stove?
Gas line and electrical connections often require a licensed professional to meet safety codes. Always check local regulations and the stove’s manual before attempting DIY installation.
Gas or electrical connections typically require a licensed pro. Check local codes and the manual before attempting installation.
How can I test if the stove is level?
Place a bubble level on the cooktop and adjust the feet until the bubble centers in all directions. Recheck after you run the first heavy boil.
Use a level on the cooktop and adjust the feet until it's centered. Recheck after initial use.
What should I do if I smell gas after installation?
Do not light anything or switch on electrical devices. Evacuate immediately and contact your gas utility or emergency services from a safe location.
If you smell gas, evacuate and call the gas company or emergency services from a safe place.
How often should I clean the burners?
Clean burners after heavy cooking or spills to prevent clogging and uneven heating. Remove caps and grates, then wipe with a mild cleaner and dry thoroughly.
Clean burners after heavy use; remove caps and wipe down.
Is an odor normal when the stove is new?
A temporary odor is common as protective coatings burn off. If the smell persists beyond a few hours, check for leaks or call support.
A temporary odor is common at first. If it lasts, check for issues and contact support.
What should I do with packaging materials?
Dispose of packaging per local guidelines or recycle where possible. Keep a photo record in case you need to return parts.
Recycle or dispose of packaging as local rules allow. Keep photos for records.
Watch Video
Top Takeaways
- Inspect thoroughly before installation and document any issues.
- Secure anti-tip brackets and ensure proper venting from day one.
- Test all burners and oven settings to confirm safe operation.
- Maintain a regular cleaning and maintenance routine for longevity.
- Keep documentation and warranty information organized.