What to Do Before Using Your Oven for the First Time: A Practical Guide
Learn what to do before using your oven for the first time with a practical, step-by-step guide. Clean interior, set up racks, perform a safe burn-in, verify temperature, and establish maintenance habits for reliable baking.

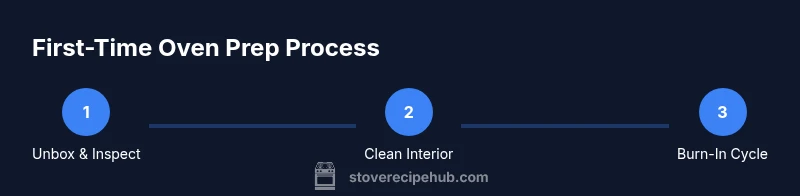
By following these steps, you’ll safely prep your oven for first use: unbox and clean interior, install racks correctly, run a burn-off cycle to cure factory oils, verify temperature with a thermometer, and note ventilation and safety considerations. This quick prep sets the stage for safe, reliable baking from day one.
What to do before using your oven for the first time: kickoff basics
If you're wondering what to do before using your oven for the first time, proper prep protects your kitchen, your cookware, and your health. New ovens come with protective oils and packaging that can emit fumes or odors on first burns. A careful kickoff reduces smoke odors, ensures even heat, and extends the oven's lifespan. Cleaning now also helps prevent lingering smells that could transfer to baked goods. Before applying power, remove all packaging materials, racks, and trays; wipe the interior, door gasket, and exterior surfaces with a damp cloth and mild soap. Inspect the oven door seal for gaps and verify that the control panel is intact. If you notice any loose parts or damage, consult the user manual or contact support before using the oven. This step lays the foundation for safe and reliable performance during every bake to come. According to Stove Recipe Hub, proper oven prep reduces fumes and ensures even heating, which is especially important for home cooks new to oven use.
Racks, trays, and seals: proper setup
Racks and trays should be installed at the recommended heights for your typical bakes, and trays should sit flat without wobbling. Avoid stacking metal objects on the bottom of the oven; misaligned items can block heat and cause hot spots. When handling racks, wear oven-safe gloves to prevent burns. Ensure door gaskets are intact and snug, with no visible gaps. A secure seal helps maintain even temperatures and reduces the chance of heat escaping into the kitchen. If the racks are difficult to slide, apply a small amount of silicone-safe lubricant to the rails or consider replacing worn rails. This setup reduces the risk of food sticking and makes future cleaning easier.
Burn-off cycle: curing factory oils safely
Most ovens benefit from a burn-off cycle to cure protective oils and remove manufacturing residues. Start with a moderate, dry heat and run for a period long enough to vent out any fumes. Keep the kitchen well-ventilated during this process—turn on the range hood and open windows if possible. Do not place plastic items inside the oven during burn-off, and avoid cooking during this initial cycle. After the burn-off, you may notice a temporary odor that should dissipate with use. The goal is to clear residues so that subsequent bakes are clean and flavors aren’t affected. If your manual specifies a different burn-off time or temperature, follow those directions. Stove Recipe Hub notes that a thoughtful burn-off cycle can improve odor control and heat consistency for first-time oven users.
Temperature verification and calibration
Oven thermostats aren’t always perfectly accurate out of the box. Use an oven thermometer placed in the center of the rack to verify the temperature you set matches actual heat. If you notice a discrepancy, consult your manual for calibration instructions or contact the manufacturer. Small misalignments are common, but addressing them ensures more even baking across containers and recipes. Record any adjustments you make so future cooks in your kitchen are aligned with the oven’s true temperature. Regular checks can help you maintain reliable results over time.
Ventilation and odor management
Ventilation is critical when you first use an oven. Turn on the range hood or exhaust fan, crack a window if safe, and keep the kitchen doors open to promote air flow. If odors linger after a few uses, run a short burn-off cycle with the oven empty and doors closed to help clear residual fumes. A well-ventilated space not only improves air quality but also reduces the risk of smoke alarms triggering during the early uses. If you’re sensitive to smells, consider starting with simpler breads and baked goods before attempting strong-flavor items that may intensify fumes during initial burn-off.
Safety basics and maintenance habits
Never leave an oven unattended during any burn-off or initial bake. Keep children and pets away from the kitchen, and ensure all cookware is dry before placing it in the oven. After use, wipe the interior with a damp cloth once cooled and remove any spills promptly to prevent stubborn stains. Establish a simple maintenance routine: wipe down after each cooking session, check the door gasket every few months, and run a light cleaning cycle if your model supports it. Regular upkeep saves time and prevents issues that could affect heat distribution and safety.
Common pitfalls to avoid
Avoid using the oven immediately after unboxing without cleaning; never ignore a strong chemical odor in the first uses; do not block vents or place foil on the bottom to catch spills during the burn-off; avoid using the oven forStorage or as a workspace during the burn-in period; don’t rely solely on the clock—temperature accuracy matters for consistent results.
Post-burn test bake and first practical bake
After the burn-off and temperature verification, attempt a simple test bake, such as a batch of cookies or a small loaf, to gauge heat distribution and timing. Use a basic recipe that doesn’t require delicate timing, and observe color, rise, and browning across the oven. If results are uneven or off, adjust rack position or temperature settings accordingly and re-check with the thermometer. This hands-on test helps you build confidence and refine your oven setup for everyday cooking.
Tools & Materials
- Microfiber cloth(For wiping interior surfaces, doors, and racks)
- Mild dish soap(Dilute in warm water for cleaning exterior and racks)
- Warm water(For washing and rinsing surfaces)
- Oven thermometer(Place in center rack to verify actual temperature)
- Oven-safe gloves(Heat-resistant protection when handling racks)
- Paper towels(Quick cleanup and blotting excess moisture)
- Ventilation options (range hood or window)(Ensure good air flow during burn-off)
- Non-abrasive scrub brush(Gently remove baked-on deposits if needed)
Steps
Estimated time: 45-60 minutes
- 1
Unbox and inspect
Remove all packaging materials, racks, and trays. Visually inspect the oven interior, door seal, and racks for any damage before powering on. This prevents starting with compromised components and helps you plan cleaning needs.
Tip: If you see damage, stop and contact support before use. - 2
Wipe and wipe again
Use a damp microfiber cloth with mild soap to wipe the interior, door, and exterior surfaces. Rinse with a clean damp cloth and dry with a towel. This removes manufacturing residues that could smoke on first use.
Tip: Pay particular attention to corners and seal edges where residues hide. - 3
Install racks and trays properly
Slide racks into the correct positions and ensure they sit flat. Misaligned racks can block airflow and create hot spots that affect cooking results.
Tip: Label rack heights on the oven wall with painter's tape for future reference. - 4
Run a burn-off cycle
Turn the oven to a moderate heat and run an empty cycle to cure factory oils and odors. Leave the space well-ventilated with the range hood on and a window open if possible.
Tip: Do not place foil or plastic items inside during burn-off. - 5
Check temperature with a thermometer
Place an oven thermometer in the center of the rack to compare the actual heat with the set temperature. Note any discrepancy and refer to the manual for calibration steps if needed.
Tip: Keep a log of any adjustments to help future cooking accuracy. - 6
Ventilate and manage odors
Use the range hood and keep a window open to manage fumes. Some initial odors are normal but should fade after a few uses.
Tip: If odors persist beyond a few uses, re-check seals or consult support. - 7
Establish basic safety routines
Keep children and pets away during setup. Clean spills promptly to prevent staining and ensure surfaces stay safe.
Tip: Regularly inspect the door seal for wear and replace if needed. - 8
Do a test bake
Bake a simple recipe, like cookies or a small loaf, to verify even heating and timing. Adjust rack position or temperature if you notice uneven browning.
Tip: Document results so future bakes are predictable.
Common Questions
Is a burn-in cycle always required before using a new oven?
Many ovens benefit from a burn-in to remove oils and odors from manufacturing. Always check the user manual for model-specific guidance, but expect a burn-in as a common first-use step.
A burn-in is commonly recommended to clear coatings and fumes; follow your manual.
What if I smell burning odors after the first use?
A temporary odor after the first few cycles is normal as protective coatings burn off. If the smell persists, ventilate the area, re-check seals, and consider a longer burn-in or professional inspection if needed.
If odors linger after several uses, check seals and ventilation and review the manual.
How can I verify the oven temperature is accurate?
Place an oven thermometer in the center of the rack and compare it to the set temperature. If there’s a consistent difference, consult the manual on calibration steps or contact customer support.
Use an oven thermometer to verify accuracy and adjust if needed.
What maintenance should I do after the first burn-in?
Wipe down interior surfaces after the oven cools, inspect the door seal for wear, and schedule periodic checks of racks and gaskets. Regular upkeep helps prevent heat loss and uneven cooking.
Wipe the oven, check seals, and plan routine upkeep.
Are there any risks I should avoid during first-use?
Avoid blocking vents, using foil on the oven bottom during burns, and leaving the door open for extended periods. Keep children away from hot surfaces during setup.
Don’t block vents or leave the door open during use, and supervise kids around hot surfaces.
Watch Video
Top Takeaways
- Wipe and inspect before heating
- Use a burn-off cycle to clear residues
- Verify oven temperature with a thermometer
- Ventilate the kitchen during initial uses
- Test bake to confirm even heat distribution