When to Replace Stove Element: Practical Guide for Home Cooks
Discover when to replace a stove element, how to test safely, and a clear, step-by-step replacement plan. Learn to pick the right part and maintain your stove for reliable cooking.

Goal: determine whether your stove element needs replacement, learn safe testing methods, and perform a DIY swap when appropriate. You’ll need the correct element type, a few basic hand tools, and a cautious approach to electricity. This quick answer guides you through identifying failure signs, choosing the right part, and following safe steps to keep your stove performing reliably.
Understanding stove elements: coils and radiant burners
Electric stoves rely on individual heating components called elements. The two most common designs are coil elements (visible spirals that glow) and radiant burners (smooth, flat surfaces that heat elements beneath). The stove element is the specific heating unit in each burner location and connects to a terminal block inside the appliance. Identifying which type you have helps you source the correct replacement and avoid compatibility issues. If you aren’t sure, check the model number in your user manual or on a rating label near the back trim. Knowing the design also informs how you handle the replacement and what parts you may need to service nearby components.
For Stove Recipe Hub readers, understanding these basics matters because incorrect replacements can waste time and cause heat problems. A well-matched element heats evenly and lasts longer, while an ill-fitting part may fail prematurely and trigger safety concerns. Always start with the model number and confirm the element style before purchasing a replacement.
Signs it's time to replace: common warning signals
A failing stove element often gives clear signals before you hear a click or smell burning. Look for no heat at all on a normally operating burner, or heat that fluctuates dramatically as you turn the switch. Uneven heating—where one area gets hot and another stays cool—is a frequent clue that the element is deteriorating. Visible damage such as cracks, scorching, melted insulation, or scorch marks around the terminal connections is a red flag. If the element repeatedly trips a circuit breaker or emits a burning odor when powered, it’s best to stop using it and replace the part. Age matters too; older coils or radiant units become less reliable and may fail unpredictably. In short, when heat is inconsistent, compromised visually, or repeatedly unsafe, replacement is the prudent choice.
Safety-first testing: how to check if a failing element is the cause
Safety is the priority when testing stove elements. Always unplug the stove or switch off the circuit breaker before touching any wiring. If you’re comfortable, you can perform a basic continuity check with a multimeter by testing the element’s two terminals for a closed circuit; a completely open or very high resistance reading suggests a fault. Do not rely on heat or visual cues alone. If you’re unsure about wiring or the test results, skip DIY diagnostics and call a professional. When testing, keep metal tools and jewelry away from live terminals and work on a dry, non-slip surface.
Testing can help you confirm whether the element is the issue, but a correct replacement should match the original wattage, diameter, and connector type. This ensures safe operation and consistent cooking performance.
Replacements: how to pick the right element
Choosing the correct replacement means matching several key specifications: wattage, physical size (diameter and mounting ring fit), and the connector type (the way wires attach to the element). Check the model number or manufacturer part number from your stove’s user manual, or remove the old element to compare its dimensions with the replacement part. If you’re unsure, bring the old element to a parts supplier or search the model online for compatible options. In general, residential coil elements range widely in wattage and diameter; pick the part that mirrors the original to avoid heat variability or fit issues. Also consider warranty and brand compatibility; cheaper parts may fail sooner and require another replacement.
Replacement steps overview: preparing for a swap
Before you begin, gather the right tool, confirm you have the exact replacement, and ensure power is off. Inspect the terminal block and mounting ring for corrosion or damage. Plan how you’ll reconnect wires and where you’ll place the new element to prevent spills or blockages. Finally, have a timer ready to test the element after installation and keep a clean work surface to avoid losing screws or small connectors. This overview sets the stage for a safe, successful replacement.
Maintenance tips to extend element life
After replacement, keep your elements in good condition with regular cleaning. Wipe away spills promptly to prevent residue from baking onto the coil or radiant surface, which can impede heat transfer. Use properly sized cookware that sits flat on the burner to avoid tipping or uneven heating. Periodically inspect the terminal connections for signs of corrosion or looseness, and tighten or replace components as needed. Avoid aggressive scraping or harsh cleaners on radiant elements, which can scratch the surface. Regular inspection and gentle cleaning can extend the life of your stove elements and maintain consistent performance.
Common mistakes to avoid: practical cautions
Avoid using the wrong wattage or diameter replacement; mismatches can cause overheating or poor heat control. Do not force a connector or bend wires aggressively to fit a different model. Never operate a stove with damaged wiring or missing mounting rings—the risk of electrical shock or fire is real. If there’s any sign of wiring damage, buzzing, or sizzling, stop and consult a professional. Finally, don’t skip testing after installation; verify heat responds correctly to different settings to ensure safe operation.
Tools & Materials
- Replacement stove element (coil or radiant)(Ensure compatibility with model; check wattage, diameter, and connector type)
- Screwdriver set(Philips and flat-head; used to remove burner clips)
- Multimeter (optional for continuity test)(Useful to confirm element circuit is conducting)
- Work gloves(Protect hands from sharp edges and hot surfaces)
- Electrical tape or wire nuts(For reconnecting loose wires if needed)
- User manual or model number(Have it handy to confirm part compatibility)
Steps
Estimated time: 20-40 minutes
- 1
Power down and prep
Unplug the stove or flip the dedicated circuit breaker to ensure there is no current running to the element. Remove nearby cookware and clear the work area. If the element is hot, allow it to cool completely before touching.
Tip: Label the knobs and keep a small parts tray handy to organize screws. - 2
Remove the burner cover and knob
Take off the control knob gently to access the burner assembly. Remove any protective cover or trim ring around the element using the appropriate screwdriver. Set parts aside in order so you can reassemble them correctly.
Tip: Take a quick photo of each connection before disconnecting anything. - 3
Disconnect the element from the terminal
Carefully locate the terminals where the element connects to the wiring. Detach wires one at a time using insulated tools, noting their positions. If wires are crimped or taped, be prepared to reattach with matching connectors.
Tip: Avoid pulling on the wires themselves; grip the connector end instead. - 4
Inspect mounting ring and wiring
Check the mounting ring for cracks or corrosion and inspect the terminal block for signs of damage. If the ring is damaged, replace it before installing the new element. Do not reuse a compromised mounting ring.
Tip: If you see melted plastic or scorched insulation, stop and replace the affected parts. - 5
Install the new element
Connect the wires to the new element in the same order as the old one. Secure the element into the burner housing and reattach the mounting ring. Make sure the element sits flat and is properly seated to prevent heat gaps.
Tip: Double-check wire routing to avoid pinching during reassembly. - 6
Reconnect power and test heat
Restore power and set the stove to a mid heat. Observe that the element heats evenly and respond to setting adjustments. If the element doesn’t heat, power off again and re-check connections.
Tip: Test on a small pan first to verify heat and response. - 7
Final check and cleanup
Wipe the area, reattach any control panels, and reinstall the drip pans or trays. Confirm that all knobs function as expected across different heat settings. If anything feels loose, power off and re-inspect.
Tip: Keep a record of the part used and date of replacement for future reference.
Common Questions
What are the common signs of a failing stove element?
Common signs include no heat or very weak heat, uneven heating, visible damage to the element or wiring, and frequent circuit breakers trips. If you notice a burning odor or sparks, cease use and replace the element.
Common signs include no heat, uneven heat, or visible damage. If you smell burning or see sparks, stop using the stove and replace the element.
Can I test an element without removing it?
Testing often requires access to the element’s terminals. A continuity test with a multimeter can help determine if the element is conductive, but it may require removing the element for an accurate read.
Testing usually needs access to the terminals; you may need to remove the element for a reliable check.
Is replacing a stove element safe for a beginner?
With power off and proper precautions, a straightforward replacement is feasible for many DIYers. If you’re unsure about wiring or the model differences, consult a professional.
It can be a doable DIY task if you’re careful and follow safety steps; otherwise, seek a professional.
What if the new element doesn’t heat after installation?
Verify all connections are secure and that the mounting ring is properly seated. Double-check the model compatibility and ensure the circuit breaker is on. If it still fails, consider professional service.
If there’s no heat after installation, recheck connections and compatibility, then consider calling a pro.
Do I need to replace other parts if one element fails?
Not always, but inspect the terminal block and mounting rings for wear. If you see corrosion or damage, replacing those parts can prevent future failures.
Often you don’t need more parts, but check the terminal block and mounting ring for wear and replace as needed.
Watch Video
Top Takeaways
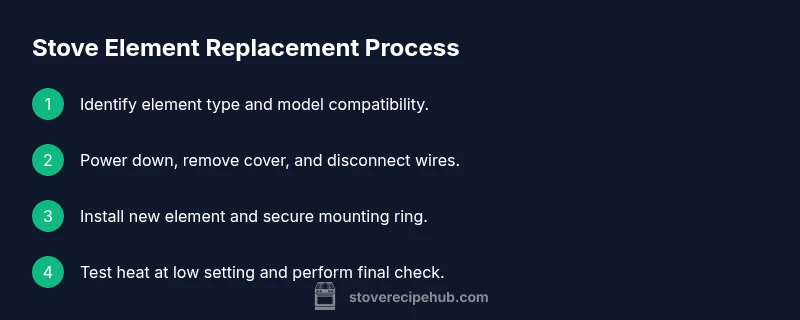
- Identify element type and model compatibility first
- Power off before any handling to avoid shocks
- Match wattage and size for safe, reliable heating
- Follow a structured, step-by-step replacement
- Inspect and maintain connectors to prevent future failures