How to Tell If a Stove Element Is Bad: Fast Troubleshooting Guide
Urgent, practical guide to diagnosing a faulty stove element on a home range. Learn symptoms, quick checks, and safe fixes to prevent stove malfunctions.

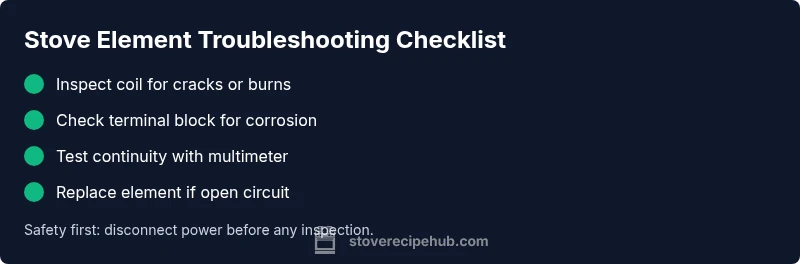
Symptoms like the burner failing to heat, remaining cold while the element glows, or showing visible damage indicate a bad stove element. Quick checks start with testing the outlet and plug, then inspecting the coil for cracks, and finally testing continuity with a multimeter. If there’s no continuity or uneven heating, replacement is advised or a professional should inspect.
How a Stove Element Works
A typical electric coil element on a stove is a resistive heater. When current flows through the coil, resistance converts electrical energy into heat. The element relies on three components: the control switch (infinite switch), the receptacle or terminal block, and the coil assembly itself. A damaged coil or a compromised connection can interrupt current flow or create arcing, leading to a burner that won’t heat or that heats inconsistently. Understanding this helps you distinguish between a bad element and a faulty control or wiring. In practice, many cases attributed to 'a bad element' are actually loose connections, a damaged receptacle, or a failing control switch. According to Stove Recipe Hub analysis, the simplest path to diagnosing a coil problem is to verify power, inspect the visible coil for damage, and perform a resistance test with a multimeter. If you’re comfortable with basic electrical tasks, you can proceed; otherwise, call a professional to avoid shock or fire risk.
Common Symptoms That Signal a Bad Element
There are several telltale signs that point to a failing stove element. The burner might not heat at all, heat unevenly (hot spots or cool edges), or take much longer to warm up than other burners. You may notice visible damage such as cracks, burns, melted insulation, or a coil that sits unevenly in the cradle. In some cases, you’ll hear buzzing or see arcing when the element is powered. Another warning is a persistent burning smell or sizzling noise even when the controls are set correctly. These symptoms don’t always mean the element is dead—wiring issues and bad receptacles can mimic the same behavior. Seeing any physical damage is a clear sign to proceed with caution. According to Stove Recipe Hub, validating the coil’s condition and connections is the fastest route to a correct diagnosis.
Quick At-Home Checks Before Replacing
Before you replace anything, perform a few non-destructive checks. First, unplug the stove and ensure the circuit is off at the breaker panel. Next, inspect the element’s terminal end for corrosion, discoloration, or loose terminals. If you can access the receptacle, reseat the element and re-tighten any mounting screws. Test the outlet with a different known-good appliance to rule out a temporary power issue. Wipe away any grease or residue that could insulate heat or hide cracks. If the element still won’t heat or shows uneven heating after these checks, it’s time to move to electrical testing or replacement. Keeping a log of symptoms and test results helps when you call a pro or shop for a replacement.
Safety First: When to Stop and Call a Pro
Electrical work carries risk. If you see melted insulation, burnt wiring, or exposed conductors, stop immediately and disconnect power. Do not perform tests if you’re unsure how to operate a multimeter safely or if your stove is hard-wired. If the burner connection looks damaged or you suspect a faulty control switch, a licensed technician should inspect. For gas stoves, never operate with damaged coils or igniters near gas lines; call a professional to avoid gas leaks and potential explosions. When in doubt, err on the side of caution and seek professional service to prevent injury or fire.
Diagnostic Test: Continuity and Resistance
Testing continuity is a reliable way to confirm element health. With the power off, disconnect the element’s wiring and set your multimeter to the low-ohm (ohms) range. Attach leads to the element’s terminals; a healthy coil typically reads a low but finite resistance, while a blown element shows open circuit (no continuity). If continuity exists but the burner still doesn’t heat, the fault likely lies with the control switch or receptacle. Document your readings and compare against the stove’s manual or a known-good element. If you lack a multimeter or aren’t confident, skip to replacement or professional evaluation.
Step-by-Step: Replacing a Burner Element
Replacing a burner element is a common repair, but it requires precision. 1) unplug the stove and ensure power is off. 2) Remove the coil from its cradle and disconnect connectors, taking a photo for reference. 3) Inspect the terminal block and cord for damage; replace if necessary. 4) Install the new element, reconnect wiring, and secure mounting clamps. 5) Reassemble the burner housing and restore power. 6) Test with a pan and observe for even heating. 7) If the new coil glows evenly and reaches target temperature, the replacement was successful. 8) If the element still won’t heat, consult a pro. Pro tip: label wires and keep track of screws to avoid miswiring.
Prevention and Maintenance Tips
To prevent future element failures, practice regular cleaning and inspection of burner assemblies. Wipe away grease that can cause poor heat transfer or arcing, and check for loose connections at the terminal block every few months. Use the correct-size cookware to prevent overloading the element, and avoid slamming pots onto the burner. If you have a glass-top stove, use non-abrasive cleaners and avoid metal scrapers that can nick the coil housing. Finally, consider a routine check by a professional every couple of years to catch wear that isn’t obvious.
Troubleshooting Flowchart: What to Do Next
- If the burner won’t heat at all, verify power and outlet first. - If the element glows but doesn’t heat, check connections and receptacle. - If there are visible cracks or melted insulation, stop and replace the element. - If resistance tests show no continuity, replace the coil or test the switch. - If you’re unsure, consult a professional and avoid further testing that could cause shock or fire.
Steps
Estimated time: 25-40 minutes
- 1
Power down and unplug
Ensure the stove is fully powered off. Disconnect from the wall outlet or shut off the circuit at the breaker. This prevents shock during inspection and repair.
Tip: Use a non-contact voltage tester to verify no current is present. - 2
Access the burner and element
Remove the burner grate and the electrical coil from its cradle. Take a quick photo of wire connections for reference before disconnecting.
Tip: Label wires if you must disconnect multiple connectors. - 3
Inspect for visible damage
Look for cracks, melted insulation, corrosion, or discoloration on the coil and terminal ends. Damaged parts should be replaced rather than repaired.
Tip: Grease and residue can mask damage; clean gently with approved cleaner. - 4
Test continuity with a meter
With the element disconnected, set your meter to a low-ohm setting and measure between the two terminals. A healthy coil typically shows a finite resistance; no continuity means the element is defective.
Tip: If you don’t own a multimeter, skip to replacement under safe conditions. - 5
Check the receptacle and wiring
Inspect the terminal block and wires for looseness or damage. Re-tighten terminals and replace any frayed wiring before reassembly.
Tip: Never bypass a damaged terminal—this can cause arcing and fire. - 6
Decide on replacement vs pro help
If testing indicates a faulty coil or you see wiring damage, consider replacing the element or calling a licensed technician, especially on gas stoves.
Tip: Professional help is advised for complex wiring or gas connections. - 7
Install new element and test
Reconnect wiring securely, reassemble the burner, restore power, and test with water in a pot to see if heating is even and adequate.
Tip: Document steps and keep spare screws organized.
Diagnosis: Stove burner won't heat or heats inconsistently
Possible Causes
- highPower issue (outlet or plug)
- highDamaged or loose terminal/receptacle
- mediumFaulty infinite switch or control switch
- highDamaged burner element (coil)
- lowInternal wiring damage at the element receptacle
Fixes
- easyTest outlet with a known-good appliance; reseat or replace plug as needed
- easyInspect and tighten terminal connections; replace damaged receptacle
- mediumTest continuity with a multimeter; replace the element or control switch if no continuity
- hardReplace the heating element and ensure correct alignment and clamps
Common Questions
What are the signs that a stove element is failing?
Look for no heat, uneven heating, cracks in the coil, or a burning odor. Visual damage and electrical symptoms like arcing also point to failure. If in doubt, start with power and connection checks before replacing parts.
Common signs are no heat, uneven heating, and visible damage. If you’re unsure, check power and connections first, then consider replacement.
Can a faulty stove element trip a circuit breaker?
Yes, a short or overcurrent from a damaged element can trip a breaker. If this happens, stop using the stove and inspect wiring, receptacles, and the element before attempting any test again.
A damaged element can cause a breaker to trip. Stop and inspect the wiring and coil before testing further.
Is it safe to test a stove element with a multimeter?
Testing with a multimeter is safe when the power is off and the element is disconnected. Use the correct low-ohm range and follow the meter’s manual to avoid incorrect readings or shocks.
Only test with the power off and the element disconnected. Follow the multimeter instructions closely.
Should I replace the entire burner or just the coil?
If the coil is visibly damaged or shows open circuit, replacing the coil is usually sufficient. If the terminal block or wiring is damaged, you may need the entire burner assembly or professional help.
Replace the damaged coil if the terminal is intact. If wiring is damaged, call a pro.
When should I call a professional?
Call a professional if you’re unsure about electrical testing, notice damaged wiring, or if the stove is gas-powered and you suspect a leak or ignition issue. Safety first.
If you’re unsure about electrical work or gas safety, don’t DIY—call a licensed technician.
Watch Video
Top Takeaways
- Test power and connections before replacing parts
- Use a multimeter to confirm element health
- Safety comes first—call a pro if unsure
- Document every step for future reference