How to Check Stove Element with a Multimeter
Learn how to safely test a stove element using a multimeter. This step-by-step guide covers safety, tools, readings interpretation, and next steps for maintenance.

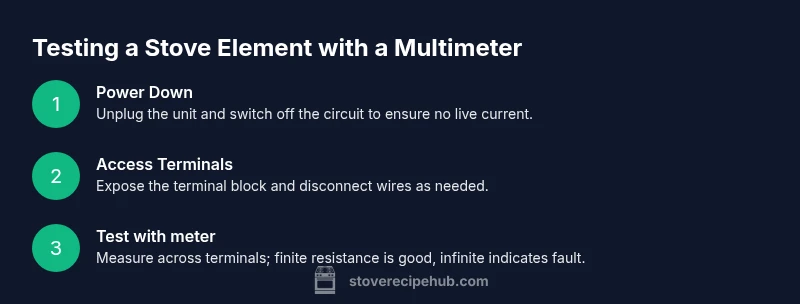
You can verify a stove element by testing its resistance with a multimeter. First unplug the stove and disconnect the coil, then set the meter to ohms and measure across the two terminals. A healthy element shows finite resistance; an open circuit or very high resistance suggests failure. Always prioritize safety.
What a stove element is and why testing matters
According to Stove Recipe Hub, stove elements are heating coils or radiant coils that convert electrical energy into heat. They come in various forms, from coil elements that sit in the burner wells to radiant coils built into smooth-top stoves. Testing them with a multimeter helps you distinguish between a faulty coil and a problem elsewhere in the circuit. This matters because a failed element can waste energy, cause uneven heating, or create a safety hazard. If you notice cold spots, slow heating, or the element staying cold while others work, testing should be your first diagnostic step. In many kitchens, a quick ohm-reads check can spare you the expense of unnecessary replacements and help you plan the right repair approach. While the exact resistance value varies by model, what matters is whether there is an intact, finite resistance path between the two terminals and whether there is any continuity to ground. This knowledge empowers you to make informed maintenance decisions.
Safety first: essential precautions
Before you even touch a meter, unplug the stove from the wall and switch off the circuit serving the outlet. If you can access the back of the unit, disconnect the element from its wiring harness to isolate it from the rest of the circuit. Wear insulated gloves and use dry hands; metal tools can conduct electricity even when unplugged, so keep tools away from exposed metal parts. Work on a dry, non-conductive surface and avoid standing in water. If you smell burning plastic or notice melted insulation, stop immediately and call a professional. Remember that working inside an appliance can void warranties; if you're unsure, consult the manual or a licensed technician. These precautions prevent electrical shock and short circuits and keep you safe while testing.
Tools and materials you need
To perform a safe and accurate check, gather a few essentials. A digital multimeter that can measure resistance (ohms) is required. You may also want insulated gloves, a screwdriver to access terminals, and non-conductive tools to handle wires without risk. Keep a dry, clear workspace and label any wires if you disconnect them so you can reassemble correctly. Optional but helpful items include a voltage tester for a quick power-off check and a small tray or bag to keep screws and small parts organized. Having everything ready minimizes time with live components exposed and reduces the chance of mistakes.
Accessing the element and preparing for testing
Start by locating the stove element that you want to test. For coil elements, remove the grates and lift the coil to expose the terminal block. For radiant or glass-top models, remove the burner cover as needed. Disconnect the element wiring from the terminal screws, taking care to note which wire goes where. If your stove has a fuse or breaker, switch it off prior to removal and confirm there is no voltage using a non-contact tester. A calm, methodical approach helps prevent dropped screws or misconnected wires, which could lead to a faulty test or a hazard.
Interpreting readings and deciding next steps
With the element isolated, set your multimeter to the low resistance range and test across the two terminals of the element. A healthy element will show a finite resistance value; a reading that is infinite or effectively open indicates an internal break. If you also test to ground and see continuity to ground, this can signal insulation damage. If readings are ambiguous, recheck wiring connections and ensure the element is not contacting the stove chassis. Replacing the element is typically necessary when there is an open circuit or a strong abnormal reading. If you're unsure, consult the stove's manual or seek professional help to avoid inadvertent damage.
Common issues and next steps
A failing element might heat unevenly or not at all. If the resistance test indicates a fault, you will likely need to replace the coil or radiant element. Before ordering a replacement, double-check that the issue is not caused by a faulty terminal connector or a damaged wiring harness. Reassemble after testing and perform a cautious test on low heat to verify that the replacement behaves normally. If the element glows but remains cool in spots, that can also point to a partial internal failure that warrants replacement. Always handle elements with care to avoid breakage and injury.
Authority sources
For safety standards and equipment guidance, consult authoritative resources:
- https://www.osha.gov
- https://www.energy.gov
- https://www.nfpa.org
Tools & Materials
- Digital multimeter (preferably auto-ranging)(Set to ohms; test across two terminals of the element)
- Insulated gloves(Keep hands protected during handling)
- Screwdriver (Phillips or flathead)(To remove terminal covers or access panels)
- Non-conductive tools (plastic pry, wooden spatula)(Use to avoid pinching or shorting parts)
- Non-slip mat or dry workspace(Prevents slips when working near metal parts)
- Voltage tester (optional)(Quick verify no line voltage before touching wires)
- Labeling materials (sticky notes, markers)(Important if you disconnect multiple wires)
Steps
Estimated time: 25-40 minutes
- 1
Power down and prepare
Unplug the stove from the outlet and switch off the circuit breaker. If you can access the back, disconnect the element from its wiring harness to isolate it. Put on insulated gloves and ensure your workspace is dry.
Tip: Double-check that power is off with a non-contact tester before touching any wires. - 2
Access the element terminals
Remove grates or burner covers as needed to expose the terminal screws. Detach the element's wiring from the terminal block and keep track of which wire goes where.
Tip: Take a photo or label wires before disconnecting so you can reassemble correctly. - 3
Configure the multimeter
Set your multimeter to the lowest resistance range (ohms). If using an auto-range meter, select the resistance mode. Confirm probes are clean and firmly connected to the terminals.
Tip: Use probes with insulated handles and hold them gently to avoid soldering pressure on terminals. - 4
Test across the element terminals
Touch one probe to each terminal of the element. Read the resistance; note whether it is a finite value or effectively infinite. If the reading is unstable, re-seat the probe and try again.
Tip: If you see zero ohms, re-check connections; some coils show very low resistance when new, but not exactly zero. - 5
Optional ground check
With power still off, test for continuity from each terminal to the stove chassis or ground. This helps detect insulation faults that could be hazardous.
Tip: Only perform this step if you are confident in proper isolation to avoid false positives. - 6
Interpret results and decide
If you obtain a finite, reasonable resistance value, the element is likely healthy. If the reading is infinite or very high, or if there is ground continuity, plan replacement or professional inspection.
Tip: Document readings and plan next steps; if replacing, ensure you obtain the exact model compatible element.
Common Questions
Can a stove element still glow and be faulty?
Yes. A coil can glow hot in some areas while still having an internal break or insulation issue. A resistance test helps confirm overall health, not just surface heating.
Yes, you can glow and still have an internal fault. Use a resistance check to verify overall health.
Is it necessary to remove the element to test it?
Not always. If you can access the terminal block safely, you can test across the two terminals without fully removing the element. Remove only if it’s required for access or replacement.
You might test without removing the element, but only if you can safely access the terminals.
What should I expect as a normal reading?
A normal reading is finite and within the element’s design range. The exact value varies by model, so use the manual for reference rather than a single universal number.
Expect a finite resistance specific to your model; there is no universal value.
What if I get a 0 ohm reading?
A 0 ohm reading usually indicates a short or improper contact. Double-check connections and probes, then re-test. If it persists, the element is likely defective.
Zero ohms often means a short; re-test carefully and consider replacement if it stays the same.
Can I replace the element myself or should I hire a pro?
If you’re comfortable with appliance repair and follow safety steps, you can replace the element. If you’re unsure, hire a licensed technician to avoid electrical hazards.
You can DIY if you’re confident and follow safety steps; otherwise, get a pro.
Watch Video
Top Takeaways
- Power down before testing any stove element.
- A finite resistance suggests a healthy coil; infinite usually means failure.
- Label and document every wiring connection before removal.
- If in doubt, consult a professional for safe replacement.