Which Wire for Stove: A Home Cook's Safety Guide
Learn which wire for stove, why a dedicated 240V circuit matters, and how to work safely with stove wiring. This guide covers code considerations, common wiring types, and when to call a licensed electrician.

Which wire for stove? Most stoves require a dedicated 240V circuit with conductors sized for high current and a proper disconnect. The exact wire type depends on the stove rating, local code, and the circuit breaker size. For safety, hire a licensed electrician rather than attempting DIY installation.
What the phrase "which wire for stove" really means
When a homeowner asks which wire for stove, they are seeking guidance on the type of electrical conductors and the circuit configuration needed to safely power a stove. This encompasses voltage, current demands, and how the appliance is connected to the home’s electrical system. The short answer is that stoves typically require a dedicated circuit designed for high current, but the exact wire choice depends on the stove’s rating and local electrical codes. Always treat stove wiring as a potentially dangerous task and prioritize safety and compliance.
Key wiring concepts for stoves
Stoves operate on a higher-energy supply than typical kitchen outlets. In many homes, a stove uses a 240V circuit that may combine two hot conductors with a neutral and a ground. The wiring must be compatible with the appliance’s terminal block, disconnect switch, and the protection provided by the circuit breaker. Because local codes vary, the only universally reliable guidance is to verify the model’s wiring diagram and adhere to the appliance’s installation manual. Remember: improper wiring can lead to shock, fire, or appliance damage.
Common wire types and why they matter
Electrical wiring for stoves involves conductors and insulation rated for higher temperatures and voltage. Typical household wiring is not sufficient for a stove’s current draw. The main considerations are insulation type, voltage rating, and compatibility with the appliance’s terminal connections. While many homes rely on rigid or semi-rigid cabling and protected raceways, the exact wire type must be specified by the stove’s manufacturer and approved by local code. Always cross-check with the installation manual before selecting wire materials.
Safety, permits, and code considerations
Before any wiring work, check your local regulations to see whether a permit or inspection is required. Most jurisdictions require a dedicated circuit, appropriate disconnect, and correct breaker sizing for a stove. Do not bypass safety devices or modify the supply cord. Hire a licensed electrician who can verify that wiring, permits, and inspections are all properly completed. This ensures not only compliance but also ongoing safety in the kitchen.
Before you call a pro: what you can check
You can begin by locating the stove’s model number and consulting the wiring diagram in the manual. Confirm that a dedicated circuit is present or planned, and note the panel location and available space for a new breaker if needed. Take clear photos of the current wiring connections and labeling. These preparations save time for the electrician and reduce the risk of misinterpretation during installation.
The role of the electrician and what to provide
A licensed electrician should perform any modification to a stove’s wiring. Provide them with the stove model, current wiring configuration, the panel’s location, and any observations you recorded (photos and notes). Request a written safety check, a connection diagram, and a clear explanation of the circuit design. This documentation helps future maintenance and clarifies the warranty terms.
How to verify readiness after installation
After the work is complete, have the electrician verify that the circuit is correctly energized, verify no stray voltage, and test the stove’s main functions. Ensure a compliance label or documentation is left with the appliance. If there are any concerns about heat buildup, unusual smells, or tripped breakers, contact the pro immediately for a re-evaluation.
Tools & Materials
- Voltage tester or multimeter(To verify power is off before inspecting)
- Insulated screwdriver set(Phillips and flathead; insulated handles)
- Flashlight(Good lighting in panel/installation area)
- Camera or smartphone(Document wiring setup for reference)
- Notepad and pencil(Record observations, model numbers, and panel details)
- Electrical-rated safety gloves(Extra protection when handling components)
- Lockout/Tagout kit(Only if you perform service that requires isolation)
Steps
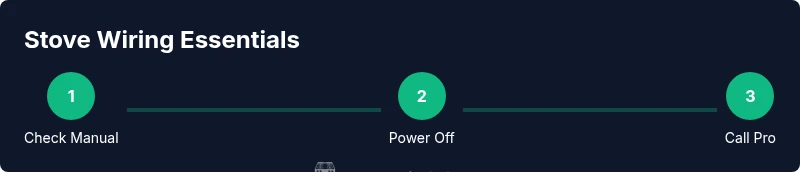
Estimated time: 60-180 minutes
- 1
Identify model and wiring diagram
Locate the stove’s model label and pull the manual. The wiring diagram in the manual shows the required wire types and connections. This step ensures you follow the manufacturer’s guidance and meet safety standards.
Tip: Have the model number handy and keep the manual within reach. - 2
Shut off power at the main panel
Switch off the main circuit breaker to de-energize the entire home before touching any wiring. Verify power is off using a voltage tester. This prevents shock and arc flash during inspection.
Tip: Stand on a dry surface and use insulated tools. - 3
Open the service panel and inspect the terminal block
Carefully access the stove’s service panel and visually inspect the terminal block for signs of wear, corrosion, or loose connections. Do not touch live terminals. If you notice damaged insulation or burned components, stop and call a pro.
Tip: Document findings with notes or photos for the electrician. - 4
Verify circuit requirements with manual and code
Cross-check the manual’s circuit voltage and the local electrical code to confirm whether a dedicated high-current circuit is required. Ensure the planned setup aligns with permit requirements if applicable. If there’s any doubt, pause work and seek professional guidance.
Tip: Consult the authority having jurisdiction (AHJ) if needed. - 5
Decide on proceeding or hiring a professional
Based on the wiring diagram and your assessment, decide whether you can proceed (only if you are qualified) or if a licensed electrician must perform the wiring. Do not attempt any wiring modifications beyond your training.
Tip: Err on the side of safety and professional involvement. - 6
Coordinate with the electrician and prepare information
Provide the electrician with the stove model, wiring diagram, current connections, and any photos you took. Prepare questions about circuit protection, grounding, and inspection requirements. Clear documentation helps ensure a correct and safe install.
Tip: Ask for a written plan and post-installation test results. - 7
Test operation and obtain safety confirmation
Have the installer test burner operation, safety interlocks, and voltage stability. Ensure the panel and disconnect are properly labeled and that there is no heat or smoke during operation. Request a final safety check report for your records.
Tip: Keep a copy of the test results for future maintenance.
Common Questions
Do I need a permit to wire a stove?
In many areas, a permit may be required for stove wiring and installation. An electrician can handle the permit process and ensure compliance with local codes. Check with your local AHJ to confirm requirements.
Yes, you may need a permit. Your electrician can help secure it and ensure code compliance.
Can I reuse existing wires when replacing a stove?
Reuse is only permissible if the existing circuit matches the stove’s rating and local code requirements. If not, replacement with the proper conductors should be performed by a professional.
Only if the wiring and circuit fit the stove’s requirements. Otherwise, hire a pro to replace it.
What should I do if the stove is gas-powered?
Gas stoves have different electrical needs than electric stoves. This article focuses on electrical wiring; consult a licensed technician for gas appliance installations and safety checks.
Gas stoves require separate considerations; consult a professional for electrical work related to gas appliances.
Is a surge protector enough for a stove?
No. A stove typically requires a dedicated circuit with proper disconnect and protection from a qualified installer. Surge protectors do not replace proper wiring and circuit protection.
No, you need a proper dedicated circuit and protections installed by a pro.
How can I tell if my breaker size is correct?
Refer to the stove’s label and manual for recommended circuit protection. A licensed electrician can verify the breaker size and ensure it matches local code and the appliance’s rating.
Check the stove’s manual and have a pro confirm the breaker size.
Watch Video
Top Takeaways
- Take safety first: power off before inspecting wiring.
- A dedicated 240V circuit is typically required for stoves.
- Follow the stove’s wiring diagram and local codes.
- Hire a licensed electrician for any wiring modifications.