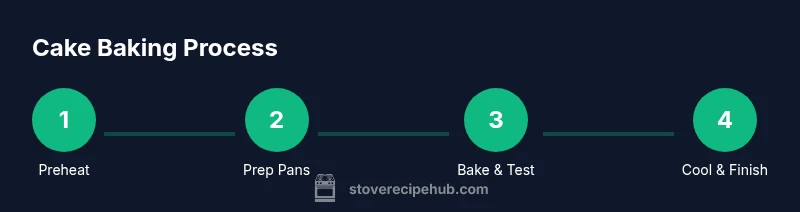
How to Use the Oven When Baking Cake
Learn how to use the oven effectively for baking cake with preheating, pan prep, bake timing, and troubleshooting. A practical, Stove Recipe Hub guide for home cooks seeking consistent, tall, tender cakes every time.

Master oven use for a cake by focusing on accurate preheating, proper pan prep, and steady bake times. This guide walks you through temperature, rack positioning, batter handling, and doneness tests so your cakes bake evenly and lift light crumb. Suitable for home cooks using standard ovens and common recipes.
Why Oven Temperature and Calibration Matter
According to Stove Recipe Hub, temperature control is the cornerstone of reliable baking. An oven that runs hot or cool alters the cake’s rise, texture, and crumb. Small deviations can cause doming, cracking, or a dry crumb. The solution starts with accurate measurement: invest in an oven thermometer and compare it to the oven’s built-in display. Use the thermometer’s reading to adjust the rack or temperature dial if needed. Calibrating your oven, either by professional service or DIY adjustments if your model supports it, helps keep your cakes predictable. When in doubt, trust the thermometer, not the oven light. Consistency comes from knowing your oven’s true heat and planning around it. Additionally, when you bake frequently, you’ll start to notice how different pans and recipes respond to the same temperature. That awareness helps you dial in your process for best results, whether you’re baking a classic vanilla layer cake or a rich chocolate torte.
Preheating and Pan Preparation
Preheating ensures that the batter meets a stable baking environment the moment it enters the oven. Begin by selecting the temperature specified in your recipe and letting the oven reach that heat before you start mixing or pouring batter. While you wait, grease your pans and line them with parchment circles or sheets to promote clean release. If your recipe requires multiple pans, align them on the same rack height to promote even heat exposure. Once the oven reaches temperature, place the pans on the middle rack and avoid crowding. Rely on a timer to avoid overheating the edges while the center remains undercooked. A properly heated, prepared pan yields a level top and uniform crumb across all layers, which reduces the need for aggressive leveling later.
Bakeware, Pans, and Rack Position for Even Heat
Pans come in various materials and colors, each affecting heat distribution. Light-colored, aluminum pans reflect heat and help prevent over-browning, while dark or nonstick pans conduct heat more quickly and can accelerate browning. Use a pan size close to what the recipe specifies; a larger or smaller pan shifts the cake’s thickness and bake time. Place the pan on the middle rack for the most even airflow and monitor the oven’s hot spots by rotating the pan 180 degrees halfway through baking if your oven has uneven heat. If you’re baking multiple layers, stagger their placement, and avoid stacking hot pans directly on top of one another. Finally, cool the pan briefly on a rack after removing from the oven; transferring to a cooling surface too soon can cause warping or sticking.
Mixing Batter and Batter Temperature for Cake Structure
Good batter texture begins with ingredients at the right temperature and mixing technique. Butter and eggs at room temperature blend more smoothly, creating a uniform emulsion that traps air for a light crumb. Cream butter and sugar until pale and fluffy, then alternate adding dry ingredients and liquids to avoid lumps. Do not overmix once the flour is added; overstir can develop gluten and make the cake dense. If your recipe calls for leavening, ensure it’s evenly distributed by sifting with dry ingredients. A batter that’s too cold may resist rising, while batter that’s too warm can rise aggressively and then crack or sink. Note the density of your batter, and adjust mixing time accordingly. The goal is a smooth, slightly thick batter that drops off a spatula in a ribbon that holds briefly before settling.
In the Oven: Bake Time, Rotation, and Doneness Tests
Bake times are estimates; your cake’s actual time will depend on oven characteristics and pan type. Start checking a few minutes early if your batter fills less than two inches in the pan; otherwise, set a timer closer to the recipe’s recommended end. Avoid opening the door frequently; each peek can cause a 5-10 minute temperature drop that disrupts bake progress. Rotate the pan once halfway through baking if your oven heats unevenly. Doneness is best tested with a clean toothpick or cake tester inserted near the center; it should emerge with a few moist crumbs, not wet batter. The cake should spring back lightly when pressed in the center, and the edges should feel set but not burnt. Remove immediately from the pan if the edges pull away easily. Let the cake rest on a rack after cooling for the best texture.
Cooling, Leveling, and Storing Cake Properly
After baking, rest the cake on a cooling rack for 10-20 minutes before turning it out of the pan. Cooling on a rack promotes even temperature and prevents condensation that can make the crumb soggy. If you plan to level or frost, let the cake cool completely, ideally 1-2 hours; wrap loosely if you won’t frost right away. For storing, transfer to an airtight container or wrap tightly; moisture and aromas can affect texture and flavor. If stacking layers, chill briefly to set frosting and prevent shifting. For longer storage, wrap tightly and freeze for up to a couple of weeks; thaw at room temperature before frosting.
Troubleshooting Common Cake Issues
Common issues include domed tops, cracks, or sinking centers. A domed top often results from too-fast heat or too much leavening; level the top with a serrated knife after cooling, or trim the top for stability. A cracked top can be from overmixing, batter temperature too warm, or pan heat too high; consider lowering temperature by a few degrees or testing your leaveners. A sinking center occurs when the cake is removed too early or when the center collapses from overbaking; ensure doneness test is done just before the end of the suggested bake time and cool gradually in the open oven door slightly ajar to reduce shock. Use even pans to reduce warping and ensure consistent baking across layers.
Tools & Materials
- Oven thermometer(Place near center of rack for accurate reading)
- Cake pans (2 standard rounds)(Grease or line with parchment; match recipe size)
- Parchment paper(Pre-cut circles for easy release)
- Mixing bowls(Stainless or glass, with enough capacity)
- Electric mixer or whisk(For creaminess and even mixing)
- Rubber spatula(Scrape sides and fold gently)
- Measuring cups/spoons(Accurate ingredients matter)
- Timer(Track bake time and doneness checks)
- Cooling rack(Promotes airflow for even cooling)
Steps
Estimated time: 60-75 minutes
- 1
Preheat oven
Set the oven to the temperature specified by your recipe and let it come to temperature before you begin mixing. This ensures the batter starts baking in a stable environment for even rise. If your oven takes longer than expected, wait until the thermometer reads the target heat.
Tip: Use a separate timer for preheat to avoid rushing batter prep. - 2
Prepare pans
Grease and line pans with parchment to prevent sticking and promote uniform release after baking. Tidy the edges so the batter can rise evenly all around the pan.
Tip: Tap the pan on the counter to settle any air pockets after pouring batter. - 3
Mix batter properly
Cream butter and sugar until light, then gradually add eggs and dry ingredients with alternating liquids to maintain an emulsion. Stop mixing as soon as flour disappears to avoid gluten overdeveloping.
Tip: Scrape the bowl and fold in any remaining dry patches for even batter. - 4
Fill and level batter
Divide batter evenly between pans and level the tops with a spatula. A uniform depth ensures even heat distribution and consistent rising.
Tip: Drop the pans once or twice to release air bubbles before baking. - 5
Bake and rotate
Place pans on the middle rack. If your oven has hot spots, rotate the pans halfway through. Avoid opening the door frequently, which can cause temperature fluctuations.
Tip: Use oven mitts and keep the door closed as much as possible. - 6
Check doneness and cool
Test with a toothpick in the center; clean or with a few moist crumbs indicates doneness. Let the cakes cool in the pan for 10-15 minutes, then invert onto a rack to finish cooling completely.
Tip: Cooling too quickly can cause cracking; support with a rack in a draft-free area.
Common Questions
What is the best oven temperature for baking most cakes?
Most cakes bake well at moderate temperatures around 325°F to 350°F (165°C to 175°C). Always follow the recipe and monitor doneness close to the end of the bake time.
Most cakes bake best around 325 to 350 degrees. Follow your recipe and check doneness near the end.
Why is my cake domed on top after baking?
Doming is usually caused by hot spots or overly rapid expansion of leavening. Ensuring even heat, proper preheating, and correct pan size helps reduce doming. Level the top after cooling if needed.
Domed tops come from uneven heat or quick rise; use even heat and proper pan size, then level after cooling.
Can I bake at a different temperature than the recipe?
If you change the temperature, expect a change in bake time and texture. Reduce or increase time accordingly and perform a doneness test earlier to avoid undercooking or drying out.
Changing temperature alters bake time and texture; test doneness earlier if you adjust temps.
Do I need to grease and flour the pan or is parchment enough?
Greasing plus parchment lining is a reliable method for most cakes to ensure clean release. Some recipes may require only parchment or only grease, so follow the specific instructions.
Grease and line with parchment for best release, unless your recipe says otherwise.
How long should a cake cool before frosting?
Let the cake cool in the pan for 10-15 minutes, then transfer to a rack to cool completely before frosting. Frosting on a warm cake can cause sliding and uneven texture.
Cool completely before frosting to avoid sliding and soggy texture.
Is parchment paper necessary for cakes?
Parchment helps release and keeps edges neat, especially for delicate batters. If you don’t have parchment, grease well and flour the pan or use a silicone liner as an alternative.
Parchment is usually best for release; otherwise grease and flour or use silicone liners.
Watch Video
Top Takeaways
- Preheat accurately and prep pans before batter.
- Bake on the middle rack for even heat.
- Test doneness with toothpick and cool completely before frosting.
- Calibrate your oven periodically for consistent results.