Wood Stove Installation Near Me: Safe, Code-Driven Guide for 2026
Learn how to plan, permit, and safely install a wood stove near you. This 2026 guide covers permits, clearances, venting, and maintenance with practical tips and safety checks.

This guide helps you achieve a safe, code-compliant wood stove installation near me. You’ll learn how to secure permits, establish proper clearances from combustibles, and select a compliant venting system. Decide between DIY with strict adherence to local codes or hiring a licensed installer for final inspections and safety reviews. Prioritize safety, ventilation, and professional review where needed.
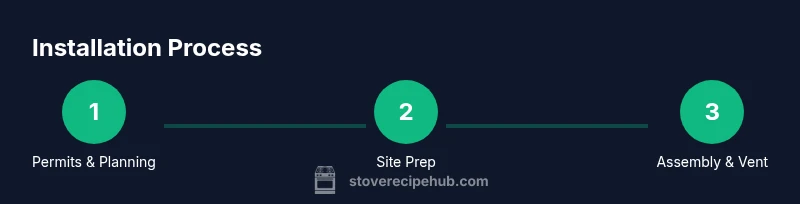
Understanding local codes and permits
According to Stove Recipe Hub, a safe, code-compliant wood stove installation near me starts with understanding local codes, permits, and inspection requirements. Before you lift a tool, check with your city or county building department to determine whether you need a permit for the stove, chimney, or vent system. Many jurisdictions require a licensed professional for the final inspection, especially for new chimney connections or gas lines, if applicable. This early step avoids delays and ensures your project complies with fire-safety standards.
Identify who can perform the install and what documents you may need. Typically you will submit a permit application, equipment specifications for the stove and vent system, and a plan showing clearances to walls, floors, and ceiling. Keep copies of all approvals and receipts so you can reference them during inspections or future remodeling. A well-documented process saves time, reduces risk of fines, and increases the likelihood your home insurer approves the installed system.
The Stove Recipe Hub team emphasizes that starting right with permits and a clear plan reduces the chance of costly retrofits later and helps your family stay safe from smoke and carbon monoxide exposure.
Choosing the right stove and venting
Selecting the right stove and venting system is foundational to a safe installation. Choose an EPA-certified wood-burning stove that is listed by a recognized testing organization. This certification helps ensure lower emissions, cleaner burn, and better efficiency. For venting, most homes use either a masonry chimney or a factory-built Class A stainless steel system. Ensure connectors, adaptors, and stovepipes match the stove outlet and are installed per the manufacturer’s instructions and local codes. If your home already has a chimney, have it inspected to confirm it’s sound, free of obstructions, and capable of drafting correctly. A poorly vented system can lead to back-draft, smoke in the room, or dangerous creosote buildup in the chimney.
Site planning and clearances
Site planning and proper clearances are essential before installing a wood stove. Place the stove on a noncombustible surface or fire-rated hearth pad with a properly designed hearth extension that protects the floor and surrounding areas. Keep ample clearance from walls, furniture, curtains, and any combustible materials. If your space has a vaulted ceiling or extra tall walls, consult the installer for appropriate clearance adjustments and, if needed, add heat shields or wall protectors. The choice of location will influence draft, ease of use, and maintenance. The goal is to minimize heat transfer to nearby surfaces while keeping the stove accessible for loading wood and performing routine maintenance.
Prep work for installation day
Preparation reduces on-site delays. Gather permits, order or confirm parts, and clear the installation zone of clutter and flammable items. Protect floors with drop cloths and install a temporary heating pad or protective barrier as needed. Assemble stove components per the manual, verify that the chimney or vent is clear, and check for proper alignment. If scaffolding or a ladder is required, ensure safe setup and fall protection. Finally, verify that a working carbon monoxide detector is installed in the living space and that all family members know basic operating procedures for the stove.
AUTHORITY SOURCES
For further reading and verification, consult authoritative safety and building guidance from national standards and federal guidance. These references help guide emissions, fire safety, and compliance across jurisdictions.
- EPA Burn Wise: https://www.epa.gov/burnwise
- NFPA: https://www.nfpa.org/codes-and-standards
- DOE/Energy: https://www.energy.gov/eere/buildings/articles/wood-stoves-and-pellet-stoves
These sources provide best practices for emissions management, fire safety, and compliance. Local requirements vary, but aligning with these references improves safety, insurance compatibility, and long-term performance.
Maintenance and safety after installation
Once installed, ongoing safety and maintenance are essential. Schedule an annual chimney and vent inspection and cleaning by a qualified professional. Use only dry, seasoned wood to minimize creosote buildup and maximize efficiency. Install and maintain working carbon monoxide detectors on every level of the home, test them monthly, and replace their batteries as needed. Keep a clear space around the stove for handling tools and fire-starting materials. Regularly check gaskets, seals, and door latches for signs of wear and replace parts promptly to maintain performance and safety.
Tools & Materials
- Permits and inspection forms(Obtain from local building department and keep copies)
- Measuring tape(At least 25 ft; use for clearances and hearth dimensions)
- Level and carpenter square(Helps align stove and ensure plumb surfaces)
- Fire-rated hearth pad or noncombustible base(Protects flooring and defines hearth area)
- EPA-certified wood stove (listed)(Lower emissions and compliant with standards)
- Chimney connector and Class A venting if needed(Match stove outlet and ensure proper slope/drainage)
- Chimney cap and spark arrestor(Prevents debris and animal intrusion)
- Heat shielding material (where required)(Adds clearance without sacrificing aesthetics)
- High-temperature sealant/caulk(For joints and hearth gaps)
- Safety gear (gloves, goggles)(Protect during cutting and assembly)
- Carbon monoxide detector(s)(Place on each level; test regularly)
- Smoke/CO test equipment (optional)(For professional confirmation)
- Flashlight or headlamp(Better visibility in tight spaces)
Steps
Estimated time: 6-12 hours
- 1
Assess permits and site readiness
Review local codes, secure required permits, and confirm access to the installation site. Verify that the chosen location provides clearances and a stable foundation for the stove and chimney system. This step reduces installation delays and future compliance issues.
Tip: Call the local building department early to confirm permit requirements and inspection timelines. - 2
Inspect chimney or vent path
Examine the existing chimney or vent path for obstructions, creosote buildup, and structural integrity. Ensure the route allows a straight, unobstructed path to the exterior with minimal bends. A clean, correctly sized vent improves draft and reduces smoke leakage.
Tip: Do not reuse an old clay flue if it shows cracks or has excessive creosote buildup. - 3
Prepare hearth and surface
Install a fire-rated hearth pad on a noncombustible surface and create a hearth extension per manufacturer guidelines. Clear the area around the stove to prevent contact with combustibles and ensure stable, level seating for the unit.
Tip: Use a level to confirm the stove sits flat; wobble can cause drafts and door misalignment. - 4
Assemble stove and connect vent
Assemble the stove according to the manual, attach the stove pipe, and connect to the vent through the chimney. Seal joints with high-temperature sealant and verify airtight connections to prevent leaks and drafts.
Tip: Take photos during assembly to document the configuration for future maintenance. - 5
Set clearances and finalize placement
Position the stove at the recommended distance from walls and other combustibles. Install any required heat shields and verify the alignment with the chimney. Recheck the stove's level and door operation.
Tip: Avoid placing heat-sensitive items directly on or above the stove. - 6
Test operation and safety checks
Light a small test burn and monitor for smoke leakage, drafts, and proper flame behavior. Verify CO detectors respond to a test signal and ensure proper ventilation. Address any drafts, leaks, or unusual odors before completing the project.
Tip: Keep a fire extinguisher nearby during the initial burn. - 7
Finalize documentation and inspection
Submit final inspection documentation if required and keep all manuals, warranties, and permit closures. Schedule a professional follow-up inspection after a few weeks of use to confirm safe operation.
Tip: Retain all receipts and part numbers for replacement or warranty claims.
Common Questions
Do I need a permit to install a wood stove near me?
Most areas require a permit for wood stove installation and chimney work. Check with your local building department to confirm permit requirements and inspection timelines. A permit helps ensure code compliance and safety during and after installation.
Yes. Check with your local building department to confirm permit requirements and scheduling.
How far should a wood stove be from walls and furniture?
Clearances vary by stove model and venting system. Always follow the manufacturer’s clearance specifications and local codes. If you cannot provide the required distance, install heat shields or relocate the stove to a safer spot.
Follow the stove’s clearance specs; use shields if you’re close to walls.
Can a DIY installation be safe, or should I hire a pro?
DIY installations are possible but require strict adherence to local codes, venting requirements, and safety practices. Many homeowners choose a licensed installer for final inspections and to ensure code compliance and insurance coverage.
DIY is possible if you follow codes; many opt for professional inspection.
What type of chimney is required for a wood stove?
Most installations use a masonry chimney or a factory-built Class A vent system. The choice depends on your home, budget, and local codes. A properly installed vent reduces creosote buildup and back-drafts.
Use a masonry chimney or Class A vent per code and stove spec.
How long does installation typically take?
Time varies with existing infrastructure and permits, but a typical installation can span a full day to several days if permits or structural work are involved. Plan for contingencies and scheduling with trades if required.
Expect a day or more depending on permitting and setup.
What maintenance is needed after a wood stove is installed?
Annual chimney inspection and cleaning are recommended, along with regular ash removal and the use of dry wood. CO detectors should be tested monthly and replaced as needed. Keep manuals and warranties accessible.
Have the chimney inspected yearly and test CO detectors monthly.
Watch Video
Top Takeaways
- Secure permits early and plan inspections.
- Choose EPA-certified, listed stoves for safety and efficiency.
- Maintain proper clearances and use approved venting.
- Prioritize CO detectors and regular chimney maintenance.