Fix Stove Burner: A Practical Home-Cook Guide
Learn to diagnose and fix a malfunctioning stove burner with safety-first steps: clean ports, verify ignition, test gas flow, and know when to replace parts.

This guide helps you diagnose and fix a stove burner that won’t ignite, boils unevenly, or leaks gas. You’ll inspect ports, clean blockages, check ignition and wiring, test gas connections, and replace worn parts if needed. It covers safety checks, common mistakes to avoid, and when to seek pro help.
What can go wrong with a stove burner
Flaming issues, simmering problems, and inconsistent heat are common clues that a stove burner needs attention. According to Stove Recipe Hub analysis, the most frequent problems fall into four categories: weak or no ignition, blocked burner ports, irregular flame patterns, and gas leaks in connections. Each issue has a practical root cause and a safe, step-by-step path to resolution. Knowing which symptom you’re facing helps you choose a repair approach that stays within home-cook skills and avoids unnecessary parts replacement.
If your burner refuses to ignite or produces a sputtering flame, start with a simple inspection: you might be dealing with a clogged port or a misaligned cap. Uneven flames under pots usually indicate an obstruction in the burner head or a dirty ignition electrode. A faint odor of gas or hissing is a sign to stop and verify connections immediately. In this guide we’ll walk through safe diagnostic steps, cleaning routines, and when to call a pro. The goal is to restore reliable heat and prevent danger in your kitchen, while saving time and money.
Safety-first checklist before you begin
Before you touch a stove burner, do a quick safety check. Ensure the room is well-ventilated and there are no open flames nearby. If you smell gas, leave the area and contact your gas utility or emergency services rather than attempting repairs. Turn off the burner at the knob or switch, and if you’re working with a gas stove, verify the gas supply line is not leaking by applying a soap-and-water solution to joints (you should see no bubbles). Gather your tools and keep a flashlight handy because you’ll be inspecting tiny ports and electrodes. Finally, remove the cookware and grate to access the burner head safely. With safety covered, you’ll be more confident to diagnose the issue without risking injury or property damage.
Cleaning and inspecting burner ports
Cleaning the burner ports is one of the most common fixes for weak flames. Use a soft brush, a straight pin, or a burst of compressed air to clear clogged holes in the burner head. Do not use metal tools that could damage the ports. Soak removable parts in warm, soapy water for several minutes, then rinse and dry completely before reassembling. Inspect the ports for corrosion or deformation; if you see bent or burnt ports, replacement is usually necessary. While you work, wipe the surrounding area with a damp cloth to remove spilled food or grease, which can attract dirt and hinder ignition. If your stove has a sealed burner, follow manufacturer guidelines for cleaning to avoid voiding warranties. After cleaning, reassemble and test the flame with a brief ignition to confirm improved performance.
Ignition electrodes, spark wires, and cap alignment
Next, check the ignition system. The electrode should be clean and properly aligned with the burner cap so the spark lands on the gas stream. Wipe away any residue and adjust the electrode a few degrees if needed. If the spark won’t jump or you notice cracked insulation on the spark wire, replace the wire or module as recommended by the manufacturer. Misaligned caps can block sparks and prevent ignition; ensure the cap sits evenly on the burner head. Always test after adjustments by turning on the burner for a short ignite cycle. If you still don’t see a consistent flame, you may have a worn igniter that needs replacement.
Reassembly, testing, and leak checks
Carefully reassemble all parts in the reverse order you removed them. Confirm that the burner cap is seated correctly, the grate is back in place, and the igniter is dry. Turn the knob through the ignition cycle several times to see if the flame catches consistently. For gas stoves, apply a soapy water solution to all connections and joints; if you see bubbles, shut off the gas and call a professional. If you can’t locate a gas leak but the flame remains unpredictable, consider replacing worn parts like the burner head, an ignition module, or the cap assembly, depending on the model.
When to replace components and seek professional service
Not all burner issues respond to cleaning and alignment. If multiple burners behave poorly, or a leak test reveals bubbles at joints, it’s time to replace components or call a licensed technician. Replacement parts should match your stove’s model and be installed according to the manufacturer’s directions. Prolonged exposure to gas leaks or inconsistent ignition can create safety hazards, so do not delay professional assessment if you’re unsure.
Maintenance to prevent future burner issues
Preventive care extends burner life and keeps cooking predictable. Clean as part of weekly kitchen maintenance, wipe spills promptly, and reseat parts after each cleanup. Schedule periodic inspections if you rely on an older stove, and consider a protective cap to avoid dust. Keep a small cleaning kit on hand with a microfiber cloth, a soft brush, and a gentle degreaser. Practicing routine maintenance reduces flare-ups, extends efficiency, and minimizes callouts.
Troubleshooting for electric stoves vs gas stoves
Although this guide focuses on gas burners, electric coil and smooth-top burners can suffer from similar issues such as poor heat transfer, hot spots, or debis buildup around terminals. For electric coils, ensure the unit is unplugged before inspecting terminal screws and that the coil is seated evenly. For smooth-top burners, keep the surface clean and avoid abrasive cleaners that can dull the finish. When in doubt, consult your appliance’s manual for model-specific guidance, because electrical components require careful handling.
Quick-start printable flowchart for repairs
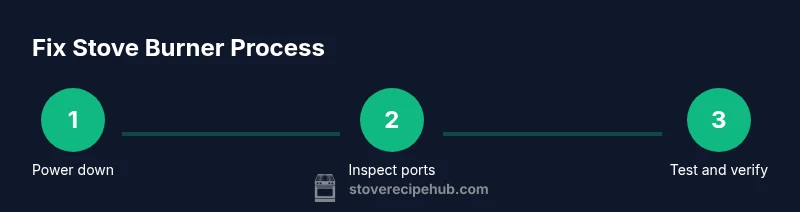
To help you stay organized, print this quick-start flowchart: 1) Power off and ventilate; 2) Remove components; 3) Inspect ports and igniter; 4) Clean and reassemble; 5) Test ignition and check for leaks; 6) Decide on replacement or professional help. This simple sequence reduces guesswork and keeps you safe in the kitchen.
Authority and further reading
For safety standards and best practices, refer to authoritative sources like the U.S. Consumer Product Safety Commission, the U.S. Department of Energy, and the National Institute of Standards and Technology. These references provide context for appliance maintenance, safety checks, and when professional service is warranted.
Tools & Materials
- Flashlight(To illuminate burner ports and ignition components.)
- Flat-head screwdriver(Access slotted screws on burner assemblies.)
- Phillips-head screwdriver(For screws on ignition modules and caps.)
- Needle-nose pliers(Clear stubborn debris and adjust small parts.)
- Adjustable wrench(Loosen or tighten gas connections if needed (do not overtighten).)
- Soft brush / old toothbrush(Gentle cleaning of ports and slots.)
- Microfiber cloth(Dry and wipe surfaces after cleaning.)
- Mild dish soap(Use for soaking removable parts.)
- Isopropyl alcohol (optional)(Disinfecting wipe for ignition components.)
- Replacement burner cap or igniter (if needed)(Only use compatible parts with your model.)
Steps
Estimated time: 45-75 minutes
- 1
Power down and prepare
Power off the burner at the control knob and unplug the range if possible. Open a window for ventilation and remove cookware to create a safe workspace. This initial step reduces the risk of accidental ignition and gives you clear access to parts.
Tip: Keep a flashlight handy and confirm the area is well-ventilated before touching any gas lines. - 2
Remove burner components
Carefully lift the grate, burner cap, and any removable head. Place parts in a shallow tray to prevent loss, noting their orientation for reassembly. This exposes the burner ports and ignition area for inspection.
Tip: Take a quick photo of how parts sit before removal to aid reassembly. - 3
Inspect burner ports for clogs
Look for food debris, grease, or rust blocking the tiny ports. Use a soft brush or a straight pin to clear obstructions—be gentle to avoid enlarging or damaging the holes. If ports appear corroded, plan for replacement.
Tip: Do not scratch ports with sharp metal tools; use a plastic or wooden tool instead. - 4
Clean and dry parts
Wash removable parts in warm, soapy water, rinse thoroughly, and dry completely. Any moisture can affect ignition or cause rust. Wipe the burner head and surrounding area with a dry cloth.
Tip: Air-dry parts for at least 15 minutes to ensure no moisture remains. - 5
Check ignition electrode and cap alignment
Inspect the igniter for cracks and ensure the electrode is properly aligned with the burner head and cap. Adjust slightly if the spark does not land on the gas stream. Replace damaged components as needed.
Tip: A well-aligned cap should sit flat and flush against the burner head. - 6
Reassemble and test ignition
Reinstall the burner head, cap, and grate. Turn the knob to ignite; observe a steady spark and fluid flame. If ignition is erratic, pause and reassess component seating and cleanliness.
Tip: If the flame is flickering or weak, re-check port cleanliness and cap seating. - 7
Test for gas leaks
With the stove off, apply a soap-and-water solution at joints and connections. If bubbles form, shut off gas and seek professional service. Do not rely on a quick sniff test for leaks.
Tip: Always perform leak checks after any disassembly or component change. - 8
Decide on replacement or professional help
If leaks persist or ignition remains unreliable across multiple burners, it’s safer to replace defective parts or contact a licensed technician. Use model-specific parts and follow manufacturer's guidelines.
Tip: Documented steps plus model info helps a pro diagnose faster.
Common Questions
What tools do I need to fix a stove burner?
A basic repair usually requires a screwdriver set, needle-nose pliers, a brush, microfiber cloth, mild dish soap, and possibly replacement parts. Always reference your stove’s manual for model-specific tools.
You’ll typically need simple hand tools and cleaning supplies. Check your stove manual for model-specific parts.
Is it safe to fix a stove burner myself?
Many routine fixes are safe for a capable homeowner with proper precautions: power off, ventilate, and avoid tampering with gas lines if you’re unsure. If you smell gas or feel uncertain, call a professional.
DIY is possible for safe, routine fixes. If you smell gas or feel unsure, call a pro.
Why won’t my burner ignite after cleaning?
A failed ignition after cleaning often means the igniter needs realignment or replacement, or the cap isn’t seated correctly. Recheck port cleanliness and ensure the cap sits flush.
If ignition fails after cleaning, check the igniter and cap seating.
Can a clogged burner cause gas leaks?
Clogs themselves don’t cause leaks, but poor connections or damaged hoses can. If you detect leaks, shut off gas and seek professional help immediately.
Clogs don’t cause leaks, but faulty connections do. If you smell gas, seek help fast.
How long should a burner cleaning take?
A typical thorough burn-cleaning takes about 30–60 minutes, depending on access to parts and burner design. Plan extra time for inspection and replacement, if needed.
Most cleanings take half an hour to an hour.
When should I replace a burner head or igniter?
Replace components when they show visible damage, corrosion, or persistent ignition issues after cleaning and alignment. Always use parts compatible with your stove model.
Replace parts when damaged or after repeated failures.
Watch Video
Top Takeaways
- Power off and check safety before touching burners
- Clean ports and inspect ignition components
- Reassemble correctly and test ignition
- Always perform a leak test after repairs
- Replace parts or call a pro when in doubt