How to Change Out a Gas Stove: A Practical Guide for Home Cooks
A comprehensive, safety-focused guide for home cooks to change out a gas stove, including planning, tools, step-by-step installation, leak testing, and maintenance.

Here’s how to change out a gas stove safely: verify the gas shutoff, unplug power, and confirm the new unit matches your gas supply and outlet. This quick guide covers the essential steps, safety checks, and when to call a pro. It also highlights common mistakes to avoid and how to test for leaks after installation. Learn how to change out a gas stove with safety in mind.
Why changing out a gas stove matters
According to Stove Recipe Hub, upgrading or replacing an aging gas stove can improve cooking performance, energy efficiency, and overall kitchen safety. A newer model may offer better temperature control, improved ignition systems, and more accurate flame settings, which reduces both waste and the risk of gas leaks. Home cooks often defer replacement until a component fails, but proactive replacement can prevent costly repairs and safety hazards. This section explains why you might consider changing out a gas stove, what to look for in a replacement, and how to plan the project so you’re not caught mid-lesson when the clock is ticking. The Stove Recipe Hub Team emphasizes that safety must come first: gas lines, electrical connections, ventilation, and proper clearance all play a critical role in a successful swap. By understanding these factors, you’ll approach the project with confidence and a clear checklist of tasks to complete.
Safety prerequisites and risk awareness
Gas work carries inherent risks, including the potential for leaks, fire, or carbon monoxide buildup. Before you touch any hardware, confirm the area is well-ventilated, keep flames and sparks away, and ensure there is a working CO detector nearby. The Stove Recipe Hub Team recommends no distractions, ample lighting, and a clear plan. If you ever smell gas or hear a hissing sound, evacuate immediately and call the gas provider or emergency services. In this guide, we assume you have a basic mechanical aptitude and access to standard hand tools. When in doubt, hire a licensed professional to handle the gas connections.
Tools and materials you’ll need
Having the right tools helps the process go smoothly and reduces the risk of damage. See the Tools & Materials section for a complete list, but in short you’ll want basic hand tools, leak-testing supplies, and protective equipment. This section also covers how to inspect the installation space for clearance, venting, and level positioning so the new stove fits perfectly. For safety, place a smoke detector nearby and keep a flashlight handy to inspect hard-to-see corners around the stove after installation.
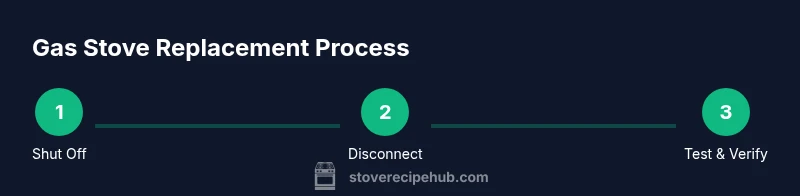
Step-by-step overview for changing out a gas stove
The process involves planning, shutting off gas and power, disconnecting the old stove, preparing the space, installing the new unit, reconnecting gas and electricity, and finally testing for leaks and operation. The steps below are designed to be clear, actionable, and safe for a home cook with basic DIY experience. Each step includes a pro tip to help you avoid common mistakes and ensure a solid connection that lasts for years.
Step 1 — Shut off gas and power
Shut off the gas supply at the shut-off valve closest to the stove, then switch off the circuit breaker or unplug the range if it’s hard-wired. This step prevents gas flow and electrical sparks during removal. Pro tip: have a partner assist with the valve handle to avoid twisting or slipping, and verify zero flame activity before proceeding.
Step 2 — Disconnect electrical connection and gas line
Carefully unplug the stove’s power cord and disconnect the flexible gas line using an appropriate wrench. Keep the line together to avoid kinking as you move the unit. Pro tip: use a flashlight to inspect fittings for rust or wear and have a bucket or cloth ready to catch any residual liquid or moisture.
Step 3 — Remove the old stove and prepare the space
Gently pull the old stove out of its installation alcove, taking care not to damage surrounding cabinetry or flooring. Clear the area, vacuum debris, and inspect the gas shut-off valve and outlet for corrosion or damage. Pro tip: use a helper or a dolly for heavy ranges to prevent back strain and accidental drops.
Step 4 — Install the new stove and connect gas line
Slide the new stove into place, align the anti-tip brackets or feet, and connect the gas line per the manufacturer’s instructions with appropriate sealant or tape rated for gas connections. Pro tip: avoid overtightening fittings and verify all connections are snug but not cross-threaded.
Step 5 — Reconnect power and test for leaks
Plug the stove back in or restore power at the breaker, then turn on the gas supply slowly and check all joints for leaks using a soap-and-water solution. If bubbles appear, tighten the fittings or replace damaged components before proceeding. Pro tip: test both the cooktop and oven gas lines as applicable to your model.
Step 6 — Burners and oven functionality check
Light each burner to confirm ignition and flame quality, and run the oven through a standard bake cycle to ensure even heating. Listen for unusual noises and watch for weak ignition or delayed lighting. Pro tip: consult the owner’s manual for specific preheating and bake settings to minimize bake inconsistency.
Maintenance and safety tips for your new stove
Regular inspections of gas fittings, seals, and hoses help prevent leaks and performance issues. Schedule annual safety checks, keep the area clear of combustibles, and maintain proper ventilation when the oven is in use. Stove Recipe Hub recommends keeping a CO detector, testing for leaks after any service, and using only manufacturer-approved parts. Consistent care extends the life of your investment and keeps your kitchen safer for family and guests.
Common mistakes to avoid
Rushing installation or skipping leak testing can lead to dangerous outcomes. Do not reuse old gas fittings or tape labeled for other uses, and never ignore unusual odors or sounds. Bad connections often show up as slow gas leaks or inconsistent flame height. By taking your time, verifying every joint, and following the manual, you’ll reduce risk and improve performance.
Tools & Materials
- Gas shut-off valve key or wrench(Used to operate the shut-off valve if it’s not easily reachable by hand)
- Adjustable wrench(Sizes vary; have both 1/2 in and 9/16 in if possible)
- Screwdrivers (flathead and Phillips)(For removing trim screws and electrical connectors)
- Channel-lock pliers(Helpful for gripping and loosening stubborn fittings)
- Gas-rated thread sealant or PTFE tape(Only if the installation requires it; use gas-rated products per manufacturer)
- Soapy water leak-test solution(Bubble formation indicates a leak; do not rely on odor alone)
- Safety gear (gloves, eye protection)(Protect hands and eyes during disassembly and installation)
- Flashlight and extra batteries(Better visibility under the cabinet and in tight spaces)
- Work gloves(Keep hands protected when moving the heavy stove)
Steps
Estimated time: Total time: 2-4 hours
- 1
Shut off gas and power
Locate and turn the gas shut-off valve to the off position. Switch off the circuit breaker or unplug the stove to remove all electrical power. This combination prevents leaks and accidental ignition during removal.
Tip: If you smell gas, evacuate immediately and call the gas company. - 2
Disconnect electrical and gas lines
Unplug the stove and use the wrench to carefully disconnect the flexible gas line. Keep fittings intact and avoid kinking hoses. This step minimizes the risk of gas leakage during removal.
Tip: Have a bucket ready to catch any residual moisture and use a flashlight for visibility. - 3
Remove the old stove
Gently slide the unit out of its alcove, protecting the surrounding cabinetry. Inspect the space for damage, and note any clearance changes needed for the new model. This step reduces the chance of scrapes or pinches when moving the new stove in.
Tip: Enlist a helper or use a dolly to avoid back strain. - 4
Prepare the installation space
Clear debris, vacuum crevices, and verify the floor is level. Ensure ventilation is adequate and that the electrical outlet matches the new stove’s plug configuration. A clean, level base improves stove stability and ignition performance.
Tip: Check the area behind the stove for hidden gas lines or vents before placement. - 5
Install the new stove and connect gas
Position the new stove, align it with the gas line and outlet, and attach the gas line with the appropriate sealant or tape if required. Tighten fittings snugly without over-tightening. This ensures a gas-tight connection and stable installation.
Tip: Avoid overtightening; cross-threading will cause leaks and damage. - 6
Reconnect power
Reconnect the stove to the electrical outlet or restore the breaker. Verify that igniters and clock/controls power up as expected. A proper electrical connection is essential for reliable ignition and timer functions.
Tip: If the cord shows wear or the plug is damaged, replace it rather than patching it. - 7
Leak test and burner check
Turn on the gas slowly and apply soapy water to all connections to look for bubbles. If bubbles appear, stop and tighten or replace the fitting before testing again. After a successful leak test, light each burner to confirm proper combustion.
Tip: Test after at least a few minutes of gas flow to ensure seals hold under pressure. - 8
Final function test
Run a full burner and oven cycle to verify ignition, flame height, and even heat. Listen for unusual noises and check for any gas odor. This ensures the unit performs safely and as expected.
Tip: Keep the oven door closed during preheat to avoid heat loss and ensure even baking.
Common Questions
Do I need a licensed professional to change out a gas stove?
Gas work involves potential leaks and fire hazards. While a confident DIYer can handle non-gas components, most jurisdictions require a licensed pro for gas line work and final inspection. Always verify local codes before proceeding.
Gas work can be dangerous; check local codes and consider hiring a licensed professional for the gas line work and final inspection.
What safety steps are essential before starting?
Shut off the gas at the valve, disconnect power, and ventilate the area. Use soapy water to test for leaks after any connection is made. Keep a CO detector active in the kitchen during and after installation.
Shut off gas and power, ventilate the area, and test for leaks with soap solution after connections are made.
How long does it typically take to replace a gas stove?
Time varies with space and model, but plan for several hours, especially if you’re learning or dealing with limited space. Resetting clearances and testing thoroughly adds to the duration.
It usually takes several hours, depending on space and model, plus time for leak testing.
Can I replace the gas line myself?
Gas line work is hazardous; many areas require a licensed professional. If you’re not trained, avoid this part and hire a pro to ensure safe connections and code compliance.
Replacing the gas line is best left to a licensed professional to ensure safety and code compliance.
What should I do if I smell gas after installation?
Do not operate any electrical switches. Leave the area, ventilate if possible, and call the gas company or emergency services immediately. Do not re-enter until it is cleared.
If you smell gas, evacuate and call the gas company or emergency services right away.
How can I test for leaks safely?
Apply a soap-and-water solution to all fittings and watch for bubbles. If you see bubbles, tighten or replace the connection and re-test until no bubbles appear.
Use soap and water on all joints; if bubbles form, fix the connection and test again.
Watch Video
Top Takeaways
- Prepare and plan before starting the swap.
- Shut off gas and power; test for leaks after installation.
- Use the correct fittings and avoid over-tightening.
- Ventilate and monitor for odors during testing.
- Consult a licensed professional if you’re unsure at any step.