How to Deal with Oven Burn: A Practical Guide for Home Cooks
Learn how to deal with oven burn with practical first-aid steps, safe cleaning, and prevention tips. This guide covers minor burns, when to seek care, and kitchen safety basics for busy home cooks.

By following this guide, you will know how to deal with oven burn through immediate first aid, safe cleaning, and prevention strategies. You’ll learn when to seek medical help, what supplies to keep in your first-aid kit, and practical steps to reduce future risk in a busy kitchen.
Understanding oven burns and risk factors
According to Stove Recipe Hub, oven burns are a common kitchen accident that can range from a minor skin irritant to a more serious injury. Most oven burns occur when skin comes into contact with hot racks, door edges, or splatter from heated oils. The risk increases in busy kitchens where multitasking leads to momentary distractions. Recognizing the signs early helps you decide between simple self-care and medical care. In this section, we’ll unpack what makes an oven burn happen and how to reduce exposure by planning your workflow and using proper protective gear.
- Common scenarios: reaching into a hot oven, grabbing a pan without mitts, or steam exposure from a steaming rack.
- Why awareness matters: quick, calm action can limit tissue damage and speed healing.
- What you’ll gain: a practical framework to respond safely whenever an oven burn occurs.
Immediate first aid steps for oven burns
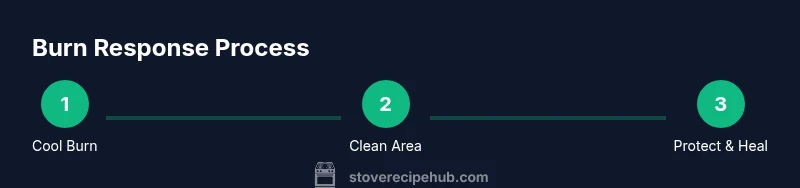
Responding quickly and correctly minimizes damage. The standard sequence is: cool, clean, protect. Start with cooling the burn under cool running water for 10-20 minutes to reduce inflammation and pain. If water isn’t immediately available, immerse the area in cool (not cold) water and avoid exposing it to ice, which can worsen tissue injury. After cooling, gently pat the area dry with a clean cloth and proceed to protective care. This is the core action you’ll use for most minor oven burns.
When to call for medical help and how to assess severity
Most small oven burns heal with home care, but some require professional evaluation. Seek medical help if the burn covers a large area, involves hands, feet, face, groin, or joints, or if there are signs of infection (increasing redness, swelling, pus, or fever). If there is severe pain that doesn’t subside with over-the-counter pain relievers, or if you’re unsure about the burn’s severity, consulting a clinician is prudent. In the kitchen, err on the side of caution with burns that blur boundaries between skin layers or blister widely.
Minor burns vs major burns: how to tell
Minor oven burns are usually red, painful, and heal within a week or two. Major burns appear as white or charred skin, or involve blisters covering large areas and a loss of sensation. Even if a burn seems minor, monitor it for worsening symptoms like spreading redness, fever, or swelling. When in doubt, treat as a potential major burn and seek medical advice. The goal is to prevent complications and ensure proper wound care.
Cleaning up after a burn incident: safety and sanitation
After addressing the immediate injury, clean the affected area and the surrounding countertop to remove any residues such as oil or sugar that could cause additional slips or burns. Use mild soap and water to wipe surfaces, dry thoroughly, and ensure the area is well-ventilated. If you dropped or spilled hot oil, dispose of absorbent materials safely and ventilate to reduce fumes. Keeping a clean workspace prevents subsequent accidents during cooking.
Protecting the skin during healing
For most minor burns, keeping the area clean and protected is sufficient. Use a sterile non-stick dressing to cover the burn if it’s likely to be rubbed or contaminated. Avoid applying heavy ointments or butter directly to large areas; instead, consider over-the-counter burn ointments or aloe vera gel as directed. Change dressings daily, wash hands before re-dressing, and observe for signs of infection. If blisters form, avoid breaking them; unbroken blisters protect healing tissue.
Healing and skin care during recovery
As the burn heals, gradual reintroduction of gentle care supports recovery. Continue to keep the area clean and dry, and apply a fragrance-free moisturizer once the skin has dried. If you notice persistent itching or scarring, seek medical guidance regarding topical treatments or scar management options. Protect the healing skin from sun exposure to prevent discoloration. Maintain a simple routine to reduce irritation while the skin regrows.
Prevention: reducing oven burn risks in the kitchen
Prevention is the best remedy. Establish a dedicated workflow when handling hot dishes: pre-heat protection, use long-handled tools, and wear heat-resistant gloves. Keep children and pets away from the cooking zone, and set up a clear cleaning routine to avoid slips. Regularly inspect oven racks and door seals for wear. Simple habits, like turning pot handles inward and using oven mitts for every heat exposure, dramatically reduce the likelihood of oven burns.
Practical kitchen safety checklist for oven burn prevention
Create a safety routine with checklists you can reference during cooking sessions. Include steps such as: wear heat-resistant gloves, keep cooking towels within reach, place hot items on heat-proof mats, and know where the nearest cold-water source is in the kitchen. Regularly review and update the checklist as you adopt better cooking practices. The most effective prevention comes from consistent, repeatable actions.
A quick home safety plan: what to do next
Develop a simple plan that your household can follow in case of a burn. Assign roles (who cools, who cleans, who calls for help), keep first-aid supplies stocked, and rehearse a brief burn-response drill. A practiced plan minimizes hesitation and ensures you act quickly and safely when a burn happens. By implementing these steps, you reduce both injury and downtime in your cooking routine.
Tools & Materials
- Running cool water(Direct stream over the burn for 10-20 minutes)
- Sterile non-stick dressings(Cover the burn if there is a risk of contamination or rubbing)
- Antiseptic wipes or saline(Cleanse around the wound gently before dressing)
- Over-the-counter burn ointment or aloe vera gel(Use only if recommended by local guidelines)
- Pain reliever (acetaminophen/ibuprofen)(Use as directed for pain management)
- Clean towel or gauze(Pat area dry after cooling the burn)
- Protective gloves or tongs(Handling hot items safely)
Steps
Estimated time: 45-60 minutes
- 1
Stop and cool the burn
Begin cooling the burned area under cool running water for 10-20 minutes to reduce tissue damage and pain. Avoid ice or very cold water, which can worsen injury. Gently pat dry with a clean cloth after cooling.
Tip: If you can’t access running water, immerse the area in cool water or use a soaked compress for short intervals. - 2
Remove constricting items
Carefully remove rings, bracelets, or tight sleeves from the affected limb before swelling begins. If swelling prevents removal, don’t force it; seek medical help.
Tip: Removing restrictive items early prevents tourniquet-like pressure as the burn swells. - 3
Clean and protect the area
Wash around the burn with mild soap and water, then pat dry. Apply a sterile non-stick dressing to protect healing skin. Do not apply butter or greasy substances.
Tip: Keep the dressing breathable and change it daily or if it becomes wet or dirty. - 4
Manage pain and monitor
If advised by a clinician, take an appropriate pain reliever. Monitor for signs of infection and increasing redness or swelling over the next 24-48 hours.
Tip: If pain worsens after 24-48 hours or you notice fever, seek medical care promptly. - 5
Follow-up care
Continue gentle skin care, avoid picking at blistered areas, and protect healing skin from sun exposure. Return to cooking activities gradually as healing progresses.
Tip: Document the burn with photos to track healing and consult a clinician if there are concerns. - 6
Safety review and prevention
Review what caused the burn (oven door, rack edge, splatter) and adjust workflow: use mitts, keep lids closed when not needed, and position hot items away from edges.
Tip: Involve all household members in the safety plan to reduce repeat incidents.
Common Questions
What counts as a minor burn vs a major burn?
Minor burns are small, superficial, and heal quickly with basic care. Major burns cover large areas or involve critical areas (face, hands, joints) and require immediate medical attention.
Minor burns are small and heal with basic care, but major burns need urgent medical help.
Should I pop blisters or apply butter to a burn?
Do not pop blisters; they protect healing tissue. Do not apply butter or greasy substances, as they can trap heat and lead to infection.
Don’t pop blisters or apply butter—keep the area clean and protected.
Is cold water always the right first aid for oven burns?
Cool running water is the standard first aid for most oven burns. Avoid ice and keep the area under cool water for 10-20 minutes.
Cool water for 10 to 20 minutes is the usual first aid.
When should I seek medical care for an oven burn?
Seek medical care if the burn covers a large surface, involves hands/feet/face, shows signs of infection, or fails to improve with home care after 24-48 hours.
If the burn is large or worsening, seek medical advice.
Can I use home remedies for oven burns?
Simple home remedies can help minor burns, but avoid unproven treatments. Stick to cleansing, sterile dressing, and guidance from health professionals as needed.
Stick to basic first-aid and talk to a clinician if unsure.
How can I prevent oven burns in a busy kitchen?
Establish a safety routine: use mitts, keep handles inward, set timers, and keep children/pets away. Rehearse a burn-response plan with the family.
Create a simple safety plan and practice it so it becomes automatic.
Watch Video
Top Takeaways
- Cool burns immediately with running water
- Cover burns with sterile dressings and monitor
- Differentiate minor from major burns and seek care when unsure
- Prevent future burns with mitts, careful handling, and safe kitchen layout