How to Fix a Stove Burner: Practical DIY Guide
Learn to diagnose and repair common stove burner issues with a step-by-step approach, safety precautions, tool lists, and maintenance tips to restore efficient, safe burner performance.

By following this guide, you’ll diagnose and fix a stove burner safely: identify likely causes (clogged ports, misaligned cap, dirty igniter, damaged base), shut off the gas, let it cool, then clean, realign, and test for a steady blue flame. Gather essentials and work slowly with careful attention to detail.
Diagnosing Common Burner Problems
Burner problems come in a few familiar forms: the burner won’t ignite, the flame is uneven, the flame is yellow, or the surface around the burner stays unusually hot. According to Stove Recipe Hub, most stove burner issues fall into three categories: ignition and flame control (igniter or electrode), physical alignment and sealing (cap seating and base), and port cleanliness (blocked gas ports). Start your repair by identifying which symptom you’re seeing, because the path to a fix differs depending on the root cause. For a DIY homeowner, the goal is to restore safe, clean combustion and consistent heat without replacing parts unnecessarily. In this guide, you’ll learn how to approach each symptom, what tools you’ll need, and how to test the burner after reassembly. With patience and careful steps, many common issues can be resolved in under an hour. Keep a notepad handy to log what you did and what the burner did afterward for future reference.
Safety First: When to Repair vs Replace
Safety should always drive your decision to repair or replace a stove burner. If you smell gas, hear a hissing sound, or notice any persistent gas odor after attempting a repair, evacuate the area immediately and call your gas provider or emergency services. Do not operate any electrical switches or flames. For electric-ignition burners, avoid liquids around the igniter and ensure dry conditions before testing. If the issue involves visible damage to the burner head, base, or ignition electrode, replacement is often the safer option. Keeping safety margins in mind helps prevent accidents and costly mistakes. The goal is to reduce risk while restoring reliable performance.
Real-World Scenarios: Gas vs Electric Burners
Gas burners depend on a clean gas port and a correctly seated cap for safe, efficient flame. Misalignment or port blockage immediately affects ignition and flame stability. Electric ignition burners rely on a functioning igniter and proper electrical grounding; water exposure or oil residue can impede ignition. The repair approach for gas burners focuses on port cleaning and cap alignment, while electric ignition care emphasizes igniter inspection and dry components. In both cases, routine cleaning and gentle handling protect the delicate parts and extend burner life.
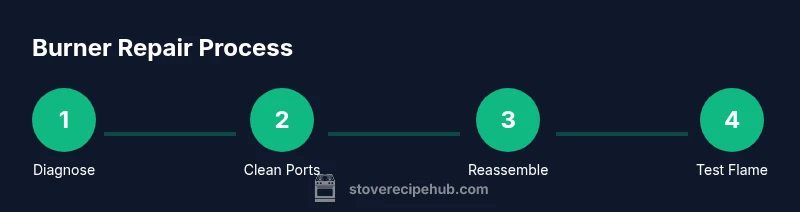
Step-by-Step Diagnostic Walkthrough
This section expands the quick guide into a practical, actionable sequence you can follow in a single session. Start by assessing symptoms, then perform controlled disassembly, cleaning, realignment, and reassembly before testing. Each action builds toward a safe, reliable burn with a steady blue flame. If you get stuck at any point, refer back to the tools list and safety notes. Document results to guide future maintenance.
Cleaning and Maintenance to Prevent Recurrence
Preventive maintenance matters. Clean burners monthly or after heavy cooking to prevent grease buildup that can clog ports or weigh down the cap. Use a soft brush, dry cloth, and a mild degreaser as needed—never soak igniters or allow liquid to pool around electrical components. After cleaning, re-seat all parts flush to ensure a proper seal. Regular checks on the gas supply line and knobs help catch leaks early and keep your stove working efficiently for longer.
Common Mistakes and How to Avoid Them
Common mistakes include over-tightening screws, using metal tools on delicate ports, and neglecting to dry components before reassembly. Also, rushing through steps can misalign the cap, leading to poor ignition. To avoid these, follow a slow, methodical sequence, test frequently after each step, and keep a clean workspace. A photo log of disassembly aids accurate reassembly and reduces error.
When to Call a Pro
If you encounter persistent ignition failures, a strong odor of gas, visible cracks, or anything that suggests a serious fault, it’s time to call a professional. A licensed technician can safely diagnose and repair complex issues without risking gas leaks or electrical hazards. For high-end ranges or sealed burners, professional service is often the most cost-effective choice to guarantee safe operation and compliance with local codes.
Quick Safety Checklist After Repair
After you complete a repair, perform a final safety check: ensure all knobs are off, verify there are no gas odors, re-check flame color (blue, steady), and test all burners individually. If any burner shows yellow flame or flickering after cleaning and realignment, re-inspect the ports and cap seating before proceeding. Always keep a note of the date and what you did, so future troubleshooting is faster and safer.
Tools & Materials
- Non-flammable degreaser spray(For grease buildup on burner components)
- Isopropyl alcohol (70%)(For quick wipe-downs (avoid igniters))
- Soft-bristle brush or old toothbrush(Gentle cleaning of ports and surfaces)
- Small flashlight(Inspect ports and igniter visually)
- Pin or paperclip(Clear clogged burner ports)
- Screwdriver set (Phillips #2 and flathead)(Remove and reassemble components)
- Protective gloves(Safe handling while repairing)
- Lint-free cloths(Wipe and dry components)
- Masking tape (optional)(Mark cap alignment when reassembling)
Steps
Estimated time: 30-45 minutes
- 1
Turn off gas and let burner cool
Before touching any burner parts, ensure the gas supply is off and the burner has cooled completely. This reduces the risk of fire or burns and makes inspection easier.
Tip: Confirm knob is in the off position and wait at least 5 minutes for cooling. - 2
Remove the burner cap and base
Carefully lift the burner cap and remove the burner base to expose ports and igniter. Use a non-metal tool if needed to avoid scratching sensitive parts.
Tip: Take a photo before disassembly to aid reassembly. - 3
Inspect ports and alignment
Look for clogged ports, soot, or misalignment of the burner cap. Misalignment can cause uneven flames or ignition failure.
Tip: Use a flashlight to spot blockages; if a port is clogged, proceed to cleaning. - 4
Clean ports and igniter
Gently brush away debris with a soft brush. For stubborn buildup, use compressed air or a pin to clear ports. Do not use liquids on the igniter.
Tip: Never use metal objects that could enlarge ports; keep the igniter dry. - 5
Reassemble and align
Place the burner base back, then align the cap so it sits flat and fully engages with the igniter. Incorrect seating can prevent ignition.
Tip: Mark alignment with masking tape if needed, then recheck after reassembly. - 6
Test the burner
Turn on gas and light the burner to verify a steady blue flame. If the flame is yellow or flickers, recheck alignment and ports or seek professional help.
Tip: A steady blue flame indicates proper combustion.
Common Questions
Can I fix a stove burner myself?
Many common burner issues can be addressed at home, especially clogs and misalignment. If you smell gas or suspect a leak, do not attempt repairs and call the gas company.
Many burner issues can be fixed at home, but never ignore gas smells — get help immediately.
Why won't my burner ignite?
Possible causes include clogged ports, misaligned cap, dirty igniter, or a faulty electrode. Clean and realign first, then test; replace parts if needed.
Common ignition issues are usually due to clogged ports or misaligned parts.
What should I do if I smell gas?
Leave the area immediately, avoid switches or flames, and call your gas provider or emergency services. Do not re-enter until cleared by professionals.
If you smell gas, leave now and call for help.
Is cleaning with water safe around burners?
Water can damage electrical igniters and cause corrosion. Use dry methods first and a damp cloth only for surfaces. Ensure everything is dry before testing.
Avoid soaking the area; use dry or barely damp cloths.
When should I replace a burner instead of repairing it?
If the flame remains yellow, there are cracks, or the base is damaged, replacement is safer and more cost-effective than repair.
If you see cracks or persistent yellow flame, replace the burner.
Why is my flame uneven after cleaning?
Uneven flames are often caused by misalignment or uneven ports. Recheck cap seating and ensure ports are clear.
Uneven flame usually means something isn't seated right or ports are blocked.
Watch Video
Top Takeaways
- Shut off gas and allow cooling before starting
- Clean and re-seat parts for proper combustion
- A blue, steady flame indicates a healthy burner
- If in doubt, consult a professional