How to Turn On a Gas Stove: Safe Ignition Guide for Home Cooks
A practical, safety-focused guide from Stove Recipe Hub on turning on a gas stove, including lighting steps, safety checks, troubleshooting, and maintenance tips.

This guide shows you how to safely turn on a gas stove, from confirming the gas supply to lighting the burner and adjusting the flame. You’ll learn automatic ignition vs. manual lighting, what safety checks to perform, and how to respond if you smell gas or detect a leak. Always prioritize safety and ventilation.
Understanding Gas Stove Ignition Systems
Turning on a gas stove is a common kitchen task, but it requires understanding how ignition works to do it safely. Different models use different ignition methods: automatic electric ignition that sparks when you turn the knob, a standing pilot light that remains lit, or manual lighting with a long-reach lighter when the igniter isn’t working. For home cooks, the key is recognizing the burner head, burner cap, gas inlet, and igniter location. When you initiate gas flow and have a valid ignition source nearby, you should see a flame appear within a second or two. If flames are slow to appear, irregular, or fail to ignite, the burner may be dirty, misaligned, or there may be a supply issue. Regular cleaning, proper cap seating, and correct burner alignment help ensure reliable ignition. Remember the exact phrase how to turn on a gas stove as you follow these steps to light the burner safely.
Key concepts to know:
- Ignition types: auto-ignition (spark), standing pilot, or manual lighting.
- Critical parts: burner head, cap, cap seating, igniter, and gas valve.
- Indicators of trouble: yellow flames, delayed ignition, or gas odor (see safety steps).
- Safety baseline: ventilate, keep flammables away, and never force a flame.
Safety First: Pre-Use Checks
Before turning on any burner, make safety and environment a priority. Confirm the gas supply valve is open and the knob aligns with the burner you intend to use. Make sure burner caps are seated correctly and there is no debris that could block the ports. Clear the cooktop surface of any towels, paper, or grease, and switch on the range hood or vent to improve airflow. Ensure the room is well-ventilated; if you work in a tight space, open a window. Listen for the igniter’s steady spark if you have an automatic ignition; a missing click or no spark indicates a potential failure in the ignition system and should be addressed before lighting. If you smell gas at any point, do not light the burner. Evacuate if necessary and call your gas provider’s emergency line. Keep emergency equipment ready—a fire extinguisher or baking soda only—and avoid leaving the flame unattended. The Stove Recipe Hub team emphasizes safety every time you approach a gas stove.
Lighting Methods: Auto Ignition vs Manual Lighting
Many residential gas stoves rely on auto-ignition, where turning the knob triggers an electric spark that lights the gas. This is convenient and reduces the need for matches. Some older or special models require manual lighting with a long-reach lighter or a match if the igniter isn’t functioning. For auto-ignition, turn the knob to the ignition or light position and listen for the click of the spark; the flame should appear quickly and settle into a steady blue color. If you use manual lighting, bring your lighter close to the burner head before turning the knob, then ignite as soon as gas begins to flow. Never place your body directly over the burner while lighting, and avoid leaning into the flame. If the flame goes out after ignition, turn the knob off, wait a few seconds for gas to clear, and try again. If repeated failures occur, contact service.
Responding to Gas Odor or Leaks
Gas odors require immediate action. If you detect a strong gas smell or hear a hiss, leave the area immediately and avoid any flames, switches, or electrical devices. Once outside, call your gas company’s emergency line or 911. Do not re-enter until professionals declare the space safe. After lighting, perform a quick leak check around connections with soapy water: bubbles indicate a leak that needs tightening or professional inspection. If you must light the burner during a power outage, use a manual lighter kept at a safe distance and never leave the lighter near the flame. Remember: safety first, then cooking.
Maintenance and Cleaning for Reliable Lighting
Regular burner cleaning improves ignition reliability. Remove the burner cap and wash it with warm, soapy water. Rinse and dry thoroughly before reassembling. Inspect burner ports for obstructions like food particles or grease; use a soft brush or wooden pick to clear clogged holes. Re-seat caps so alignment marks match, ensuring even gas flow. Periodically check igniter contacts if accessible, and replace faulty parts following the manufacturer’s instructions. After cooking, wipe down the stove to prevent grease buildup, which can affect ignition. Clean burners work better and last longer, making every turn of the knob a reliable light.
Authority Sources and Further Reading
For grounded safety guidance, consult established sources on gas safety and home appliance maintenance. These resources cover general gas safety, proper ventilation, leak detection, and safe use of cooking appliances:
- https://www.nfpa.org/Public-Education/Staying-Safe/Safety-in-the-Home/Gas-Burners
- https://www.osha.gov
- https://www.cpsc.gov
Note: Local building codes and appliance manuals provide model-specific instructions. Always follow the manufacturer’s directions and contact a licensed professional for repairs.
Quick Reference: Common Scenarios
- You’re unsure if the igniter works: always perform a test with the flame off and observe the ignition hue and flame color when lit. A steady blue flame indicates proper combustion; a yellow or orange flame may indicate dirty ports or insufficient air.
- Cooking with kids: maintain distance, use a back burner when possible, and turn pot handles inward to prevent tipping.
- After meals: inspect the burner heads and caps for residue; a quick wipe helps prevent clogs and misfires. Always end with safety checks before leaving the kitchen.
Tools & Materials
- Gas stove in good working condition(Ensure each burner lights and ignites properly.)
- Long-reach lighter or kitchen matches(Needed for manual lighting when the igniter is not functioning.)
- Ventilation (range hood or open window)(Improves air quality and reduces gas buildup.)
- Soapy water solution(Test connections for leaks after maintenance.)
- Fire extinguisher or baking soda(Keep accessible for small flare-ups.)
- Flashlight(Helpful if lighting is dim or cabinet access is required.)
Steps
Estimated time: 10-15 minutes
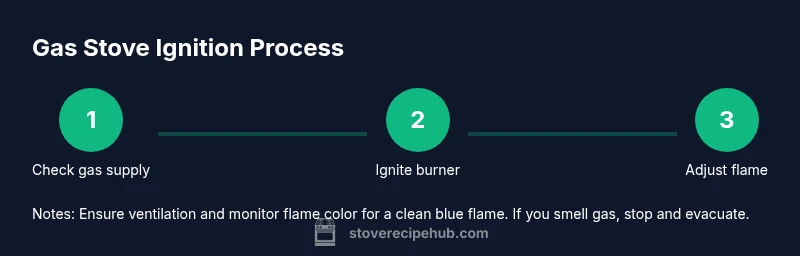
- 1
Check gas supply and knob alignment
Confirm the gas valve is fully open and the chosen burner knob aligns with the burner. Inspect the burner cap seating and ensure there is no debris blocking the ports. This initial check prevents ignition failures and gas escape during operation.
Tip: If you smell gas at any point, do not ignite; evacuate and call your gas provider. - 2
Identify ignition method and prep space
Know whether your model uses auto-ignition or requires manual lighting. Clear the cooktop, keep flammables away, and ensure the area is well-ventilated before proceeding.
Tip: Have your lighter or matches accessible but away from the burner head until ready to ignite. - 3
Engage auto-ignition or prepare lighter
If your burner has a working auto-igniter, turn the knob to the ignition position and listen for the spark. If there is no igniter, prepare a long-reach lighter for manual lighting.
Tip: Do not hover your hand over the burner during ignition. - 4
Light the burner
For auto-ignition, a flame should appear quickly. For manual lighting, bring the lighter to the burner head as gas begins to flow, then ignite. Watch for a steady blue flame.
Tip: If the flame flares, adjust by turning the knob slightly to reduce gas flow. - 5
Adjust flame height
Ensure the flame is steady and blue with no yellow tips. Adjust to the needed height for simmering or high-heat cooking. Verify flame evenness by briefly lighting adjacent burners.
Tip: A yellow flame may indicate dirty burners or insufficient air, stop and clean. - 6
Test another burner and finalize
Optional but recommended: light another burner to ensure ignition is reliable across the cooktop. Once lit, begin cooking and monitor flame behavior closely.
Tip: If other burners fail to light, consult a technician before use. - 7
Turn off correctly and conduct a leak check
When cooking ends, turn the burner knob to off and perform a quick leak check around connections with soapy water if you’ve done any maintenance. Ventilate briefly after use.
Tip: Keep a close eye on the area for a few minutes after turning off the flame.
Common Questions
What should I do if I smell gas or suspect a leak?
If you smell gas or suspect a leak, exit the area immediately and avoid using any flames or electrical switches. Call your gas company’s emergency line or 911 from outside. Do not re-enter until professionals declare it safe.
If you smell gas, leave the area and contact emergency services from outside. Do not re-enter until professionals say it's safe.
Why won’t my burner light after turning the knob?
Possible causes include a clogged burner port, misaligned cap, insufficient gas flow, or a faulty igniter. Clean and re-seat the burner, verify the gas valve is open, and try again. If it still fails, schedule service.
Common causes are clogged ports, misalignment, or a bad igniter. Clean, reseat, and retry; if it fails, call for service.
Can I light a gas stove with a match?
Yes, you can manually light with a long-reach lighter or match if the auto-ignition isn’t working. Stand back and keep your body away from the flame while lighting.
You can use a long lighter or match if the igniter isn’t functioning. Stand back and light safely.
Why is the flame yellow or orange?
A yellow or orange flame often means incomplete combustion or dirt in the burner ports. Clean the burner and ensure proper air supply to restore the blue flame.
A yellow flame usually means dirt or airflow issues; clean the burner and ensure proper air flow.
How often should I clean and maintain burners?
Clean burner caps and ports every few weeks during regular use, and inspect for signs of wear during routine maintenance. If you notice frequent ignition trouble, schedule a professional inspection.
Clean burners every few weeks and inspect for wear. If ignition trouble persists, call a pro.
Watch Video
Top Takeaways
- Verify gas supply and knob position before lighting.
- Use auto-ignition when available; otherwise, use a long lighter.
- Ventilate and test for leaks after lighting.
- Do not ignore a gas smell; evacuate and call for help.
- Keep burners clean for reliable ignition.