How to Replace Stove Knobs on Your Cooktop
Learn to replace stove knobs safely and effectively with a practical, model-agnostic approach. This guide covers compatibility, tools, a detailed step-by-step process, maintenance tips, and safety checks for 2026.

By following these steps, you will successfully replace stove knobs on most gas or electric cooktops. Gather the replacement knob kit that matches your model, a few common tools, and a soft cloth for cleanup. This quick answer previews the process and key safety checks before you begin. Be sure to disconnect power and cut gas if applicable, and test both alignment and function after installation.
Why replacing stove knobs matters
Worn or misaligned stove knobs are more than cosmetic flaws. They can affect gas flame control, heat output, and overall safety. When knobs are loose, you might inadvertently bump the dial and cause uneven burners or, in worst cases, an unintended flame. Replacing stove knobs restores precision and reduces the risk of accidental ignition. According to Stove Recipe Hub, knob maintenance is a practical DIY task for home cooks who want reliable stove-top performance without calling a technician. In 2026, many kitchens rely on compact, easy-to-replace knobs, making this a smart skill to have. Start by inspecting each knob for cracks, wear on the stem, or looseness around the shaft. If you notice wear, replacing the knob is a safe project that most people can complete in under half an hour with the right parts. This task also gives you a chance to clean the post-assembly area and ensure there are no crumbs or grease that could interfere with the fit.
Knob types and compatibility
Knobs come in several styles that attach differently to the stem. The most common types are push-on, friction-fit, and set-screw knobs. Compatibility depends on the stem diameter, the attachment method, and whether the knob covers a gas control valve or an electric coil. For accurate replacement, measure the stem diameter and check the replacement kit’s compatibility notes. As noted by the Stove Recipe Hub Team, choosing knobs that match your stove model helps prevent misalignment and improves safety. In 2026, a wide selection exists, so take note of your model number and the number of burners to ensure a perfect fit. If you’ve ever had a knob spin loosely, you’ll appreciate how proper matching reduces wear and tear over time, keeping burners responsive and safe.
How to assess wear and fit before replacement
Before investing in new knobs, assess each control carefully. Look for cracks in the plastic, worn lettering, or visible wear on the stem. A loose-fitting knob can indicate a worn shaft or a damaged set screw. Gently wiggle the knob; if it moves more than a few millimeters without resistance, it’s time to replace. Also inspect the shaft for rust or damage and check that the knob aligns with the marked position on the dial when pressed on. Stove Recipe Hub analysis shows that early detection of wear helps prevent accidental ignition or misalignment, yielding safer cooking experiences in 2026 and beyond.
Tools and materials you'll need
Having the right tools makes replacing stove knobs straightforward. Here’s a concise list of essentials:
- Replacement stove knob kit (model-compatible) — required; ensures proper fit and control
- Soft cloth for cleaning — required; helps remove grease before reassembly
- Optional: Allen wrench or screwdriver (depending on knob type) — recommended if set screws or screws are present
- Mild dish soap and water for cleaning knobs and stems — optional
- Small container for keeping screws/parts organized — recommended
Remember to verify compatibility before purchasing the kit. The right knobs should fit snugly on the stem without excessive force. This saves time and avoids damage to the control shaft.
Safety considerations before you begin
Safety first: always power down the stove and, if applicable, disconnect the power source to the unit before handling knobs. If your stove has gas controls, turn off the gas supply at the main valve or ensure you are in a well-ventilated area before starting. Keep children and pets away from the workspace. Do not attempt to replace knobs if you notice damaged stems, leaking gas, or any chemical odors. Always work on a cool surface and wipe away any moisture to prevent slips during removal and installation.
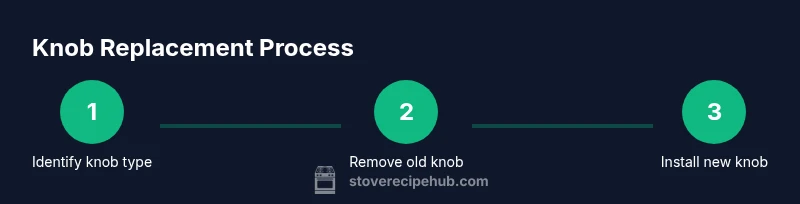
Step-by-step overview of the replacement process
This section provides a practical narrative you can follow step-by-step to replace stove knobs without confusion. Plan your work, select the correct knobs, and proceed methodically. After removal, verify stem condition, clean the mounting area, and align the new knob so the indicator aligns with the reference marks on the panel. Finally, test each knob by turning to each position to confirm smooth operation and proper flame or heat control. If a knob does not seat properly, recheck compatibility or re-seat with gentle pressure. The goal is a firm, accurate fit that responds predictably when you touch the control.
Detailed troubleshooting if a knob doesn’t fit
If a replacement knob does not fit, reassess compatibility first. Confirm stem diameter and shaft type, re-check the model compatibility notes, and ensure you are not trying to force a mismatch. If there is resistance, remove the knob and inspect the stem for burrs or damage. Some knobs require a small set-screw to lock onto the stem; if so, loosen, align, reinstall, and tighten only until snug. In some cases, you may need to adapt by selecting a different kit that matches your exact model number and burner configuration. Always avoid forcing parts into place to prevent further damage.
Cleaning and maintenance after replacement
After installing the knobs, wipe down the entire area to remove fingerprints, grease, and cleaning residues. This keeps knocks and friction unimpeded as you operate the dials. Regular maintenance includes quick wipe-downs after cooking and periodic checks for loose screws or wear. If you notice discoloration or buildup around the stem, clean gently with a damp cloth and a little dish soap. Keeping the control area clean helps preserve knob longevity and ensures reliable performance across the stove.
Common mistakes to avoid and quick checks
Common mistakes include buying the wrong model, forcing knobs onto incompatible stems, or neglecting safety checks. Quick checks after installation should include ensuring each knob aligns with its corresponding burner indicator, rotates smoothly through all positions, and returns to a resting position when released. In 2026, home cooks report that taking a few extra minutes to verify fit and alignment reduces the need for rework and reduces frustration. The Stove Recipe Hub team emphasizes that careful selection and test-fitting are the simplest path to a durable, safe replacement.
Tools & Materials
- Replacement stove knob kit (model-compatible)(Ensure knobs match your stove model; include as many knobs as burners on your unit.)
- Soft cloth(For cleaning stems, panels, and knobs before reassembly.)
- Allen wrench or screwdriver(Only if your knobs use set screws or screws to attach.)
- Mild dish soap(Use for light cleaning of knobs and surfaces.)
- Organizing tray or small container(Keeps screws and parts organized during replacement.)
Steps
Estimated time: 15-25 minutes
- 1
Power down and prepare
Power off the stove and unplug if it’s an electric unit. If you can access the gas valve, ensure it is closed and work in a well-ventilated area. Clear the surface of any pots, pans, or obstructing items so you have space to operate safely.
Tip: Double-check the power switch and keep a clear path to the work area. - 2
Remove the old knob
Gently pull the knob straight out from the stem or loosen any set screws with the appropriate tool. If there is resistance, do not force it—recheck for hidden screws or a locking mechanism.
Tip: If there’s a set screw, use the proper Allen wrench to loosen before pulling the knob. - 3
Inspect the stem and mounting area
Look for wear on the stem, scratches, or burrs. Clean the mounting surface to remove grease that could interfere with seating the new knob.
Tip: A clean stem ensures a snug fit and accurate alignment. - 4
Match the new knob to the stem
Verify knob type and model compatibility. Align the knob’s indicator with the stove panel marks before pressing onto the stem.
Tip: Start with a gentle press, then apply even pressure until fully seated. - 5
Secure any set screws
If the knob uses a set screw, tighten it just enough to hold the knob firmly without deforming the stem.
Tip: Over-tightening can strip the stem or crack the knob. - 6
Test fit and alignment
Turn each knob through all positions to confirm smooth operation and correct flame or heat control. Check that the indicator aligns with the corresponding burner as you operate.
Tip: If misalignment occurs, re-seat the knob and recheck the alignment marks. - 7
Clean up and finalize
Wipe surfaces again to remove fingerprints and ensure everything is dry. Store any extra parts and document the replacement for future reference.
Tip: Take a quick photo of the finished setup for future reference. - 8
Monitor performance
Use the stove for a short cooking test to confirm responsive control. If anything feels off, recheck the fit or consult the manufacturer’s guidance.
Tip: Keep a record of the model and knob type for future replacements.
Common Questions
Do I need to replace all knobs at once or can I replace just one?
You can replace individual knobs if you find a matching replacement. Ensure compatibility, especially with stem size and attachment method, to avoid fit issues.
You can replace a single knob as long as it matches the stem and model. Make sure it fits securely and aligns with the panel.
What if the replacement knob doesn’t fit the stem?
Re-check compatibility notes and the stem diameter. Do not force a knob onto a mismatched stem; choose a kit that matches your stove model or consult the manufacturer.
If it doesn’t fit, don’t force it. Check the stem size and look for a compatible knob kit.
Are gas knobs different from electric stove knobs?
Yes. Gas knobs regulate gas flow and may have different stem designs than electric knobs. Always match the knob type to your appliance’s control system.
Gas knob designs can differ from electric; pick knobs that match your stove's control mechanism.
Can replacing knobs damage the stove?
When done correctly, replacement knobs don’t damage the stove. Forced fits or using incompatible parts can harm the stem or control mechanism.
If you follow the steps and use compatible parts, replacement is safe.
How long does knob replacement typically take?
Most people complete a knob replacement in 10-20 minutes, depending on knob type and access to screws.
Usually about 10 to 20 minutes.
Where can I buy model-compatible knobs?
Check the stove manufacturer’s parts store or reputable third-party kits that specify compatibility with your model.
Look for replacement kits from the manufacturer or trusted suppliers that list your model.
Watch Video
Top Takeaways
- Know your knob model before buying replacements
- Power off and ensure gas is safe before starting
- Align indicators precisely for accurate control
- Test each knob after installation to confirm proper function