Stove Top Replacement Guide: Safe DIY Techniques for Home Cooks
Learn a practical, safety-focused approach to stove top replacement. Identify parts, prep safely, perform a secure install, test thoroughly, and maintain your stove top—designed for home cooks and DIY enthusiasts by Stove Recipe Hub.

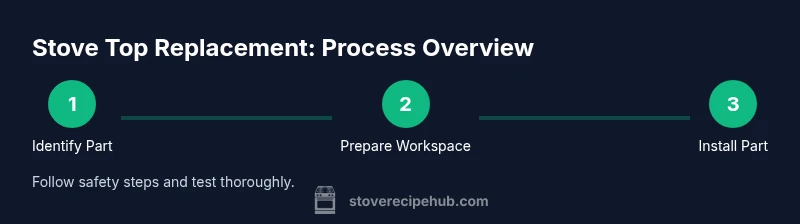
By the end of this guide you will be able to safely perform a stove top replacement for a damaged burner or module, choose compatible parts, and complete a secure install using common hand tools. You’ll also learn essential safety steps, quick testing methods, and when to call a professional to protect your kitchen and household.
What stove top replacement covers
Stove top replacement refers to swapping out a damaged burner module, control switch, grate, or even an entire cooktop surface on a residential stove. In many homes, the most common targets are a malfunctioning burner, a warped burner cap, a cracked glass surface on an electric coil top, or a worn knob assembly. Replacing parts rather than the whole unit can save money and downtime, but compatibility and safety matter. According to Stove Recipe Hub, the first step is to identify the exact model and the part number, because a mismatch can lead to poor fit, gas leaks, or electrical hazards. You’ll want to access your model’s manual or manufacturer’s site to confirm part numbers and warranty implications. This section will outline how to decide if a replacement is appropriate, what parts to buy, and how to prepare your workspace for installation.
A successful stove top replacement starts with clear identification. Collect the model number, measure any sockets or openings, and confirm that the replacement part matches the brand, model, and serial number. If you’re unsure, contact the manufacturer’s support line or a trusted retailer. Take photos of the current setup from multiple angles so you can compare connectors, mounting brackets, and wiring harnesses. Doing this upfront reduces the risk of ordering the wrong part and having to return it later. Finally, review any warranty or safety notices—some parts or configurations may void manufacturer warranties if installed by a non-authorized service provider.
Safety basics before you start
Safety is the foundation of any stove top replacement project. Begin by turning off power to the stove at the circuit breaker and, for gas stoves, closing the gas shutoff valve if accessible. Unplug the unit if possible and remove any nearby combustibles. Ventilate the area by opening windows or using a range hood. Keep a fire extinguisher within reach and wear safety gloves and eye protection. After turning off utilities, use a soapy-water solution or a commercial leak detector spray to verify there are no active gas leaks before you begin handling parts. If you smell gas at any point during the process, stop immediately and contact emergency services. As you work, document each connection and keep fasteners organized in labeled containers. This approach minimizes confusion and reduces the risk of reassembly errors.
Choosing the right replacement parts
Compatibility is the difference between a quick fix and a new problem. Start by locating your stove’s exact model number—usually found on a label under the cooktop or inside the oven door frame. Use this to search for model-matching replacement parts such as burners, burner caps, knobs, and grates. When selecting parts, verify several factors: connector type (gas valve, electrical plug, or screw terminals), mounting hole pattern, burner diameter, and color/finish that matches the rest of the surface. If you’re uncertain, buy from a retailer that accepts returns or offers compatibility checks. Keep the old parts for side-by-side comparison, and photograph the connectors before removal so you can replicate the orientation during reassembly. Finally, avoid “universal” parts that aren’t confirmed compatible with your exact model, as this can lead to misfit and safety risks.
The safe DIY installation process (high-level overview)
With the right parts on hand, you’ll install the replacement component by following a careful sequence: reconnect the burner assembly, align the parts with the mounting points, and secure screws or clamps without overtightening. Reattach knobs or control modules, ensuring the electrical connectors are seated fully and the gas line (if applicable) is tightened to the manufacturer’s torque specification. After reassembly, gently test the burner by turning it to its lowest setting first, then to higher settings to confirm responsiveness. Finally, perform a leak test on gas lines by applying a soap solution and watching for bubbles. If you notice any hiss, bubbling, or irregular flame behavior, power down and consult a professional. This approach emphasizes careful alignment and secure connections to prevent leaks or misfires. Remember to clean and wipe the work area to remove any dust or metal shavings that could affect performance.
When to hire a pro and warranty considerations
DIY stove top replacement is feasible for many basic components, but certain situations call for professional help. If the replacement involves a gas line, a brittle or corroded connection, or if you are uncomfortable working with gas or electricity, contact a licensed technician. Some stove warranties require professional installation to remain valid; check your warranty terms before you begin. If you do hire a pro, request a post-install safety check, including an ashless leak test and a quick flame assessment. A professional can also verify that the burner timings and heat control are calibrated correctly for uniform cooking. Finally, retain your purchase receipts and model numbers for warranty claims.
Maintenance tips to extend stove top life
To maximize the life of your stove top replacement, perform regular maintenance that keeps burners clean and components aligned. Wipe spills promptly to prevent residue buildup, remove and clean burner caps, and inspect knobs for wear. Use a soft brush or cloth to clear crumbs from grates and ensure the burner ports are free of obstructions. Periodically test burner ignition and flame quality; a weak or uneven flame can indicate clogged ports or misalignment. Lubricate any sliding parts with manufacturer-approved lubricants if applicable, and avoid using abrasive cleaners on glass or enamel surfaces. Finally, schedule a quick annual inspection if your stove is older or heavily used, which can catch wear before it leads to failures.
External sources and reference points
For further safety and installation guidance, you can consult reputable authorities. External sources include government and education resources that cover general appliance safety and best practices for electrical and gas fixtures. These references provide additional context on safe handling, leak testing, and the importance of proper installation. While not model-specific, they reinforce the fundamentals of stove top replacement safety and maintenance.
External sources and reference points (continued)
- OSHAdvisories and general appliance safety: https://www.osha.gov
- National Institute of Standards and Technology (NIST) on measurement and safety practices: https://www.nist.gov
- U.S. Department of Energy guidance on safe kitchen appliance use: https://www.energy.gov
Tools & Materials
- Replacement burner or module (model-matching part)(Ensure compatibility with exact make/model; locate model number on label under cooktop)
- Knob replacement (if needed)(Only if current knob is damaged or missing)
- Screwdriver set (Phillips and flat-head)(For removing trim plates, screws, and connectors)
- Adjustable wrench(For any nuts or fittings; use with caution on gas lines)
- Gloves and eye protection(Protect hands from sharp edges and splinters)
- Soap solution or leak detector spray(For post-install gas leak testing)
- Towel or rag(Keep area clean and dry; wipe spillages as you work)
- Voltage tester or multimeter(Useful if you are uncertain about electrical connections)
Steps
Estimated time: 60-90 minutes
- 1
Power down and isolate
Turn off the stove at the circuit breaker and unplug the unit if possible. For gas stoves, close the local gas shutoff valve. Remove nearby combustibles and ensure the area is well-ventilated. This prevents sparks, leaks, or accidental startup while you work.
Tip: Double-check that the power is completely off with a quick tester before touching any components. - 2
Remove the damaged part
Carefully detach the damaged burner, cap, or module. Keep track of screws and connectors, and take photographs from multiple angles to reference during reassembly.
Tip: Label screws by location to avoid confusion later. - 3
Check compatibility
Compare the old part with the replacement to ensure the same connector type, mounting holes, and flame or burner port configuration. If in doubt, contact the retailer or manufacturer for a compatibility check.
Tip: Choose a model-matching part to avoid misfit and safety hazards. - 4
Install the new part
Position the new component, align mounting points, and secure with screws. Reconnect any electrical plugs or gas fittings with care, following torque recommendations in the manual.
Tip: Avoid overtightening screws to prevent warping or cracking. - 5
Reconnect utilities and test
Restore power and gas, if applicable, and perform a cautious test. Start on the lowest setting, then increase gradually. Use a soap solution to check for leaks at connections.
Tip: If you smell gas or hear hissing, shut down immediately and contact a professional. - 6
Finalize and document
Return any removed parts to their assigned locations, clean the work area, and take photos of the final installation. Note the date of replacement and part numbers for future maintenance or warranty claims.
Tip: Keep your receipts and model numbers in a dedicated maintenance folder.
Common Questions
Is stove top replacement safe to do myself?
DIY stove top replacement is feasible for non-gas components when you follow safety steps and use model-matching parts. If gas lines or electrical systems are involved, consider professional assistance to minimize risk.
DIY replacement is possible for non-gas parts when you follow safety steps, but if gas lines or electrical systems are involved, seek professional help to stay safe.
How do I know which replacement part I need?
Find the stove’s model number and check the manufacturer’s part list. Look for a model-matching part with the exact connector type and mounting pattern. If compatibility is uncertain, contact the retailer or manufacturer before purchasing.
Look up your model number and choose the exact model-matching part. If unsure, contact the retailer for compatibility help.
Can I replace just a single burner or must I replace the whole top?
In many cases you can replace a single burner, cap, or knob without replacing the entire cooktop. If the glass, frame, or control system is damaged broadly, a full top replacement may be more cost-effective and safer.
Often you can replace a single component like a burner or knob; broader damage may require a full top replacement.
What should I do if I smell gas after replacement?
If you smell gas, stop immediately, turn off the gas supply, evacuate if necessary, and call emergency services. Do not operate electrical switches or switches that could create a spark.
If gas is detected, stop, shut off the gas, exit, and call emergency services—do not create sparks.
Will replacing a stove top void my warranty?
Warranty terms vary by manufacturer. Some parts or replacement work may affect coverage if performed by a non-authorized technician. Check your warranty documentation or contact the manufacturer for specifics.
Warranty depends on the maker; check your documents or contact the manufacturer to confirm coverage after replacement.
Watch Video
Top Takeaways
- Verify model compatibility before buying parts.
- Always shut off power and gas and ventilate the area.
- Test thoroughly for leaks and flame stability after installation.
- The Stove Recipe Hub team recommends professional help if unsure about gas work.