Stove Not Lighting After Cleaning: Quick Troubleshooting Guide
Urgent, practical guide to diagnose and fix a stove that won’t light after cleaning. Step-by-step checks, common culprits, safety tips, and preventative habits to get your stove back in action quickly.

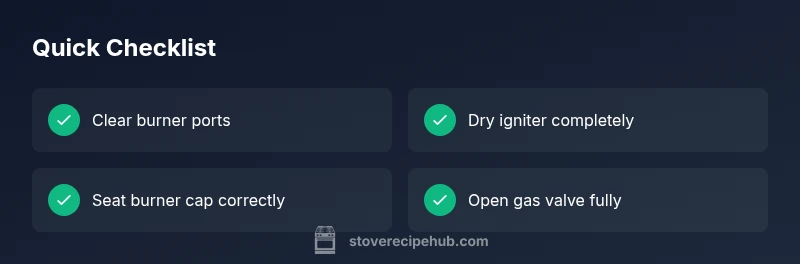
If your stove won’t light after cleaning, start with the simplest fixes: verify the burner ports are clear, ensure the igniter spark is visible, and confirm the gas supply is on. Most failures stem from moisture, dirty igniters, or misaligned burner caps. Do a dry reset by turning off power and gas, wait 30 seconds, then try re-lighting. If it still won’t light, follow the diagnostic flow below.
Why this happens after cleaning and how to approach it
Experiencing a stove not lighting after cleaning can be alarming, but the fix is usually straightforward. Cleaning procedures often leave behind tiny amounts of moisture, cleaning residue, or displaced burner parts that interfere with ignition. The Stove Recipe Hub team notes that many home cooks encounter ignition problems when the igniter or burner ports are damp or the burner cap isn’t seated correctly. The first moves are gentle, safe checks that don’t require disassembly: dry the surface completely, observe the igniter’s spark from a comfortable distance, and confirm the burner cap sits snugly in place. By ruling out moisture, misalignment, and clogged ports in that order, you’ll rapidly identify the most likely cause without unnecessary risk.
Quick checks you can perform safely
Before you dig deeper, perform these no-tools checks with the stove unplugged or gas supply turned to a safe position. - Inspect the burner ports for visible debris or crust; a thin wire or dry brush can clear tiny blockages. - Look at the igniter: you should see a visible spark when you attempt to light; if not, the electrode may be dirty or misaligned. - Confirm the burner cap is centered and fully seated; an off-center cap can prevent ignition. - Ensure the gas valve is fully open and you sense gas flow when attempting to light; if you smell gas, stop and ventilate the area. According to Stove Recipe Hub analysis, moisture and residue from cleaning are common culprits. - Dry everything thoroughly; even a small amount of moisture can prevent the spark from propagating. - Re-seat the burner cap and verify alignment with the burner base.
Common culprits and how to diagnose them
In practice, the top suspects are clogged ports, damp igniter, misaligned parts, and a partially closed gas valve. A clogged burner port or misaligned cap blocks gas flow to the ignition point. A moist igniter can fail to produce a spark, delaying ignition. If the gas valve is not fully open, or if there’s a partial gas supply issue, ignition will fail regardless of the spark. Based on Stove Recipe Hub Research, focusing on these four areas covers the vast majority of post-cleaning ignition failures without expensive diagnostics.
How to test the igniter and gas flow
Begin with the simplest test: trigger the ignition and observe the spark at each burner. If you hear a click but see no spark, the electrode may be dirty or misaligned; wipe with a dry cloth and check spacing. For gas flow, ensure the knob is fully turned and the valve is open; if you suspect a gas supply issue, do not force the gas valve. If you detect a gas smell at any point, evacuate and contact your local gas emergency line. A reliable spark and steady gas flow are the foundation for ignition. If the spark is weak or intermittent, the igniter or wiring may need replacement, usually a job for a qualified technician.
When to call a professional and safety reminders
If you cannot achieve a clean ignition after performing the above checks, or you notice a gas smell, seek professional assistance immediately. Gas appliances require careful handling, and a misstep can lead to leaks or fire. The Stove Recipe Hub team recommends scheduling a service call if ignition remains inconsistent after dry resets and port cleaning. Always prioritize safety: never attempt to light a stove with a suspected gas leak, never bypass safety mechanisms, and never perform electrical work beyond your comfort level.
Preventive habits after cleaning to keep your stove reliable
Adopt a safe cleaning routine that reduces the chance of post-cleaning ignition problems. Dry the surface thoroughly after any cleaning, avoid soaking igniters, and keep burner ports free of debris. After reassembly, perform a quick ignition check to confirm spark and flame before cooking. Regular maintenance—like glancing at the igniter for wear and ensuring burner caps are snug—can prevent future issues. The Stove Recipe Hub team emphasizes consistency: small, proactive steps beat reactive repairs.
Steps
Estimated time: 25-40 minutes
- 1
Power down and re-prepare
Turn off the stove power and gas supply. Wait 30 seconds, then switch everything back on. This dry reset clears minor electrical or gas-supply hiccups and gives the system a clean restart.
Tip: Do not rush this reset; moisture can linger longer than you think. - 2
Inspect and clear burner ports
Remove the burner cap and inspect the ports for crust or debris. Use a thin wire or pin to loosen any blockage, then wipe the surface dry. Reassemble and align the cap properly before attempting to light.
Tip: Always ensure the ports are dry after cleaning to prevent a weak spark. - 3
Check the igniter and spark
Observe the igniter as you trigger the spark. If you don’t see a bright, continuous spark, the electrode or wiring may be dirty or misaligned. Clean gently and re-test. If the spark is weak, the igniter may need replacement.
Tip: Keep the igniter dry; moisture suppresses sparks and can cause misfires. - 4
Verify gas flow and valve position
Ensure the gas valve knob is fully open and that you can hear or feel gas flow when attempting to light. If you smell gas, stop, evacuate, and call the gas emergency line. If flow seems reduced, there could be a supply issue.
Tip: Never pry at a loose valve; call a professional if unsure. - 5
Re-test after reassembly
Reassemble all components, perform a slow full ignition test, and watch for a clean flame. If ignition remains inconsistent, skip to professional service to prevent safety hazards.
Tip: Document which step helped or didn’t—this speeds up service calls.
Diagnosis: Stove won't light after cleaning
Possible Causes
- highClogged burner ports or debris blocking gas flow
- mediumMoisture on igniter or electrode
- mediumMisaligned or dirty igniter spark electrode
- lowGas valve not fully open or gas supply issue
Fixes
- easyClean burner ports with a thin wire or pin, then dry thoroughly before re-testing ignition
- easyDry the igniter and electrode with a dry cloth and allow it to air-dry completely; retest
- easyRe-seat the burner cap and ensure it is properly aligned with the burner base
- easyVerify gas valve is fully open and check for a continuous gas supply; if gas odor is present, stop and call a professional
Common Questions
Why does my stove not light after cleaning?
Most often, moisture on the igniter, clogged burner ports, or a misaligned burner cap prevents ignition. A quick dry reset and port cleaning resolve the majority of cases.
Most often, moisture or debris blocks ignition; a quick dry reset and cleaning usually fixes it.
Is it dangerous if the stove won’t light after cleaning?
Yes. If you smell gas, stop immediately and evacuate. Ignition failures can indicate gas leaks; contact a professional if the issue persists.
If you smell gas, stop and call for help immediately.
Can moisture affect ignition?
Absolutely. Moisture can dampen the igniter and the electrode, preventing a spark from forming and delaying ignition.
Moisture can prevent the spark from forming, delaying ignition.
What should I do first if gas smells?
Leave the area, avoid flames or switches, and call the gas emergency line. Do not attempt to light the stove.
Leave the area and call the gas emergency line if you smell gas.
When should I replace the igniter?
If you repeatedly see no spark or a weak spark after cleaning and adjustments, the igniter or its wiring likely needs replacement by a professional.
If the spark is weak or absent after checks, replace the igniter with professional help.
Watch Video
Top Takeaways
- Start with dry resets and simple checks first
- Moisture and misalignment are the most common culprits
- A clean ignition spark and clear gas flow are essential
- Call a professional if gas smells or ignition remains inconsistent